- Author admin caroline@plants-knowledge.com.
- Public 2023-12-17 03:39.
- Last modified 2025-01-24 12:45.
Sending a bouquet of flowers on special occasions is a beautiful gesture. Sending plants also offers hobby gardeners an opportunity to exchange their own ornamental and useful plants for varieties grown by other garden enthusiasts.
Notice plant growth
During transport, plants have to make do with a limited supply of light and oxygen. It therefore makes no sense to send the sensitive goods in their main growth phase. For most house and garden plants, this lasts from spring into summer, while growth gradually goes into a dormant state in autumn. A particularly large amount of energy is required to develop leaves, flowers and seeds. In order to minimize energy-consuming factors, you should cut off withered flower residues in good time before fruit ripening and seed development. Cut flowers are an exception because they are cut off in the middle of the growing season. These phases will give you guidance on the ideal shipping time:
- Houseplants have just faded
- Garden plants are not developing leaves
- Flower bouquets fresh and without delay directly after cutting
Note:
Avoid shipping during hot periods or during periods of frost, as in both cases lack of water can be a problem.
Compare shipping companies
When looking for the right shipping partner, shipping time plays an important role in ensuring that your houseplants and flowers reach their destination safely. For all major shipping companies, the delivery time is one to two working days for standard shipping. Except for DHL, the service providers make several delivery attempts, which has a negative impact on the he alth of the plants. There are different procedures regarding further package handling after a failed delivery attempt:
- DHL offers the possibility of collection within seven days from a branch
- Hermes will make up to three delivery attempts on the following days
- DPD will make two further attempts if the package has not been delivered to the shop
- UPS will attempt two additional deliveries on the following business days
Pack correctly
So that the plants do not suffer any damage during transport, they must lie firmly in the package without any wiggle room. Open spaces should be filled with insulating materials to create a buffer. Wood wool, newspaper, straw or Styrofoam are suitable for this. It is important that potted plants and flowers survive accidental falls or throwing of the box undamaged. If possible, you should limit the energy consumption of the plants through pruning measures. This will save you space in the box at the same time. Cut flowers and bouquets do not need to be trimmed. The basic procedure for ornamental and useful plants in pots is as follows:
- Shorten houseplants, perennials and shrubs
- Wrap potted plants and bouquets completely in paper
- Put the leaves and shoots upwards
Tip:
After packaging, do the shaking test. If you hear rattling noises coming from the box when moving, you need to add more filling material.
Cardboard egg cartons
Egg containers provide ideal packaging for small plants grown in a coconut fiber tablet. Young plants with soil balls can also be placed in the recesses if you wrap the root ball in damp kitchen paper. However, this method carries the risk of the plants falling out of their place in the egg carton due to falls.
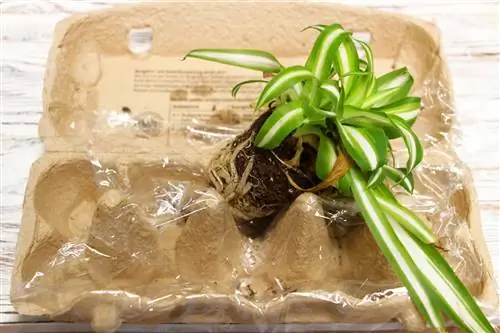
To prevent this, the following trick helps:
- wrap the moistened root ball in cling film
- Carefully form the foil at the base of the plant into a funnel
- fix with a rubber
- Stick double-sided adhesive tape into the slots in the box
- Place plants on the adhesive surface
Tip:
Plastic containers of yogurt and margarine are equally suitable as packaging.
PET bottles
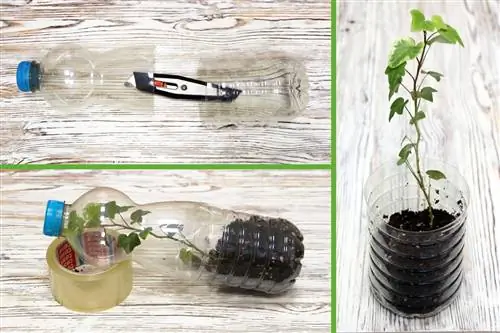
Empty plastic bottles serve as universal packaging for smaller potted plants. In terms of size, you can choose between 500 milliliters, one liter and 1500 milliliters. Choose the containers according to the pot size. Cut the top part of the container so that the lid remains connected to the bottom part of the bottle in a narrow area. Now open the bottle and place the plant and plastic pot inside. If the plant moves in the plastic bottle, secure the plant pot in the packaging with adhesive tape.
Cardboard leftovers
If you want to ship larger garden plants, you can make a safe protective cover using leftover cardboard packaging. Lift the root ball out of the bed and prune the plant. Shorten both roots and above-ground plant parts. Place the plant in a plastic pot and moisten the substrate. How to prepare the package for sending:
- Pack the pot in a plastic bag and secure it with a rubber band
- Cut two pieces of cardboard the size of the sides of the shipping box
- attach the wrapped planter to one of the cardboards with adhesive tape
- glue the second piece of cardboard to the plastic pot on the opposite side
- Push the construction into the transport box and fill in the cavities
Plastic bags and cardboard rolls
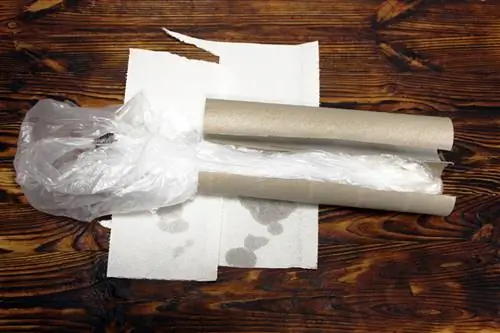
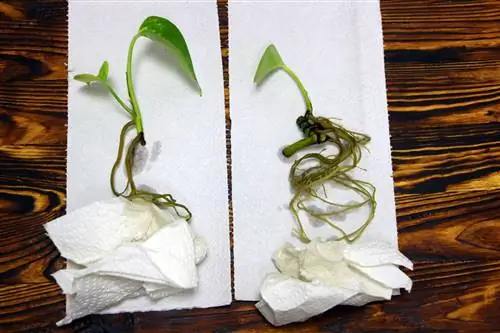
You can safely pack larger offshoots and cuttings in a roll of kitchen or toilet paper. For short shoot tips, a freezer bag with a zipper is sufficient. Place the plant parts in the bag, add a few splashes of water and pull the zipper until there is a small gap. Blow air through the opening and close the packaging completely.

