- Author admin caroline@plants-knowledge.com.
- Public 2023-12-17 03:39.
- Last modified 2025-01-24 12:45.
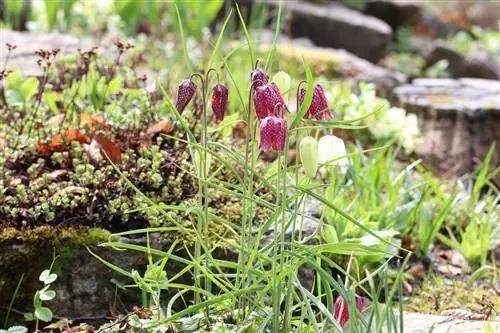
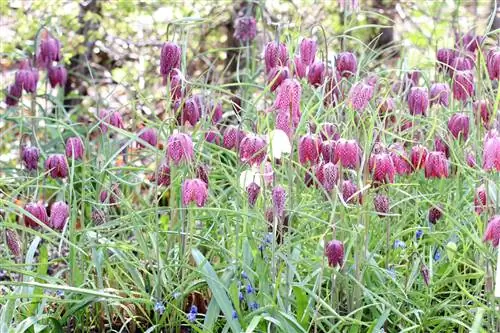
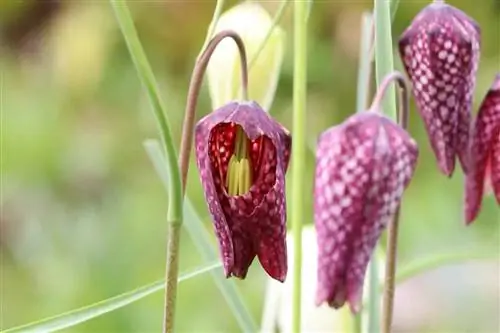
The flowers of the checkerboard flower come in elegant white, pink, red or intense purple. In Germany, this pretty spring bloomer is one of the protected plants. One more reason to plant it.
Profile
- Plant family: Liliaceae, Liliaceae
- Botanical name: Fritillaria meleagris
- German names: checkered flower, lapwing egg, common checkered flower
- Growth: perennial, upright, loose, spreading, overhanging
- Growth height: 25-35 cm
- Foliage: green, linear, pointed, entire
- Flowers: bell-shaped, white, pink, red, purple, checkerboard
- Flowering period: April to May
- Lime tolerance: sensitive to lime
- Toxicity: poisonous
Location requirements
According to its natural habitat, it prefers sunny to partially shaded, rather cool and moist locations. Even on fresh to swampy soils, e.g. B. in a meadow near a body of water, it can stand without any problems. However, the meadow should not be mowed before the seeds ripen at the end of June.
Anything else would be very damaging to the preservation of the stock. The same applies to fertilizing wet meadows. It would cause the checkerboard flower to quickly be overgrown by other plants. If this plant feels comfortable in one location, it can form dense stands.
Soil texture
The checkerboard flower feels most comfortable on fresh, moist, well-drained and nutrient-rich soil. They should be slightly acidic to neutral. The conditions are optimal on wet meadows and near ponds. If the plant is to be in a bed or planter, the soil must be kept constantly moist. Coarse sand should be added to clay soils. Commercially available potting soil for flowering plants is suitable for keeping in a pot.
Tip:
Even if the checkerboard flower loves moist surfaces, it cannot tolerate waterlogging.
Planting
You don't always have to buy ready-made plants or wait until you get a checkerboard flower as a gift. We show how planting onions works and what you should pay attention to.
Planting time and planting depth
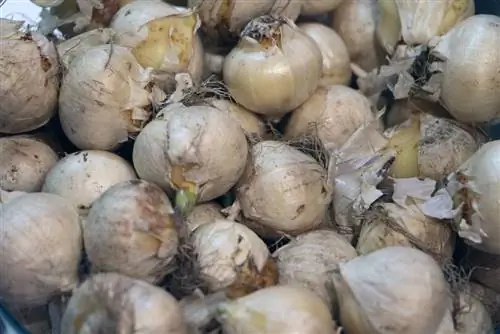
Ideally, you should plant the bulbs immediately after purchasing them, as they dry out relatively quickly. The best time to plant is between August/September and November, but preferably in September because the bulbs take root very slowly. Planting distances of 15-20 cm are recommended so that the bulbs have enough space to form daughter bulbs.
Planting instructions
Before planting, it is advisable to loosen the soil to a spade depth and remove weeds, stones and root residues. To help the plants grow, you can improve the soil with compost or horn shavings. Then you create the planting holes.
- Planting holes twice as deep as the bulb is tall
- Between eight and ten centimeters
- Put a thin layer of sand on the bottom of the planting holes
- Sand protects onions from rotting
- Then insert onions
- Fill planting holes with soil, press soil down
- Water the planting site thoroughly
- Do not allow the soil to dry out at any time
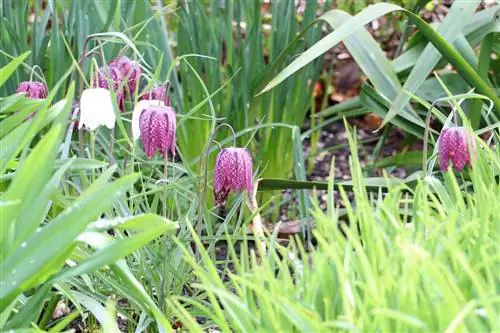
When planting in a bucket, pay attention to drainage holes and good drainage. Since these plants move in completely after flowering, it is advisable to mark the planting site. This way you'll know where the bulbs are next spring and won't accidentally dig them up.
Caution:
Checkerboard flowers (Fritillaria meleagris) are poisonous in all parts of the plant, especially the bulb. It is better not to plant them in areas where small children are present.
Care instructions
It is definitely worth leaving a space for Fritillaria meleagris in your home garden, especially since it has now become rare in the wild. It has proven to be extremely easy to care for, robust and undemanding.
Watering and fertilizing
- Keep soil evenly moist all year round
- Even after the leaves have moved in
- In generally moist locations, water little or not at all
- Water regularly and more often in normal garden soil
- Provide specimens in the bucket with water most often
- Substrate in the bucket dries out quickly
As far as the nutrient requirements of checkerboard flowers are concerned, it is usually enough to give the common checkered flower a dose of compost in the spring. Potted plants are supplied with a liquid fertilizer for flowering plants every two weeks during flowering.
Cutting
Pruning measures like with most other plants are not necessary here, on the contrary. The stems and leaves should be left standing until they are completely wilted. As long as there are still green parts of the plant, the onion extracts valuable nutrients and stores them. In this way, it creates important energy reserves for the winter and next year's budding.
Wintering
The checkered flower grows perennial and has good winter hardiness. It can cope with even very harsh winters. It tolerates temperatures down to minus thirty degrees. As a result, it can overwinter outdoors without any protection. However, drought is also dangerous in winter. If there is no protective snow cover, there is a risk of frost if there is severe frost at the same time.
The onions cannot absorb moisture from the frozen ground and therefore must be watered on frost-free days. The water for irrigation should definitely be cold, otherwise the bulbs could sprout prematurely. Specimens in pots are somewhat more at risk; they cannot survive without winter protection and watering.
Tip:
After a successful wintering is the best time to repot potted plants. This should generally be done every two to three years.
Propagate
If you already have a checkerboard flower, you can grow additional plants from it. We show what options there are for propagating checkerboard flowers and how to implement them.
Sowing
Basically, this plant self-fertilizes when the seeds fall on fertile soil. Of course you can also sow or propagate them by hand. Seeds for sowing can be purchased or harvested from existing plants.
As soon as the three-fold seed capsules on the plant have matured, around May and June, they are cut off. The seeds, which are cold germinators, must then be subjected to cold treatment.
Stratify
- Remove the seeds from the capsules
- Put into freezer bags with some damp sand
- Seal the bag, not too tightly
- Store in a warm place for about two weeks
- At temperatures between 18 and 20 degrees
- Then close the bag tightly and put it in the fridge for four to six weeks
- Temperatures now between zero and five degrees
- Don't let sand dry out in the bag
- Sow seeds after the cold treatment is over
Sowing
- Sowing directly or in seed trays
- Thoroughly loosen the soil at the sowing site
- Soil should be fine crumbly
- Mix seeds with commercial potting soil
- Spread widely at 18-20 degrees
- Cover thinly with soil
- Moisten the soil afterwards
- Cover seed trays with translucent foil
- Remove cover daily for ventilation
- Place in a bright and warm place
- Avoid direct sunlight
- Keep the soil or substrate evenly moist
As soon as the seedlings are about ten centimeters tall, they can be separated into small pots or directly in the bed. If sowing is not carried out in spring but in autumn, the plants should overwinter frost-free.
Tip:
Sowing is quite complex and time-consuming due to the stratification. As a rule, only about 50 percent of the seeds germinate.
Growing onions
Another and relatively simple method of propagation is via bulbs. They form on the side of the mother bulb. After the plants have grown, the bulbs are dug up and the brood bulbs are removed, if possible without damaging them or the mother bulb. The mother onion is replanted directly. Since the small onions dry out quite quickly, they should also be planted directly on site at the appropriate depth. Finally, water well again.
Onion scales
Like all lily plants, the bulb of the checkered flower has a scale-like structure. This enables propagation via onion scales. The best time for this form of propagation is also when the plants have moved in.
- Carefully dig up the onion
- Peel off four to six outer scales depending on size
- Leave a small piece of onion base on each scale
- Sprinkle injuries on the mother bulb with charcoal powder
- Put the mother onion directly back into the ground
- Then fill small pots with potting soil
- Place the onion scales about halfway into the substrate
- Put a translucent plastic bag over the pots
- Place in a partially shaded place
- Keep the substrate slightly moist and ventilate regularly
- Optimal germination temperatures at around 20 degrees
- First flowers after three to five years
As soon as the onion scales have formed roots and, at best, small bulbs, they can be transplanted. Or you can simply cover them with soil so that only a small tip sticks out. The whole thing is then placed in a place that is around five degrees cool and outside in the following spring. In late summer, the bulbs should be strong enough to plant out in their final location in the garden.
Diseases and pests
Onion rot
Onion rot usually occurs due to too much moisture. Even though the checkerboard flower needs a lot of water, it doesn't like waterlogging. The plants quickly become weak and yellow. There is usually also a foul smell. The checkerboard flowers can then no longer be saved.
Snails
Snails are a common problem, and they come in different types. They are often attracted to the moist environment. To protect the plants, you should regularly check them for signs of feeding and consistently remove any snails.
Lily Chicken
Sometimes the lily hen feasts on the leaves of the checkerboard flower, where it can cause massive damage. They can be easily identified by their bright red shield. To combat them, you should regularly read the adult beetles and rinse the plants thoroughly to catch their larvae. Spreading rock dust or dry coffee grounds can also be helpful.
Voles
Voles can cause particularly great damage. If they are discovered, it is usually already too late. Fighting it is quite difficult. It is said to be most promising from autumn to spring. At this time they can no longer find so much in the garden and accept bait even better. Probably the only effective means are vole traps, which are available in abundance in stores. As a rule, you need more than just one trap to be able to equip every active corridor with it.

