- Author admin [email protected].
- Public 2023-12-17 03:39.
- Last modified 2025-01-24 12:45.
So that an olive tree can develop its Mediterranean magic even north of the Alps, it thrives in a pot. This makes overwintering easier, but regularly raises questions about proper repotting. Why should the ornamental tree be repotted at all? When is the best time? What should you pay particular attention to? Which soil is suitable for an olive tree plant? The following instructions provide detailed and practical answers to these questions. Read here how to skillfully repot your olive tree step by step. Benefit from our information about the substrate.
Reasons to repot
In the plantations around the Mediterranean, the olive tree grows up to 10 meters high. At the same time, it sends its strong main roots down to a depth of up to 7 meters, supplemented by a richly branched root system about 50 to 100 cm below the surface of the earth. In the pot's limited substrate volume, there are limits to this growth, which requires regular repotting. The reasons are convincing:
- He althy growth of trunk and branches is based on unhindered root growth
- Nutrient consumption gradually depletes the soil in the bucket
- Regular fertilization causes an accumulation of nutrient s alts in the substrate
- Watering with water that is too hard causes leaf chlorosis and growth depression
Furthermore, it may be necessary to repot an olive tree immediately as part of an emergency measure. This is often the case in hobby gardens when excessive watering leads to waterlogging. Only a quick change to dry soil can save the tree.
The best time
As an evergreen plant, an olive tree never stops growing completely at any time of the year. Nevertheless, he reduces his activities to a minimum in winter. By scheduling late winter or early spring, you reduce stress to the lowest level. In the middle of the cold season, there is a risk of waterlogging if you water after repotting. However, if fresh shoots are imminent, there are best prospects of rapid rooting in the new soil, as the growth energy has already been set in motion.
Information about the substrate
The quality of the soil largely determines successful cultivation. This is even more true in the pot, as your olive tree cannot develop as freely as in the olive groves on the Mediterranean. The substrate has important tasks to fulfill. This includes supplying the roots with water, nutrients and oxygen. In addition, the plant soil gives the olive tree roots stability. Since the exotic plant is designed for a climate with high temperatures and low rainfall, the perfect soil should be tailored to these conditions. It is obvious that normal, moist garden soil does not meet these requirements.
The best substrate for an olive tree in a pot should be well-drained, loose, humus-rich and structurally stable. Special plant soil from specialist retailers largely covers the quality requirements, but is expensive to purchase. If you like to mix the substrate yourself, use the following components:
- Compost
- Bark humus
- Coconut fiber or wood fiber
- Natural clay or garden soil
- Algae lime or dolomite lime
- Quartz sand or fine grit
Mixing these ingredients in the right proportions is an art. Over the years, each olive gardener develops his own individual recipe. A mix of 35 percent compost and garden soil, 20 percent coconut fibers and 10 percent algae lime and sand has proven to work well in practice.
The correct pH value in the substrate
Given its Mediterranean origins, the olive tree is often equated with citrus plants. With regard to the light and temperature conditions, this is largely true. As far as the quality of the substrate is concerned, the requirements in terms of soil acidity vary significantly. As the correct composition of the soil already suggests, an olive tree is designed to be lime-loving. The olive tree plant therefore favors a neutral to slightly alkaline pH value between 7 and 8. In an acidic citrus soil with a pH value of 5.5 to 6.5, your Olea europaea will fall far short of expectations.
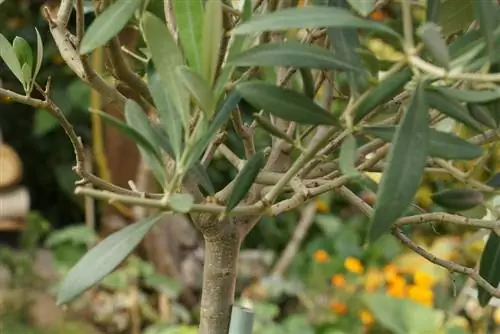
However, there is the option to modify citrus substrate if you want to repot your olive tree in it. By enriching the acidic soil with sand, rock powder or algae lime, the pH value is raised to a neutral to alkaline level and any clay content that may be too high is compensated for.
Tips for the right bucket
The right size of the new pot is often a headache for olive tree gardeners. If it is too small, another change is on the agenda next year. If it is too large, growth initially concentrates on rooting, which is to the detriment of shoots, leaves, flowers and fruits. This is what the new pot should be like:
- In diameter 4 to 6 cm larger than the previous vessel
- Distance between root ball and vessel wall of 2 cm
- One or more openings in the floor as a water drain
- Made of sturdy material, such as terracotta, to protect against windthrow
Please choose a color that is as light as possible. Black or dark brown pots attract the sun's rays, so that during hot midday hours the root ball heats up too much due to its exposed location. This leads to damage to the roots even in a heat-loving olive tree.
Tip:
After 5 to 7 years, the olive tree reaches a size that exceeds all dimensions in the pot. Lovingly cared for and properly overwintered to date, the plant now has sufficient winter hardiness to be planted in regions with mild winters.
Step-by-step instructions
If the right substrate and new pot are available, repotting a large olive tree requires a helping hand. Also have a sharp, disinfected cutting tool ready in case root pruning is necessary. You will also need pottery shards or grit as drainage material, as well as a piece of fleece that is permeable to air and water.
If the work surface is covered with foil or old cloths, this foresight makes later cleaning much easier. The preparatory work is now complete, so you can now proceed step by step as follows:
Unpotting
If the olive tree has been in a terracotta pot for a long time, the edges of the root ball may stick firmly to the walls. The fine roots have clung to the porous material. In this case, take a knife and slowly run it between the root ball and the wall. You then lay a large olive tree on its side so that two people can pull it out of the pot. You can pot a smaller tree by clamping the container between your feet, grasping the trunk and slowly pulling out the ball.
Processing root balls
Shake off the used substrate from the roots. Stuck chunks can be carefully removed by hand. At the end you should have a clear view of the entire root system. Now rotten, dead and stunted strands appear. Cut these out with scissors or a knife. It is possible to reduce the size of the root ball in this phase by cutting off the fine roots all around with a knife. As a result, the previous bucket can be used again. You also delay further growth in size. More than 2 cm should not be removed from the root ball in order not to impair the vitality of your real olive tree.
Prepare the bucket
The finished root ball is put aside to prepare the bucket. How to do it right:
- Place a curved pottery shard over each opening in the floor
- Place a 3-5 cm thick layer of grit, pebbles or expanded clay on top
- Spread the breathable fleece over the drainage to protect against siltation
- Pour a thin layer of substrate onto the fleece and press it on
To correctly estimate the height of the lower substrate layer, measure the height of the root ball. After potting, there should be a distance of 2 to 3 cm between the root disk and the edge of the pot.
Stew
Position the root ball in the middle of the pot on the substrate. Now align the olive tree so that it stands straight in all directions. Now it is again an advantage if an assistant stabilizes the trunk with his hands. Fill the cavities all around with soil, pressing down occasionally to prevent air holes from forming.
Repotting and cutting go hand in hand
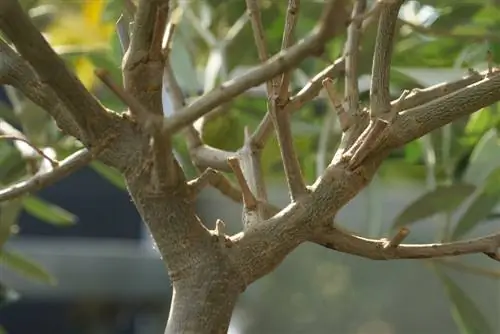
Spring is not just the ideal time to repot an olive tree. A moderate maintenance cut supports vitality and willingness to bloom during this time. Therefore, carefully examine the crown for dead shoots in order to thin them out. In addition, branches affected by diseases or pests can be cut off. You should, of course, check in advance whether combating it makes pruning unnecessary. Branches without leaves are not necessarily doomed to be cut. First scrape off a little bark. If green tissue appears underneath, the plant will sprout again at this point.
If individual branches grow out of the crown shape, they are shortened to the desired length. Position the scissors so that there is a bud, a sleeping eye or a he althy pair of leaves below the cut. Such a cut promotes further branching within the crown.
Regenerate
Repotting means maximum stress for your olive tree. So that the plant can regenerate in peace, first move the pot to a warm, partially shaded location. There, water the root ball thoroughly with normal tap water. Only when the water runs out of the floor opening is the current demand met. After 8 to 10 days, the repotted olive tree returns to its original place in the sun. Since the substrate contains a supply of nutrients, apply fertilizer again after 4 weeks at the earliest.
Tip:
The olive tree is a drought specialist that can utilize even tiny drops of nighttime condensation with the help of its leaves. Waterlogging, on the other hand, reliably destroys the robust tree. Therefore, only water your Mediterranean character when the soil is noticeably dry.
Cleaning out the repotted olive tree
If you have followed these repotting instructions, the new season is now almost upon us. Since an olive tree thrives more magnificently the more fresh air and warm sunshine it can absorb, it is cleared out as early as possible. The outside temperature is a crucial indicator of the right time. Use a minimum-maximum thermometer to measure nighttime temperatures for 1 to 2 weeks. If the values no longer fall below -5 degrees Celsius, the outdoor season begins for your repotted olive tree.
Please note that after the winter break he will have to gradually get used to the full sunshine. On the balcony and terrace, an olive tree should therefore acclimatize in a partially shaded location for a period of 8 days. In addition, the site should be well protected from excessive rain and strong winds.
Conclusion
After reading these step-by-step instructions, you are now familiar with the professional process for repotting your olive tree. Early spring is the best time if the root ball is squeezed into the previous bucket or is waterlogged. After transplanting, your real olive tree will feel right at home in an airy, sandy substrate with a pH value of 7 to 8. So that it does not concentrate on root growth, the new pot should be 4 cm larger in diameter. Drainage prevents harmful waterlogging, while a watering edge ensures a clean floor. Now is also the ideal time to thoroughly lighten the crown. If the stressed olive tree is then allowed to regenerate for a week in a partially shaded location, the new season will be promising.

