- Author admin [email protected].
- Public 2023-12-17 03:39.
- Last modified 2025-01-24 12:45.
Propagate magnificent roses from seeds is undoubtedly considered the ultimate challenge within the Gardeners Guild. With a lot of patience, a lot of sensitivity and these instructions for propagating roses, the plan can definitely succeed. The rose hips of a wild rose provide the seeds for pure breeding. If you like to be surprised by the results, use the fruits of your most beautiful rose. It's worth a try after all, because the first home-grown rose crowns every hobby gardener's career.
Harvesting seeds
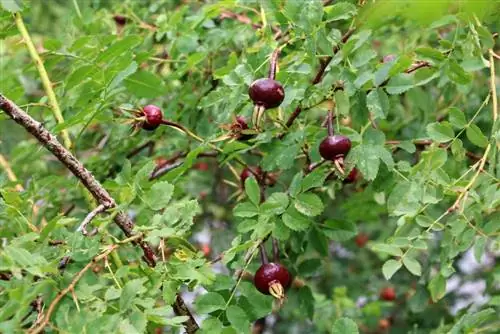
For a rose to develop its bright red or orange hips, the flowers must remain on the bush until they have completely wilted. Rose hips are collective nut fruits that contain between 10 and 30 small nuts that serve as seeds. If the mother plant is a wild variety, the later young plants take on exactly its attributes, so that botanists speak of pure propagation. The outcome of sowing seeds of a rose variety, on the other hand, is a horticultural roulette. Nobody can predict which characteristics of the parent or grandparent plants will prevail. At this point the great fascination of rose cultivation is revealed, as many a legendary rose queen was born this way. This is how you go about harvesting seeds:
- Harvest the rose hips when they are completely colored
- Dried and wrinkled fruits are unsuitable for sowing
Since the germination rate of rose seeds is very low, as many rose hips as possible are harvested. In this case, a larger mass increases the subsequent yield.
Tip:
The germination test with floating seeds does not work on roses. Even germinable nuts often float on the surface of the water.
Preparatory work
Following the seed harvest, the next work steps will be tackled without further delay. In particular, the fruits should not be dried because the seeds inside become unusable. The fresher the seeds, the better the chances of success. The preparation goes as follows:
- Cut the rose hips with a sharp knife
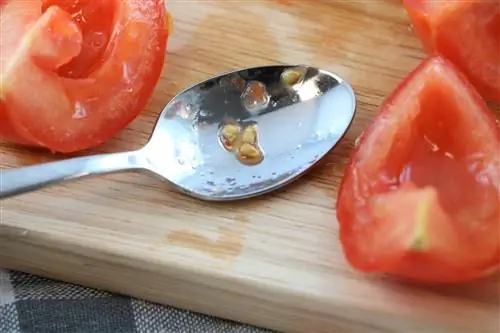
- Pull out the seeds inside with the tip of a knife or a spoon
- Put in a sieve and clean the pulp under running water
It is essential to completely remove the pulp from the seeds. There is nothing wrong with rubbing them with your fingers across the bottom of the sieve under the water jet. The cleaned seeds then immediately enter the next phase.
Breaking germ inhibition
In the plant world, seeds that thrive within a fruit have a natural germination inhibition. In this respect, rose seeds are no exception because they have a hard shell that is sometimes more or less hairy. In this way, Mother Nature ensures that the nuts do not germinate and die prematurely in winter. In order to overcome this inhibition threshold, the seeds undergo the following treatment after cleaning:
- Pour 2 cups of water (240 ml each) into a bowl
- Mix 3 teaspoons of 3 percent hydrogen peroxide into it
- Soak the seeds in this solution for 20 minutes
- Then dilute with 2 more cups of water and let it soak for another 24 hours
The pretreatment described effectively prevents mold formation while at the same time softening the hard seed shells. Hydrogen peroxide is available at the pharmacy. If you prefer a less drastic approach, soak the rose seeds in lukewarm chamomile tea for 48 hours. To do this, fill the prepared tea into a thermos flask and add the seeds. This way the temperature is maintained over the time frame.
Stratification
Rose seeds are naturally protected from premature germination by more than just their hard shell. In addition, a cold stimulus is required to finally put the nuts in the mood to germinate. Specifically, for rose propagation this means that the seeds must be exposed to a simulated winter. Botanists refer to this process as stratification. The following instructions show how to do this using simple means:
- Fill a plastic bag with moist sand or sphagnum
- Add the seeds and close the bag tightly
- Store in the vegetable compartment of the refrigerator at 4-5 degrees Celsius
During the following 4-6 weeks, the moisture content is checked from time to time because the seeds must not dry out. Germinating seeds are immediately sorted out and enter the next stage of sowing. A heated greenhouse or cold frame eliminates the need for stratification in the refrigerator. When sown in small pots at a constant 4-5 degrees Celsius, germination also occurs within 1-2 months.
Tip:
Seed harvesting and pretreatment are not necessary if roses are propagated with already stratified seeds from specialist retailers.
Sowing
At the first sign of germination, plant the seeds. Multi-pot plates or small cultivation pots are ideal. Fill this with lean potting soil that has previously been disinfected in the oven for 30 minutes at 150 degrees. The substrate is moistened with water from the spray bottle before the seedlings are planted.
- Make a depression in the substrate with a pencil or piping stick
- Insert one seedling at a time with the root shoot facing down
- Place in a bright, not full sun location at 20 to 25 degrees Celsius
Once the small roses have rooted completely through the growing pot and have developed 4 to 6 leaves, repotting them into nutrient-rich, well-drained rose soil is on the agenda. They are kept constantly moist in a sunny, warm window seat until the planting season begins in mid-May.
Pincing
The bushy growth of roses is effectively supported by early tweezing. Repeatedly pluck off the fresh shoots with your index finger and thumb or tweezers. This measure elicits additional side shoots from the young plant, which results in lush branching over time.
Planting out
Young plants that develop vigorously are suitable for moving into the bed or onto the balcony from May onwards. If in doubt, continue to nurture weaker specimens until early autumn and then plant them out. Consideration of soil fatigue also applies to plants that come from rose propagation by seeds. Therefore, choose a location where rose plants have not been cultivated in previous years. A sunny, airy location is ideal
- The soil is nutrient-rich, humus-rich and deeply permeable
- Create a planting pit for each rose with twice the volume of the root ball
- Drainage on the sole made of pottery shards or grit prevents waterlogging
- Enrich the excavation with compost, horn shavings and a little sand
- Pour in a handful of substrate, insert the rose in the middle
- Surround with soil as much as it was previously in the pot and water in
In the following months and years it remains to be seen when the first blossoms will appear. Roses planted in May are fertilized for the first time in mid/late June. At the end of July/beginning of August, the flowers receive a final dose of fertilizer in the form of patent potash to prepare them for the coming winter. Generously piling up with leaf mold before the first frost serves as effective winter protection.
Conclusion
In order to propagate roses from seeds, a certain amount of stamina is required. The rose hips should be harvested at the right time. The seeds it contains are protected against premature germination in two ways. The aim is to soften the hard seed coat and put the seeds in a germination mood as part of stratification. If this pretreatment has been completed successfully, further sowing takes place according to the classic framework conditions. Small roses develop quickly in the bright, warm location and can be planted out from May. Then the excitement increases to see what result the self-propagation of roses with seeds will be crowned with.


