- Author admin caroline@plants-knowledge.com.
- Public 2023-12-17 03:39.
- Last modified 2025-01-24 12:45.
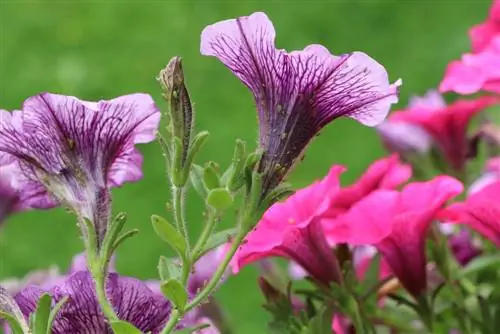
Petunias make an impressive statement with their voluminous funnel flowers. In the flower bed, the balcony box and the hanging basket, the tropical ornamental plants bloom so luxuriantly all summer long that they cover their foliage. Before the first frost puts an end to this floral display, knowledgeable hobby gardeners secure the material for another floral spectacle next year. Instead of purchasing new plants at the beginning of each season, you can easily grow petunias yourself. You can read how sowing and propagation succeed here.
Seed harvesting
To grow petunias yourself by sowing, the withering flowers are no longer cleaned out at the end of the season. Now they should wither completely so that the seed pods underneath can fully develop. These are green at the beginning and then turn beige or light brown as they progress. It is important to pop out the capsules when they are fully ripe but have not yet burst open. Since the mass bloomers produce an abundance of fruit, it is no problem if one or two capsule fruits escape your attention. Even inexperienced hobby gardeners quickly develop a good sense of proportion when it comes to choosing the right time. How to harvest the petunia seeds:
- Grasp the stem between your thumb and forefinger just below the seed capsule
- Pnip off the dried fruit including a small piece of the stem
- Dry and let ripen in a warm, airy place for a few days
- When the capsules burst open, collect the tiny black seeds
Until sowing, store the seeds in a dark screw-top jar or plastic container in a cool place.
Sowing
Sowing behind glass is possible from the end of February. If the subsequent flower color is of secondary importance, the seeds collected by hand are used. However, if you want an explicit color, specialist retailers have affordable offers available. The reason for this differentiation is that garden petunias are always hybrids. It is therefore a guessing game as to which attributes of the parent plants will prevail in the seeds. In the case of certified seeds from the specialist dealer, the seeds were carefully selected so that the flower color is precisely predetermined. Sow seeds as follows:
- Small cultivation pots or a seed tray fill with nutrient-poor substrate, such as peat sand or seed soil
- Sow the fine seeds and sieve thinly with substrate, sand or vermiculite
- Mixed with a little bird sand, the seeds are distributed particularly evenly
- Moisten the substrate with water from the spray bottle
- Place a glass plate or cover it with foil
Prepared in this way, place the seed containers in a partially shaded, warm window seat. Ideally, a heated indoor greenhouse is available, as 20 to 23 degrees Celsius are required for germination. Within the following 3 weeks, the cotyledons emerge from the seeds. During this phase, keep the substrate constantly moist and ventilate the cover daily to prevent mold from forming.
Tip:
Before the seed soil is filled into the containers, it goes into the oven at 150 degrees for 30 minutes. In this way, the substrate is thoroughly disinfected to destroy any fungal spores, viruses or insect eggs hidden in it.
Pricking
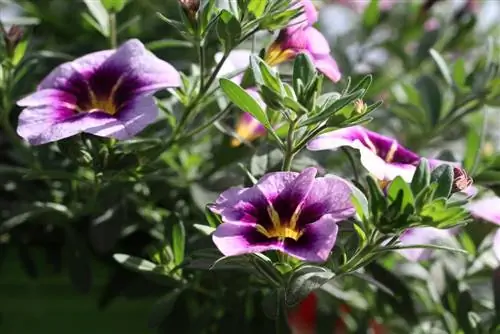
Once germination has started, the growth of the young petunias now progresses quickly. If at least one additional pair of leaves has developed in addition to the cotyledons, the seed container is very crowded. Separation is now on the agenda. Here's how to do it:
- Place a clay shard in a 9 cm pot above the bottom opening as drainage
- Fill halfway with potting soil or a potting soil-sand mixture
- Make a depression in the substrate with the pricking stick or a spoon
- Select a strong seedling, lift it out of the soil with the pricking rod and place it in the hollow
Before placing in the soil, take a look at the root strands. If these are longer than 2 centimeters, they are shortened. Last but not least, fill the cavities with substrate so that a small edge remains and water. From the beginning of May, place the young plants in the garden or on the balcony during the day to harden them off. Here the petunias can get used to the sun and fresh air until they are planted out in mid-May.
Propagation by cuttings
As an alternative to sowing, propagation from cuttings is very popular with hobby gardeners thanks to its uncomplicated application. At the beginning of summer, choose a beautifully blooming petunia as a mother plant. Here's how to do it step-by-step:
- Fill small plastic pots or multi-pot plates with potting soil
- Press the substrate down with a small board and moisten with a fine spray
- Using a sharp, disinfected knife, cut several head cuttings with a length of 10-15 cm
- The interface is located just below a bud or leaf node
- Remove the lower leaves and place each cutting in its own pot
So that rooting occurs quickly, place the cultivation pots in a larger container that must be closed with a plastic hood. A warm, humid microclimate develops here in which the small petunias thrive. If the young plants sprout in the upper area, this is the signal that a root system is forming in the soil. As soon as the small pots are completely rooted, plant the petunias in the bed or pot.
Care
So that home-grown petunias develop their full beauty, experienced hobby gardeners pay attention to the following aspects of care:
- The sunnier the location, the more lush the flowers will be
- Ideally, the planting site is protected from wind and pelting rain
- Soil and substrate are nutrient-rich and well-drained
- Water petunias regularly with collected rainwater or decalcified tap water
- Fertilize regularly from May to September with liquid fertilizer for flowering plants
Cleaning out wilted flowers every few days always attracts new blooms. Take this opportunity to take a look at any pests and diseases. It is often the tiny whiteflies that take over a petunia. The pests are clearly visible on the green leaves of the plant. In an early infestation stage, yellow sticky traps help to combat the pests. Otherwise, specialist retailers will have systemic rods available that are pressed into the substrate. If the rich green leaves turn yellow, petunias are suffering from iron deficiency. This is triggered by irrigation water that is too hard. You can compensate for the deficiency with the help of a special liquid fertilizer containing iron. In addition, only soft or decalcified water should be used for watering.
Wintering
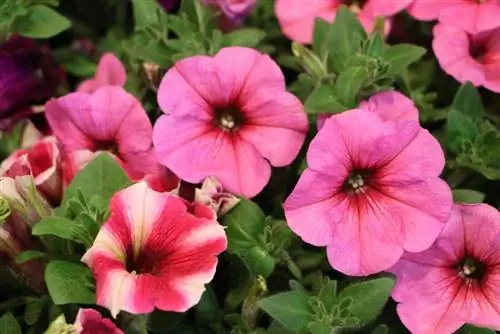
When the first frost puts an end to the blooms, it is not absolutely necessary to dispose of petunias in the compost. If there is enough space for a bright, frost-free winter quarters, the wonderful ornamental plants are definitely suitable for cultivation over several years. Before clearing away, cut all shoots back to 20 centimeters. During wintering at 5 to 10 degrees Celsius, only water enough to prevent the plants from drying out. There is no fertilization during this time.
Conclusion
You can easily grow magical petunias yourself. Choose from two straightforward methods. The seeds can be sown indoors from February onwards. You can harvest the seeds yourself the year before as capsule fruits when the flowers have withered or purchase them cheaply from specialist retailers. The most important prerequisites for success are constant warmth at least 20 degrees Celsius and a partially shaded location. Alternatively, propagate your most magnificent petunia from cuttings at the beginning of summer.

