- Author admin caroline@plants-knowledge.com.
- Public 2023-12-17 03:39.
- Last modified 2025-01-24 12:45.
Drystone walls are often used to fortify slopes. But a dry stone wall can also be used for other purposes to visually brighten up the garden. As the name itself suggests, this is a wall that is built dry, i.e. without mortar. Only a few materials are required. The tools to build the drywall are also limited. A pickaxe, wheelbarrow, rubber mallet, hammer, chisel and a spade are recommended. Materials include gravel, drainage fleece, drainage hose if available, wooden pegs, wall cord, rock garden plants and of course the appropriate stones.
Planning
So that the drywall has perfect support, an appropriate place must be chosen. In addition, the rainwater should be able to drain away easily and not damage other beds and plants. If you want to enhance the connection between the house and the garden with a dry stone wall, make sure that the stones form a visual unit with the house. Once you know where the drywall is to be placed, it's time to get the material. Well-stocked hardware stores have stones of all kinds. Choose the stones according to your taste or rely on natural stones, which conjure up a special flair in the garden.
Slope dry stone wall installation
- Before you can lay stone on stone, the dry stone wall needs a foundation: you have to dig a trench about 40 cm deep. The width should be one third of the height of the drywall. So if the drywall is to be 90 cm high, the width of the trench must be 30 cm.
- Now the trench is filled with a layer of gravel so that about 10 cm of trench remains. This is then compacted with the appropriate tool. The remaining 10 cm are filled with sand and then a smooth base is created.
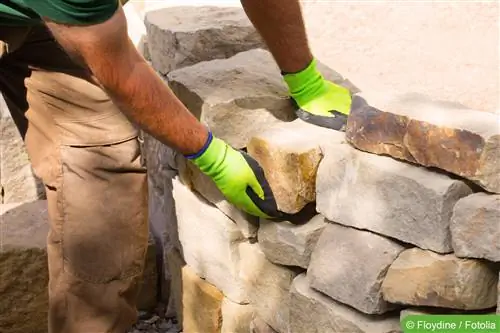
- Now the foundation of the wall has been laid and you can theoretically start laying the stones. But the arrangement of the stones also plays a major role here: Therefore, sort the stones by size and use the thicknesses for the first row.
- If the soil is very moist, it is recommended that a drainage hose or fleece be used. There should be a distance of about 40 cm between the slope and the wall, so that there is still enough space left to fill up the space behind the wall.
- When the first row of stones has been laid, the joints are filled with sand. If the distance between the stones is too large, use smaller quarry stones to fill it.
- So that the stones and sand stick together, the stones are tapped with a rubber mallet. The sand is thereby compacted and holds the stones firmly together.
If you want to plant plants on the wall, the plants are used directly when building the wall. This prevents the plants from being damaged when they are subsequently inserted into the drywall.
- As soon as the plants have been inserted, the next layer of stone comes. Proceed as with the bottom row. The joints are filled with sand and tapped into place with a rubber mallet. Now the plants are being used again.
- Continue until the drywall is at the correct height. Longer stones placed across the wall provide more stability. These stones should protrude into the slope and interlock with the slope rubble.
Freestanding drywall
The construction principle is the same, but with the difference that the stones are not built in a row but in two. The dry stone wall must therefore consist of two stone walls that run parallel to each other. The gaps are also filled with sand and each row is worked on with a rubber mallet.
Design
The choice of plants is crucial for the drywall to be a visual eye-catcher. Drywall plants are usually very easy to care for and require little maintenance. The finish for the dry stone wall should consist of the most beautiful stones, so that the wall has a perfect overall appearance.
Planting
The planting happens during the walling process. This has the advantage that the plants do not have to be squeezed into the holes. So no roots are injured, so the plants have an optimal living space. When planting, just make sure that the plant is lightly pressed. This ensures there is sufficient oxygen supply. You should also water the plant enough so that the roots mix well with the sand. This is also a crucial aspect for solid growth.
Care
A dry stone wall requires little maintenance. Most plants planted in a dry stone wall can cope well with a short dry period. So if you add a little water to the wall every now and then, that will be enough. The dry stone wall is a visual highlight in the garden and is also easy to care for.
Materials and suitable plants
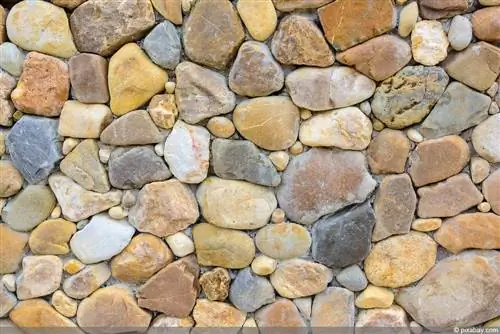
Almost all types of stone are suitable for the wall. Granite, greywacke, limestone, sandstone, quartz rock or even bas alt are visually fascinating. These types of stone are the most commonly used types of stone for dry stone walls. The most suitable plants are peony carnation, hanging cushion bell, carpet silver rue, stonewort and creeping golden sheaf. Of course, there are many other plants that look great in a dry stone wall. If the wall has shady to semi-shady areas, dwarf lady's mantle, spring sedge, gold droplet, white alpine aster and blue alpine aster can also be planted in the dry stone wall. For the wall crown, Serbian sheaf, creeping golden sheaf, blue cushion, summer and wall alyssum as well as the stone purse Armenia are well expressed.
Conclusion of the editors
A dry stone wall provides a visual demarcation in the garden area. The dry stone wall can stand alone or be used as a slope reinforcement. The construction is very easy for hobby gardeners and craftsmen. The wall is also suitable for raised beds and visual improvements to the garden. The color accents created by the plants make every wall a beautiful and colorful eye-catcher. However, never proceed without planning, because as easy as the plants are to care for, they are also sensitive when choosing a location.
What you should know about dry stone walls in brief
- A dry stone wall can either stand on a slope or completely free on a property. For stability reasons, a dry stone wall should not be built higher than 1.2 m if it is free-standing.
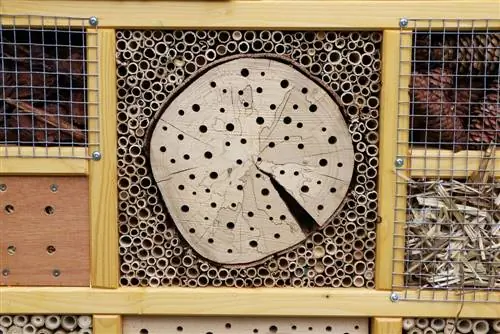
- A dry stone wall or the cavities inside provide a home for weasels or slowworms, but also for lizards, toads and mice, as well as for bumblebees and also wild bees.
- The vegetative colonization of the dry stone wall can either be left to nature, or you can also fill it with quickly blooming flowers or other plants.
- But before that happens, the gaps have to be filled with soil so that the plants have a breeding ground. When planting yourself, you should make sure that you don't put the plants so close together.
As a rule, you should choose plants for planting that spread quickly on the dry stone wall, even in a relatively short time. When planting, it is also important to ensure that some areas of the dry stone wall remain free of vegetation so that, despite the planting, the animals still have the opportunity to find protection from the sun or a place to sunbathe. The following are particularly suitable for planting a dry stone wall:
- stonecrop,
- Houseleek,
- Blue pillow,
- Man sign,
- Saxifrage,
- Goose cress,
- hungry flowers,
- heath carnation,
- Pasqueflower,
- Bluebells,
- Zimbelkraut
- and thyme
In addition, a dry stone wall can also be planted very well with stone purse, mountain magic clover, woolly zest or bitterroot and catchfly, as well as, for example, goose cress, or rockweed, field bindweed, as well as the so-called fleabane, cushion phlox and of course Johannis herbs. So that the plants can be easily planted on the dry stone wall, you should choose cover stones that are as flat as possible for the top layer of the dry stone wall during construction.

