- Author admin [email protected].
- Public 2023-12-17 03:39.
- Last modified 2025-01-24 12:45.
Pruning vines seems to be a science in itself. But with instructions for the right cut, with a little time and leisure, it's definitely doable. The vines require winter pruning every year. Further measures such as breaking out in spring, thinning pruning, summer pruning or rejuvenation pruning can optimize the overall result, but are not necessary in every case. There is some controversy on the subject of pruning. Don't let yourself be unsettled. When it comes to grape vines, it is better to cut them too much than too little. You will learn more with every year.
Winter cut
What is the right time for winter pruning? The first discussion begins here. Some people say November and December are the best times. Others cut in February, March. The argument of the November-December advocates: In spring the sap begins to shoot in, so that the branches bleed when pruned. If you want to be on the safe side, cut your vines sometime from November to February at the latest. It is important that temperatures are not far below 0 °C. There are some differences in the grape varieties here. It's best to find out beforehand how many degrees below zero the plant can tolerate winter pruning. Special effects on the harvest in relation to the different cutting times are not documented. For the cut itself, it is important to recognize the different types of wood of the new shoots on the vine, there are:
- Fruit wood: important for the harvest; is cropped short, medium or long
- Replacement wood: Shoots that can be important for wood formation next year
- Trunk wood: Shoots that can be important for the basic shape of the vine (training)
The fruit wood is important for normal winter pruning (without training). These are shoots that grew last year (last year's wood) on which buds can be seen. They are 5 to 10 cm apart and are juicy green when cut. These shoots are shortened to 2 to 6 eyes (short to medium pruning). As a rule of thumb, there should be more than 20 buds per square meter after pruning.
The next step is to evaluate the trimmed shoots. Only the best remain. They are close to the trunk and almost as thick as a pencil. That's around six shoots per square meter. You can then mark these with a colored ribbon to make your work easier. Now the remaining shoots are removed, flush with the next thicker shoot.
The vine now looks pretty bare. No wonder, because almost 80-90% of the vine has been removed. Finally comes the fine cut. The marked shoots are trimmed again. A distinction is made based on their location on the trunk. On the upper vines you leave up to six eyes, on the lower ones you shorten again and only leave 2 to 3 eyes. Finally, wild shoots (water shoots) on the older wood are removed.
Basically, the following must be observed when trimming:
- Use a clean, sharp cutting tool
- When cutting, leave a stub above the last bud; Cut is made between two buds
- Make the cut at an angle
Break Out
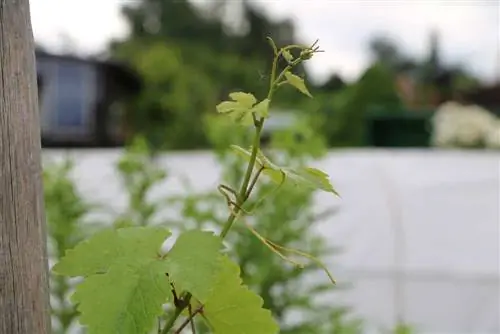
Spring pruning usually means breaking out. Water shoots (water shoots), everything that sprouts from the old trunk wood, are broken out. This is very easy to do without tools. Shoots that sprout from the fruit wood and do not show any signs of fruit are also removed. However, one shoot per fruiting wood shoot should remain on, even if no fruit can be seen. If several shoots come from one fruit base on the fruit wood, only the strongest ones are allowed to continue growing.
Blending cut
The thinning cut is not always necessary. It is used on older vines that have grown without training or for a long time without pruning. In this case one speaks of neglect of the vine. You can see this by the many branches growing together, some of which (especially in the lower area) only sprout sparse leaves. When thinning, dead wood is removed and, if present, all infected and diseased parts of the vine. Depending on their shape, excess trunk branches are cut away or shortened. The best time for thinning is in February and March, when the vines have no leaves yet.
Summer cut
Summer pruning is something for ambitious gardeners or winemakers. This can ensure a rich harvest or particularly accurately growing vines on the trellis. Whether summer pruning makes sense also depends on the vigor of the grape varieties. Strong-growing varieties initially produce an excessive number of shoots, so that without summer pruning you can lose track of all the leaves over the years. The best time for this is June. But actually these corrective cuts can be done all summer long. During summer pruning, particularly long shoots and non-bearing, stingy or watery shoots are removed.
Summer pruning also includes so-called green pruning, a form of defoliation in places. All leaves that deprive the fruit of the sun from the fruit are removed. This should happen gradually. Otherwise, the young grapes could get sunburned if their sun protection is radically removed. With this measure, the grapes ripen sooner and become larger. The risk of mold infestation is also reduced.
Rejuvenation cut
After five to ten years it may become necessary to rejuvenate the vine. You can tell this because the branches (the thick side branches from the main trunk) are gnarled and outdated. Now it’s time to breed a new “offspring” there. To do this, look for a water shoot as close as possible to the trunk. It shoots up long and straight and now needs to be shortened to just a few buds. The finish is also shortened after the water release. New fruit shoots should now grow from the lower buds of the water shoot. Tip: If there is no water shoot to be found, it can be provoked. Damaged or bruised branches often produce water shoots. To do this, you can hit the trunk at the desired location with the blunt side of a knife or scissors, just hard enough to squeeze a few fibers.
Conclusion
Even if it all sounds very complicated and labor-intensive at first, if you want to enjoy grape vines, you should think about this topic a little. With every year you learn something new and over time you get a feeling for which cut is necessary and when. Regular checks, joy in care and observation of growth behavior make pruning work easier for he althy, beautifully grown vines.
What you should know in brief
Time
- The vines are cut in spring from February to March.
- This means that the relationship between the growth of the cane and fruit success remains balanced.
- As a rule: the more severe the pruning, the greater the growth of the cane and the lower the fruit success.
- This is because the vine produces its flower buds the previous year.
Basic rules
- Prune old vines vigorously, young ones less: A vigorous pruning can act like a fountain of youth on an old, exhausted vine because it stimulates new growth. The exact opposite is the case with a young stick. Its growth can be slowed down if you leave more fruit wood on it.
- Cut water shoots, leave annual wood standing: The flowers arise on the green, this year's shoots, which come from annual wood. The so-called water shoots are barren. They grow directly from old wood that is more than two years old.
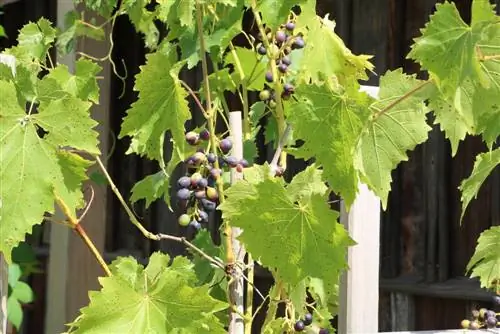
Rod and cones
- A rod is a shoot that is cut back to eight to twelve eyes.
- When we talk about a cone, we mean a shoot that is shortened to one or two eyes.
Cutting
- The one-year-old wood usually removes 90 percent of the existing eyes.
- A complete tier can be cut out of the trellis. There is no need to worry that the stick will die.
- On the contrary: This can even rejuvenate an older stick.
- The most practical form for a vine trained as a trellis is the cone cut.
- It must be prevented that the cone moves further and further upwards. To do this, the tenon is cut as short as possible.
- Only one or two visible eyes remain on the cone.
- The one-year-old shoot is cut off exactly in the middle between two eyes.
- It is also important to prevent leaves that are too dense because this shades the grapes and fungal diseases can occur relatively easily. Therefore, a distance of approximately the length of a pair of pruning shears (around 20 cm) should be left between the cones.

