- Author admin [email protected].
- Public 2023-12-17 03:39.
- Last modified 2025-01-24 12:45.
If you work diligently with hand tools in the garden or around the house, it can happen that the associated wooden handle breaks or tears completely. In this case, you don't have to buy a new, expensive tool straight away. With the right instructions, a replacement handle can be attached to the damaged equipment in just a few steps. You can then continue working normally without major interruptions.
Single stem
In most cases, a new hand tool is purchased straight away if the wooden handle of the old tool breaks. Only a few people dare to do the stemming themselves. However, if you have some practical experience and follow the instructions carefully, you will definitely be able to complete the repair. When buying, it is important to pay attention to the quality of the new handle; the right fit is just as important. Depending on the equipment, the shaft is in most cases either triangular, oval or round, although there are also certain special shapes in exceptional cases. Often the ratio of width and length of the replacement handle is incorrect, so you can make the required handle yourself using a drawknife. The wood fibers are crucial; if the fibers are too short and slanted, another break is inevitable.
- Only use handles made from seasoned wood
- Professional chamber drying is ideal
- Make sure the wood fibers are straight and continuous
- The best stem woods are acacia, ash and hickory
- Consider climatic conditions when planting
- When the humidity is high, the stem sits tighter
- When the humidity is low, the stem becomes loose
Tip:
It is best to leave the newly purchased wooden handle in dry air for at least a week, either in a centrally heated room or directly on the radiator.
Instructions
In addition to careful selection, it is also important to ensure that the replacement handle is installed correctly. First, the old handle and its remains must be completely removed from the hand tool. Then the new handle must be prepared to fit the shaft; there are different methods for this. When refinishing, it is recommended to follow the wood grain and only remove excess material where the fibers are no longer continuous. This ensures that the wooden handle retains its resilience for a longer period of time. Anyone who planes or files the continuous annual rings weakens the stem considerably. Tools should then be used to drive the handle into the shaft. Tool manufacturers carry out this work step with powerful presses; existing tools can also be used for household use. It is important to have a firm and resistant base so that damage can be avoided.
- Requires hammer, hand saw, hardwood and metal wedges
- If necessary, use waterproof glue or glue
- Carefully saw off the broken handle
- Drill the rest until you can knock it out
- Do this with a hammer and blunt chisel
- Prepare the replacement handle for the shaft to fit perfectly
- Draw appropriate contours with pencil
- Then remove excess material
- Either with rasp, draw knife or scraper blade
- Then drive the handle in far with a hammer
- Make sure it is firmly seated, secure the handle by wedging it
- If the fit is too loose, use glue or glue
Note:
A planing bench that can be used to apply a lot of pressure to drive in the replacement handle is ideal.
Axe
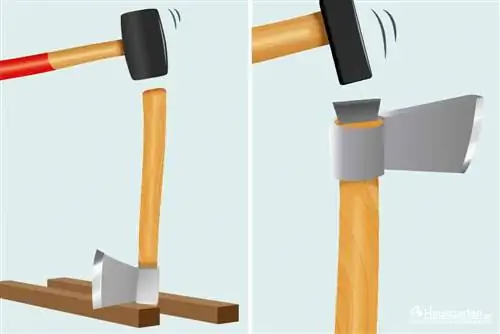
Old ax heads rarely fit together with new handles. In order to attach a new handle to an old ax, the handle diameter should be selected slightly larger and then machined according to the respective dimensions. Since wood begins to swell when the humidity is higher, the handle becomes slightly thicker over time. In this way, the seat becomes even stronger, making it significantly more stable and safer.
- Drive in the new handle at least 5-10 mm above the head with a rubber mallet on a wooden base or freehand
- Always proceed so far that the replacement handle is firmly seated
- Saw the excess and drive the wedge into the wooden base with a hammer
- Saw off the protruding part if it gets in the way
- Place the head of the ax straight on the handle
- Never hit the hammer head as there is a risk of splinters
hatchet
On a hatchet, the attachment between the handle and the striking head must hold permanently and reliably. As soon as the replacement handle comes loose, this situation can endanger life during use. When the ax flies around in its pieces, its head resembles a dangerous missile. Although the mechanical implementation of removing the new handle is comparatively simple, it must be done correctly and according to specific instructions.
- Be careful when driving in the stem end
- Make sure the handle sinks evenly into the head
- Keep measuring with angle iron
- Maintain a right angle between the center of the blade and the shaft
- Correct the seat with additional hammer blows
Broom
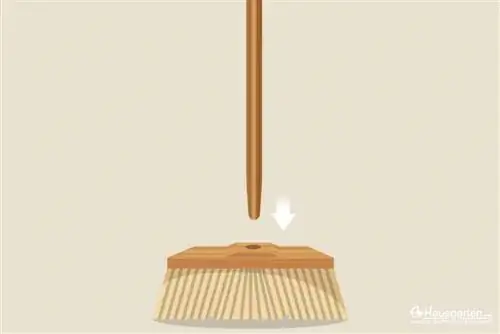
Brooms are usually equipped with a thread for which suitable handles are available in every well-stocked supermarket. It is much more difficult to repair brooms for gardening and sweeping outdoor areas that only have an empty handle hole without a thread. Long wooden handles with the right circumference are suitable for this, which are tapered at the bottom and then processed accordingly.
- First measure the depth of the handle hole
- Sand the edge of the handle accordingly
- Put the broom on with firm pressure
- The end of the handle should disappear into the hole as far as it will go
- Let the head end of the broom fall vertically onto the hard floor
- Repeat until the handle is very tight
Cross hoe
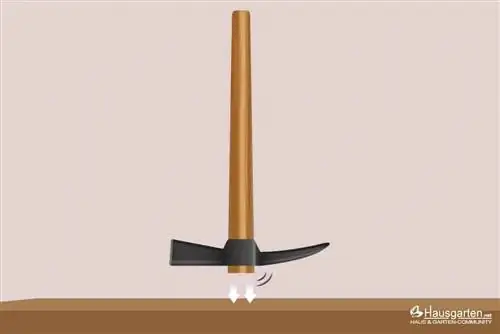
The wedge shape of the pickaxe and the handle almost never match each other. Therefore, the hoe either has to be pressed onto the handle with great effort or the handle has to be ground in precisely. In general, the pickaxe is not connected to the replacement handle, as is the case with the ax or hatchet with the wedge. Therefore, the new stem must be conical in order to hold sufficiently firmly. Under no circumstances should the metal part wobble when chopping, as it could come off under heavy use.
- Work on visible contact points with sandpaper
- Then carefully rework with a rasp
- Put the hoe on the handle
- Knock vigorously several times on the hard floor
- Check the tightness of the seat from time to time
Note:
How much you have to sand off the contact points can be estimated by where light still shines through at the end of the handle.
Shovel
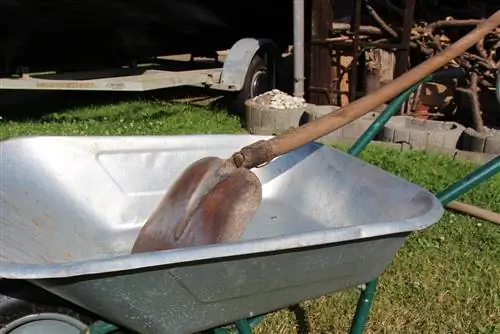
Specialist retailers offer many different handles for a shovel, which differ considerably in terms of handle shape, material, diameter and length. Wooden handles are widely used and can be easily replaced if they break. To find the correct dimensions, remove the old shovel handle and measure the diameter of the opening and the length before purchasing a new one. Ideally, the same dimensions are selected that perfectly match the shape of the handle of the shovel.
- Note handle shapes: D-handle, button handle or T-handle
- Button handle offers little grip for the hands
- Therefore not ergonomically useful, rarely used
- D handle offers a secure hold thanks to the triangle
- T-handle enables comfortable working thanks to the horizontal bar
- You can try out various handle shapes at the hardware store
Spade
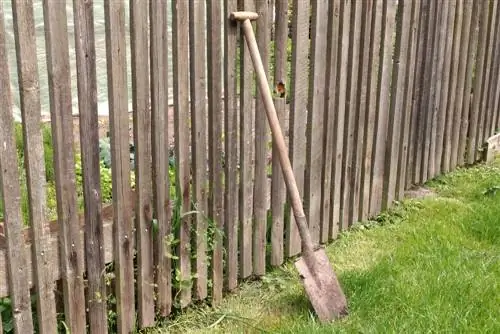
The first step when spading is to remove the rivet that runs straight through the old handle. To do this, clamp the spade handle firmly and then either file or sand the head of the rivet. The head must be ground down to such an extent that the normal thickness of the rivet can be seen. Then take a mandrel and knock out the rivet to the other side. If the remaining wood in the handle of the spade cannot be pulled out immediately, the entire spade should be heated so that the wood dries out completely and then comes loose. If you're in a hurry, you can heat the spade handle with a flame.
- For single handles, clamp the spade in a vice
- Carefully drill a hole in the spade booklet from side to side
- Drill should be half a centimeter thinner than rivet
- Alternatively you can use a thick nail
- Drive nail through the hole, leave half a centimeter longer
- Then spread the end of the nail with a hammer
- Smooth surfaces are important
- Otherwise soil and weeds will remain stuck
Sledgehammer
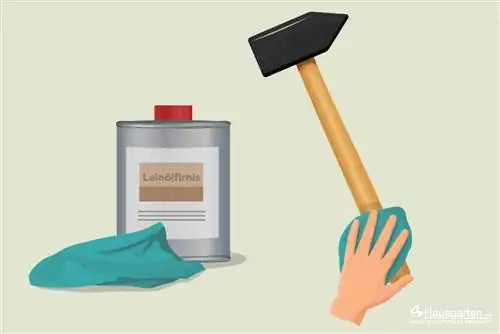
The head of the sledgehammer is the most expensive part because it is made of solid metal. That's why it's always worth replacing the relatively inexpensive handle if it breaks. New wooden handles must be prepared well before and after insertion so that working with the sledgehammer is easy. That's why the handle must be completely smooth, as large frictional forces arise during use. If the wood is too rough, it will rub the palms of your hands and can cause injury.
- Sand the new handle carefully with sandpaper
- Repeat the procedure several times
- Finally use fine-grit sandpaper
- Oil the handle after insertion
- Repeat oiling a few times
- Oil absorbs quickly and completely into dry wood
- Serves as protection against adverse weather influences
Christmas tree
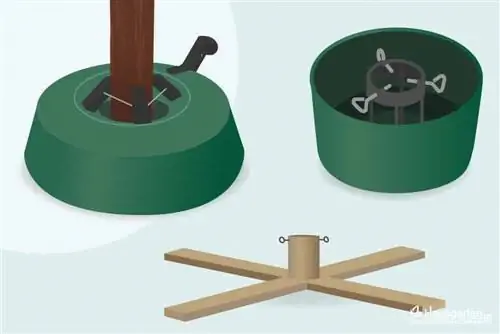
So that a painstakingly set up Christmas tree does not tip over after a short time, it must be firmly planted in the matching stand. However, the selected tree often offers stubborn resistance when it is set up because it is an untreated natural product. Then the handle must be made suitable for the stand using an ax and saw, so that a secure stand is guaranteed over the long term. Otherwise, there is a risk of fire in the house or apartment when using real candles.
- Always choose a stand that matches the Christmas tree
- The higher the tree, the heavier the stand must be
- Weight classes are between 5-15 kilograms
- Stands that can be filled with water are ideal
- This makes them even heavier
- Tree stays fresh longer like in a vase

