- Author admin caroline@plants-knowledge.com.
- Public 2023-12-17 03:39.
- Last modified 2025-01-24 12:45.
Growing hibiscus plants from seeds or cuttings is easy to understand even for the inexperienced hobby gardener. Propagation by cuttings has the advantage that the new plants bloom earlier than their relatives grown from seeds and that exact copies of the mother plant grow from the cuttings because they have the same genetic material. When propagating from seeds, more patience is required. The new hibiscuses grow more slowly at first and only show their first flowers after 2 to 3 years, which can also look different than those of the parent plants.
Propagation with seeds
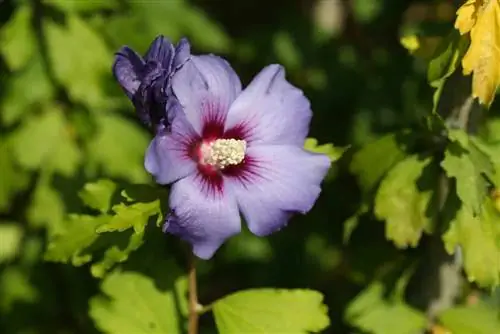
To grow marshmallows yourself from seeds, it is advisable to use the seeds of your own plants. The garden marshmallow, for example, produces seeds. Seeds must be purchased for the Hibiscus rosa sinensis or rose marshmallow. Like all tropical hibiscus varieties for windowsills and balconies, these hibiscuses do not produce seed heads.
If marshmallow seeds from your own garden are used, you should remember that all marshmallows are hybrids. This means that the plants are created through crosses and the seeds contain the genetic information of both parent plants, which in turn were themselves hybrids. Therefore, when using seeds from existing plants, it is completely uncertain which properties, such as flower color, the new plants will develop.
It can happen again and again that completely different new hybrids develop from a single capsule fruit. If a specific hibiscus variety is to be grown from seeds, specialist retailers offer selected, high-quality hibiscus seeds, with a high probability that the desired plant with the favored properties will grow in the end.
Preparing seeds
If the seeds of the garden marshmallow have turned dark, they can be collected in the garden or carefully picked from the seed heads and used for sowing. The hard-shelled seeds of hibiscus, whether tropical or winter-hardy, are not known to germinate very well. However, with a tried and tested trick, the germination process can be accelerated without much effort. This requires a sharp cutter or, better yet, a scalpel (from the pharmacy) and a non-slip surface.
- Fixing a seed to the base
- Cut off the shell about 0.5 mm wide on the round side of the seed
- Soak the cut seeds in lukewarm water for 24 to 48 hours
Tip:
If you don't feel comfortable cutting with a scalpel, you can also carefully sand off the seed shell with a nail file or sandpaper.
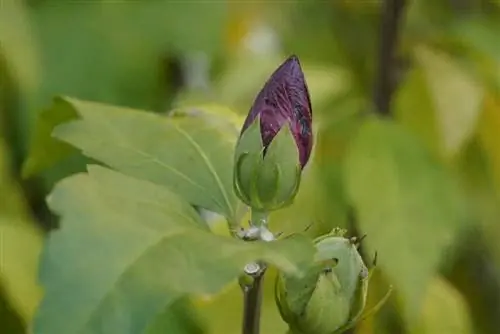
Only the hard shell of the seeds is cut open or filed down and the inside must not be damaged. After opening the seed coat, the inside of the seed should be visible. If the color is light yellow, the seed is OK. If there is a brown to black color inside, the seed is unusable. As an alternative to watering, the seeds can also be soaked in a 0.2 percent potassium nitrate solution from a specialist retailer at room temperature.
Sowing
It is important that the seeds do not dry out again after watering and soaking. Ready-made substrates from the garden center, self-mixed, nutrient-poor substrates with a high sand content or peat soaking pots are suitable for sowing seeds. Hibiscus seeds require a germination temperature of 26 to 30 °C and a humidity of around 90%. A heated mini greenhouse for the windowsill is therefore ideal for sowing. The floor of the greenhouse is covered with expanded clay or perlite to a thickness of approx. 2 cm and then the substrate is filled in or the peat soaking pots are placed on top.
- Place seeds individually in the soil with the cut, round side facing up
- Cover the seeds thinly with soil
- Spray the soil with water and always keep it moist
- Cover plant box with foil or glass plate
- Place the greenhouse or planter in a bright place without direct sunlight
- ventilate the planter regularly to prevent mold formation
Germination time
The more constant the temperature in the planter, the better the seeds will germinate. After about 4 to 10 days the seeds will begin to germinate. If the shell of the seed is pressed upwards, it can be carefully removed with your fingers or, better, tweezers. If Torquell pots are used for sowing, the first roots will grow out of the small pots after just a few days. If the seedlings are approx. 6 cm tall and roots can be seen, the seedlings can be transplanted into larger pots with substrate for hibiscus and fertilized for the first time after another week. During this time, the cover can also be removed step by step so that the young plants can slowly harden off.
If Hibiscus syriacus is grown from seeds, it takes 2 to 3 years before the first flowers appear on the plants and it becomes clear which characteristics of the parent plant have prevailed. In the 3rd year, the home-grown garden marshmallows are strong enough and can be planted in the garden.
Propagation by cuttings
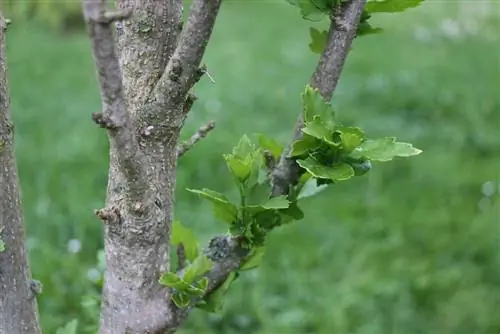
If you want to propagate marshmallows that are already in the house or garden, you can propagate them using cuttings so that the new plants have the same properties as the mother plants. The effort required for propagation from cuttings is no higher than for propagation by seeds. The ideal time for propagation from cuttings is May, June and July.
Growing soil and environmental conditions
Ready-made substrates from specialist retailers or self-mixed substrates made from approx. 1/3 sand mixed with humus soil or peat are suitable as growing soil. So-called peat swelling pots are also suitable. The substrate should be fresh, fine-grained and always moist. A wet substrate or waterlogging must be avoided.
The cuttings are best rooted at a constant temperature of 26 °C to 30 °C and a humidity of 80 to 90 percent. The more constant the temperature and humidity are kept, the better the cuttings will root.
A heated greenhouse for the windowsill or a heating mat that can be placed under the planter ensure even temperatures. The heating is controlled via a thermostat that is placed at the bottom of the planter box. Matching heating mats are available from terrarium shops or greenhouse accessories shops.
To ensure consistently high humidity, the planter box should have a transparent hood or be covered with a glass plate or transparent plastic film. An approx. 2 cm high drainage layer made of gravel or perlite is placed under the substrate in the plant box.
A bright place without direct sunlight on a windowsill in the house is suitable as a location for the planter or mini greenhouse. A place without direct sun is important because the sunlight can cause the temperature in the planter to fluctuate too much.
During the rooting period, the plant box must be ventilated by regularly lifting the cover to prevent mold formation.
Preparing the cuttings
The fresher and he althier the shoots are, the safer the propagation of hibiscus through cuttings is. The shoots should not be fresh green, but slightly woody. Shoots from the previous growth period are ideal. The shoots selected for propagation are cut at an angle of approx. 10 to 15 cm long and opposite a vegetation node. The tip of the cut is then shortened by 1 to 2 millimeters to blunt the tip. Since not all cuttings produce roots, it is advisable to prepare approximately twice as many cuttings as the number of plants to be grown.
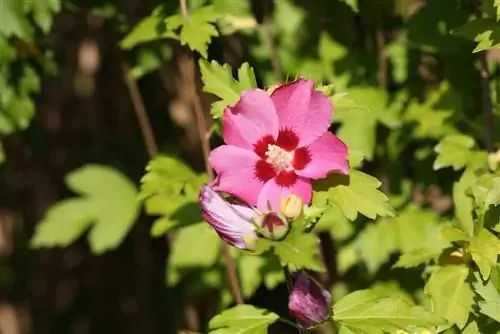
The length of the shoots is not crucial for the success of propagation. What is more important is that each shoot ideally has 3 eyes. Buds and the lower leaves are carefully cut off from the stem of the cuttings with a sharp knife or cutter. The eyes in the corners of the leaves must not be damaged. These are the vegetation nodes where the cutting will sprout again. The prepared cuttings should be lowered into the available potting soil immediately after preparation. The interface must not dry out.
Planting the cuttings
The cuttings are inserted into the substrate up to about a third of their length and the substrate is then lightly pressed all around. Depending on the humidity, the soil can be sprayed with a little water.
Rooting aids
So-called rooting aids are available from specialist retailers for propagation with cuttings. These are special algae extracts that, on the one hand, promote the formation of roots and, on the other hand, prevent rot and mold formation at the interface of the cuttings. Using the powdered rooting aid is easy. The freshly cut end of the cutting is moistened and briefly dipped into the powder. Due to the moisture, some powder sticks to the cutting and is added to the potting soil. Alternatively, the powder can also be sprinkled into the planting hole for the cutting.
Other aids that are particularly successful for rooting older cuttings are rooting hormones. These are synthetically produced plant hormones such as IBA (indole-3-butyric acid) or IAA (indole-3-acetic acid). The growth hormones are available from specialist retailers as tablets or powder.
It is used in the same way as the other rooting aids. However, when using rooting hormones, the manufacturer's dosage instructions must be strictly adhered to. Too much hormone does more harm to the cuttings than good.
Tip:
Due to the accelerated root formation when using rooting hormones, the cuttings are more sensitive to rot and mold formation. It is therefore recommended to sterilize the substrate in the oven for 30 minutes at approx. 120 to 150 °C before planting.
Rooting in water
The cuttings can also be rooted in water. This method has the advantage that the new roots can be seen immediately. Here too, more cuttings should be prepared than plants are to be grown. Not all cuttings form new roots.
- Use a glass or plastic cup for each marshmallow cutting
- Fill the container approx. 5 cm high with clear water
- Rainwater or tap water that has been stale for at least 24 hours is ideal
- Cover the cuttings with a transparent plastic bag
- Remove the covers once a day and spray the cuttings with water
- Change the water in the containers every 2 to 3 days
When the roots have grown to about 5 cm long, the plants can be transplanted into pots with special substrate for hibiscuses. This should be done carefully because of the sensitive and brittle roots.
Rooting time
It usually takes around 3 weeks to 3 months for the first roots to form on the cuttings. New leaves often grow before roots have formed. When the cuttings are sufficiently rooted, they are planted in their first pot. A transparent plastic bag is first placed over the pot and plant for about two weeks, which ensures high humidity. The bag may need to be supported to prevent it from sinking onto the plant. Next spring, after the last frosts, the young marshmallows can be moved to the balcony or terrace or planted in the garden.
Conclusion
Growing marshmallows yourself from cuttings or seeds requires some effort and patience, but is also easy for laypeople to do. What is important is good seed quality, fresh cuttings and, above all, the right environmental conditions for cultivation. The more uniform the temperature and humidity are maintained, the faster and better the seeds of Hibiscus syriacus will germinate and root the cuttings of tropical hibiscus varieties. Careful preparation of seeds and cuttings contributes to successful propagation, as do rooting aids and the right substrate for cultivation.

