- Author admin [email protected].
- Public 2023-12-17 03:39.
- Last modified 2025-01-24 12:45.
Tomatoes are popular in the garden because they are easy to care for and produce a rich, tasty harvest that store-bought tomatoes have difficulty matching. In spring the choice must be made between growing them yourself and buying young plants. If the tomato plants are sown themselves, they will have to be separated at some point. Pricking out is done so that the plants have better growing conditions and to select the best tomatoes for further cultivation.
Time
Depending on when the tomatoes were sown, the time for pricking out can be different. Basically, the young plants should be well developed and already have a certain size. If, when you remove the tomato plants, it turns out that the roots are so extensive that they are already hindering and entangling each other in the growing tray, you have waited too long before pricking out. The right time also depends on the location of the plants. Tomatoes grow faster when there is warmth and lots of light. Basically it can be said that the young plants can be separated about 4 weeks after sowing.
Work equipment:
- Pots made of clay or plastic, 10 cm diameter
- Planting soil
- Wooden sticks, stick, fork, spoon or similar
- Water, mini watering can or spray bottle
- waterproof base or coaster for the pots
- possibly clean scissors
Preparation
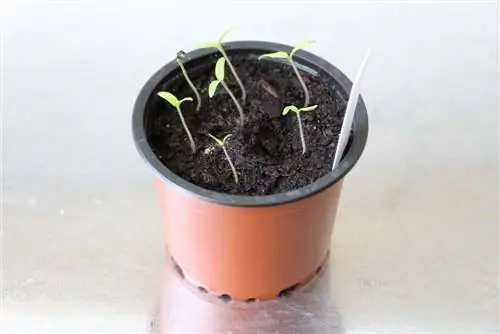
The young plants are watered thoroughly again so that the roots are sufficiently supplied and grow quickly in the new substrate. The holes in the pots are covered so that no soil can be washed out, but water drainage is still guaranteed. Pieces of pottery, pebbles or a piece of kitchen paper, which will later rot, are suitable for this. Potting soil from the garden store is suitable as a substrate. In contrast to potting soil, it contains fertilizer that supplies the plants with the necessary nutrients. Finished, sifted compost mixed with a portion of sand is also suitable. However, there is then a risk of weeds developing.
Select young plants for further cultivation
The strongest young plants are selected for isolation. In addition to the cotyledons, they should have at least two well-developed leaves. Sick or weak plants are not suitable for further cultivation. You should also pay attention to pests.
Prepare young plants
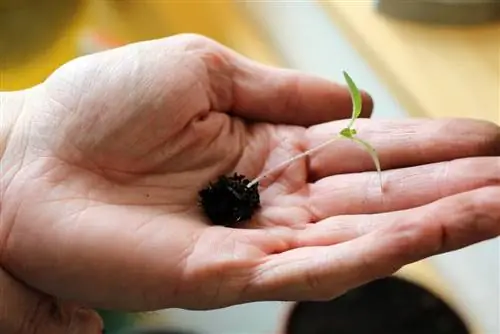
Some soil is poured into the new pots. Then the young plant is removed from its growing tray. To do this, use a pricking stick, a fork or another tool to carefully loosen the soil around the plant. It is also possible to simply use your fingers. Under no circumstances should the plant be pulled out of the ground by force. Roots could break off. Leaves and stems must not be snapped off.
If the roots are very long, they can be shortened slightly with scissors. However, if a ball of soil has formed around the roots, it should not be removed. The plant is placed in the new pot with the soil.
Inserting into new pots
The plants are placed in the middle of the new pots in the soil and fixed there by hand. With the other hand, add soil around the plant until the pot is full. Then carefully press the soil around the tomato. Maybe add some more soil.
Tip:
When pricking out, plant tomato plants deeper than before. New roots form on the trunk, which provide the plant with additional nutrients and water.
Pouring
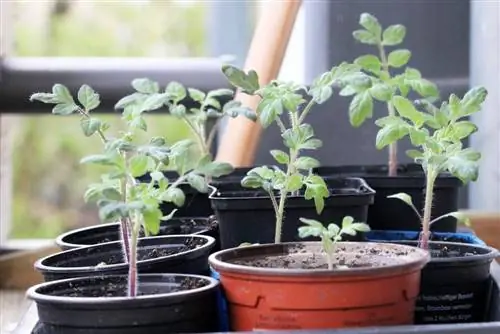
Proper and thorough watering is very important for the young plants. The pots are placed on a waterproof surface or in a small tray and watered thoroughly using a small watering can or, even better, a spray bottle. Excess water should be able to drain away so that waterlogging does not occur. When watering, the soil is washed directly to the young roots, which then grow better.
Location
In the first few days, the young plants should not be in the blazing sun. Water absorption via the roots is still insufficient, while a lot of water can evaporate via the leaf mass. There is a risk that the young plants will wither. You can tell that the tomato plants have grown because new leaves are forming and the stems are getting longer. Then they can stand in the sun again, and later also outdoors.
Further aftercare
The young plants must be watered regularly, but must not be too wet. There is little or no fertilization until planting. There is enough fertilizer in the substrate. Further repotting should be avoided so that the plants grow quickly in their final location later. Every transplant means stress for the young tomatoes. A support pole becomes increasingly important as the plants get larger. If it is placed later, care should be taken to avoid damaging the roots of the plants.
Tip:
A support aid can be beneficial even in the early stages. Before the young plants are potted, for example, insert a chopstick or a kebab skewer into the soil to which the tomato can be tied later.

