- Author admin caroline@plants-knowledge.com.
- Public 2023-12-17 03:39.
- Last modified 2025-01-24 12:45.
A wise master of Japanese garden art once said: “Bonsai is not a type of plant and does not pursue a final destination, but represents a never-ending journey.” In fact, skillful bonsai care builds a bridge from horticultural knowledge to fascinating garden art. The successful cultivation of bonsai trees means a constant struggle between the gardener and the plant. In order for an originally majestic tree to thrive in a bowl, important basic rules of bonsai cultivation must be observed. This guide familiarizes beginners with the right bonsai care from A to Z.
Buy beginner bonsai in specialist stores
Buying a pre-grown tree from a specialist retailer is an excellent way to get started with bonsai farming. With proper care, a bonsai can last for several generations of a family, like the world-famous Yamaki family maiden pine. The legendary bonsai is more than 400 years old and survived the atomic bomb of Hiroshima. You can't expect such a masterpiece from a cheap offer from the hardware store. Simple bonsais from expert breeding cost between 100 and 500 euros. Premium quality copies cost several thousand euros and are not recommended for beginners.
Depending on the tree species and origin, a bonsai is suitable for cultivation indoors or outdoors. A tried and tested indoor bonsai suitable for beginners is the birch fig (Ficus benjamini). Other subtropical tree species with the potential for indoor bonsai include jade tree or money tree (Crassula) and fuki tea (Carmona retusa). For other tropical tree species, the bar is set at a level that overwhelms bonsai novices. The selection of native and Japanese tree species that pave the way for beginners to bonsai culture is significantly larger, such as maple (Acer), azalea (Rhododendron), privet (Ligustrum), Chinese juniper (Juniperus chinensis) and pine (Pinus).
Location in summer
Keeping a bonsai indoors permanently is a sure way to kill it. This applies equally to tropical, subtropical and native tree species. Your first bonsai should at least spend the warm season in the fresh air and soak up plenty of sun. The popular fig bonsai, for example, remains a shadow of its former self when kept under house arrest all year round. Winter-hardy bonsai species ideally stay outdoors all year round. Trees from tropical regions spend the winter behind glass in order to relocate to the garden or balcony in time for spring. Regardless of a specific type of bonsai, these premises must be taken into account when choosing a location in summer:
- Sunny to semi-shady location
- Ideally protected from strong winds and pelting rain
- Species sensitive to cold: from April/May to September/October
- Winter-hardy species: all year round
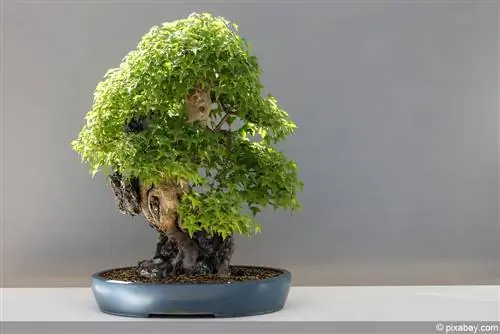
Before you clear out your indoor bonsai on the balcony or terrace in spring, harden the tree for two weeks. In a partially shaded location, the leaves can get used to the unfamiliar sunlight and do not suffer from sunburn. Gardens and balconies do not always offer the ideal conditions. This is no reason to deny a bonsai the beneficial stay in the open air. A simple shade net protects the south-facing balcony from the blazing midday sun. A light mist in the early morning and late evening works wonders to combat dry air on hot summer days.
Pouring
Proper watering plays a key role in bonsai care. Instead of watering a tree in its pot on a hard-and-fast schedule, water it as needed. A variety of factors influence when and how often you water your bonsai. Tree species, size, substrate volume, season and local site conditions determine the ideal watering rhythm. The following guidelines serve as practical guidelines:
- Water the bonsai as soon as the soil has noticeably dried out
- Put your finger 1 centimeter deep into the substrate
- Slightly damp to wet: do not water
- No moisture felt: watering
- Run room temperature, stale water directly onto the root disc
- Stop the pouring process when the first drops run out from under the bowl
- Wait a few minutes and water again
Use a special watering can with an integrated shower. The design prevents soil from being washed out of the bowl when watering. Please make sure that the entire root ball is soaked. By watering again every few minutes, all root areas are reliably supplied with water.
Substrate influences water supply
There is a close interaction between substrate quality and water supply. The majority of bonsai trees thrive in a loose, permeable soil mixture of Akadama, fine-grained gravel and humus in a ratio of 2:1:1. The striking permeability of bonsai soil makes frequent watering necessary. On hot summer days in a sunny location, it is not uncommon for a bonsai to have to be watered in the morning and evening. If you don't have the time to regularly patrol with the watering can, you should double the proportion of humus and halve the proportion of gravel.
Fertilize
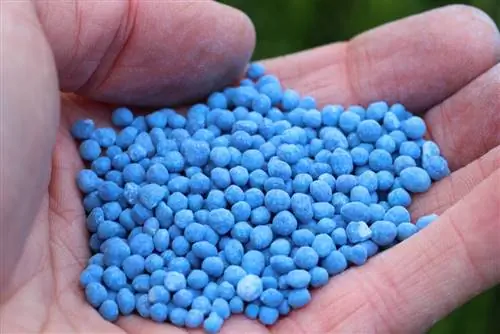
Bonsai trees rely on a continuous supply of nutrients during the growing season. In contrast to their big brothers in the forest and garden, trees in their shells cannot rely on an extensive root system. From spring to autumn, regularly apply a balanced fertilizer to compensate for the energy reserves used up. Special pelleted or liquid bonsai fertilizer from specialist retailers is composed according to traditional Japanese recipes. How to fertilize a bonsai with gardening expertise:
- Administer nitrogen-concentrated fertilizer in spring with NPK 12+6+6
- In summer, fertilize balanced with NPK 10+10+10
- In the fall, fertilize with potassium emphasis with NPK 3+10+10
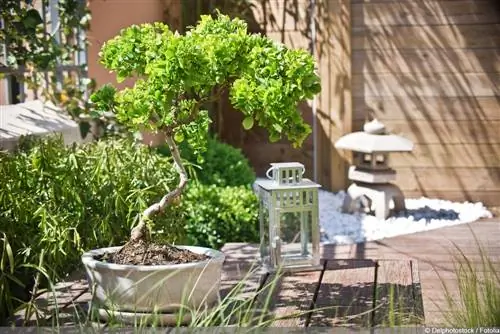
Apply the fertilizer according to the manufacturer's instructions. As you get older, the amount of nutrients you need reduces. By then, as a beginner, you will have accumulated a respectable we alth of experience to be able to take the changes in dosage into account in an informed manner. It is important to note that you add clear, soft water to the substrate before and after each fertilization. Fertilizer s alts can cause root damage on dry soil. Subsequent watering ensures an even and thorough absorption of nutrients.
Tip:
So that solid bonsai fertilizer is not washed away or picked up by birds when watering, there are practical fertilizer baskets. Pellets or granules are filled into a basket and stuck upside down into the substrate. The perforated surface of the basket allows irrigation water to flow unhindered so that the nutrients it contains are transported to the roots.
Cutting
Pruning care for bonsai trees consists of maintenance pruning and design pruning. Both types of cuts are described in more detail below.
care cut
A care cut focuses on maintaining the shape and vitality of your bonsai. The cut is primarily aimed at removing unfavorable and dead shoots for a crown flooded with light. At the same time, top buds are continuously removed to promote growth inside the crown. How to complete a flawless bonsai care cut:
- Time window is open from spring to late summer (tropical tree species all year round)
- Deciduous tree bonsai: trim branches that protrude from the crown shape, grow inwards or crisscross
- Pruning: Place bonsai scissors 2 millimeters above an outward-facing bud
- Coniferous tree bonsai: Do not cut off shoots to be removed, but pluck or break them off manually
- Plucking technique: Take the shoot tip between your thumb and index finger and pull or break it off
In addition to maintenance pruning, there is leaf pruning for deciduous trees. Use this pruning technique if you want to reduce leaf size and achieve more lush branching. Between the end of June and mid-July, cut off all or some of the leaves so that the petiole remains. Only he althy, vital bonsai trees that can cope with the strenuous procedure are suitable for the measure.
Design cut
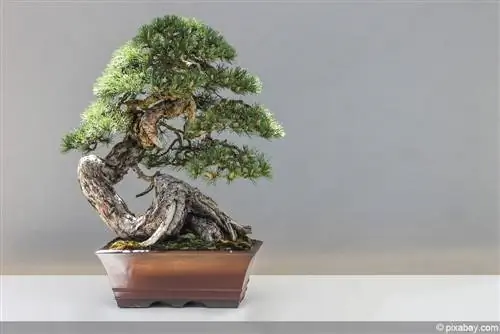
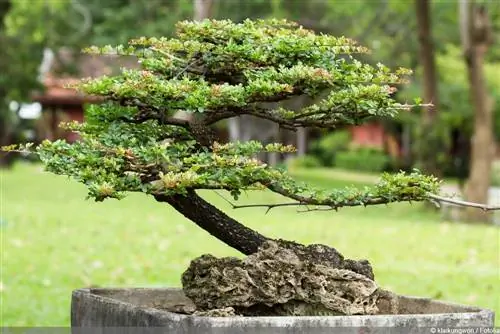
A design cut gives the bonsai its characteristic shape. Over the course of more than two thousand years of development, countless design forms with individual attributes have emerged in the art of bonsai. Suitable for beginners are, for example, the strictly upright bonsai form (Chokkan), the forest bonsai form (Yose-ue) or the spectacular rock form over stone (Seki-joju). Although the specific bonsai design can fill entire libraries, the following basic rules are important for the beginner:
- Best time: early spring, well before budding begins
- Exception: cut spring-flowering tree species after the flowering period
- Place the bonsai on a completely accessible platform at eye level
- Bonsai scissors and concave pliers, freshly cleaned and ready to hand
- At the beginning, thin out dead, stunted shoots and remove dried leaves
- Stand back to plan further steps in the cutting process
- Cut off vertical, unnaturally twisted branches that cross the front of the trunk
To create a natural tree crown, there should be no thick branches in the upper crown area. Don't be afraid to cut off a strong shoot near the top of the tree if it grows thicker than the branches in the lower crown area. To reduce scarring after a more extensive design incision, the use of concave forceps is helpful. This leaves a slight indentation at the incision site, which heals more quickly and inconspicuously.
Wiring and bending
An artistic bonsai cut is completed by correct wiring and bending. Blending alone is not enough to give a bonsai the desired shape. Only a combination of well-considered cutting and skillful wiring followed by bending leads the mini tree step by step to the desired silhouette. For beginners, aluminum wire is the right choice because the material is easier to process than copper wire. With a supply of wire in thicknesses of 1 to 8 millimeters, you are well equipped to get started. As a rule of thumb, the wire thickness corresponds to a third of the branch diameter. How to proceed professionally:
- Cut appropriate length of wire
- Wrap the wire twice around the trunk or main branch at a 45 degree angle
- From there continue wrapping to the tip of the branch
If you wire several branches of your bonsai, please make sure that the wires are neatly next to each other at the starting point of the trunk or leading branch and not on top of each other. Once all the intended branches have been wired onto the tree, each shoot is bent into the desired shape and direction.
Wintering
When the thermometer drops below 15 degrees in autumn, tropical and subtropical bonsai trees move to the bright, warm windowsill. To compensate for the acute lack of light from November to February, supplementary lighting with plant lamps is recommended. Humidifiers or a gentle mist of soft water can help against dry heating air.
The root balls of hardy outdoor bonsais rely on protection from frost. Although the trunk and crown are frost-resistant down to -20 degrees Celsius, the root area can freeze from -5 degrees Celsius. Please cover the bowls with bubble wrap or fleece. Alternatively, you can sink the bonsai trees and their bowls into the ground. Balcony gardeners place the mini trees in a wooden box filled with straw, leaves or bark mulch. Alternatively, place an outdoor bonsai in a bright, frost-free winter quarters at temperatures below 10 degrees Celsius.

