- Author admin [email protected].
- Public 2023-12-17 03:39.
- Last modified 2025-01-24 12:45.
Sitting comfortably in the garden, watching the butterflies go about their business and letting your mind unwind - it couldn't be more relaxing. Unfortunately, butterflies are becoming increasingly rare in our gardens. In fact, many species are now in acute danger of extinction. So it's high time to do something good for the animals. A butterfly box is an important contribution and can be built quickly yourself.
Background
Butterflies are always tied to very specific living conditions. Although they can fundamentally differ from species to species, what they have in common is that the animals each need food and protection. Both are increasingly missing, especially in our gardens. So-called wild gardens would be ideal for the butterflies, in which a wide variety of flowers, bushes and grasses proliferate in the summer, the lawn is not meticulously trimmed and in the autumn piles of leaves and fruit that have fallen from the trees are sometimes left lying around. However, the reality today is usually different. A neat, sparkling clean garden may be a garden owner's pride, but it is no longer suitable as a habitat for butterflies. Now you don't have to let every garden go completely wild in order to help the animals. But it can be a little less septic clean.
Butterfly box
A so-called butterfly box can make an important contribution to improving the living conditions of butterflies in our gardens. Above all, it offers the animals protection from wind and weather. Especially in winter, it reliably ensures that the winged insects, which are butterflies, do not freeze to death - no matter what stage of development the animal is currently in. Although quite a few species leave our latitudes during the winter and seek warmer areas, there are also various butterflies that overwinter here. However, the box doesn't just make sense during the winter months. Violent storms and heavy rainfall can be a major threat to butterflies all year round. Here too, the butterfly box offers the protection that the animals would otherwise no longer find.
Construction instructions
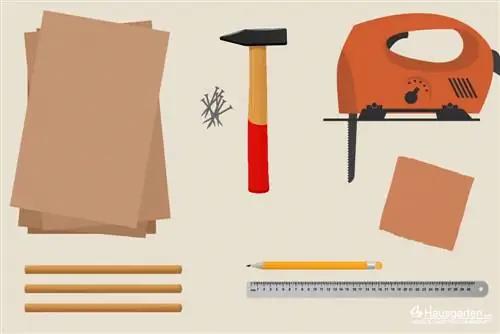
Building a butterfly box yourself is not a big challenge. The construction can be done relatively easily even by people who are relatively inexperienced. The amount of material and tools required is kept to a minimum. Normally the time required to build the box is well under two hours. The following materials and tools are required:
- untreated wooden boards
- small square or round pieces of wood
- stainless steel nails
- Jigsaw
- Hammer
- Sandpaper
- Ruler
- pencil
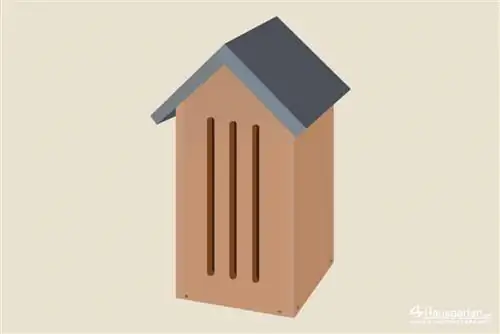
You can basically imagine a butterfly box as a small birdhouse. The structure is accordingly. It consists of four side walls, a bottom wall and a sloping roof. The big difference to the birdhouse, however, is that there is no entry hole on the front. Rather, vertical slots are cut in the wall, which can take up almost the entire length of the board. The butterflies then enter the box via these slits and can leave it again this way. Inside, two or three square or round pieces of wood are attached to which the animals can cling or lay eggs. How big the butterfly box is is largely up to each hobbyist.
Tip:
The size should be based on the width of the boards available. This saves additional work steps and may also reduce costs.
Crop
The first step is to cut the boards to size. If you buy them at a hardware store, it is usually possible to have them cut to size there. Otherwise, simply use a jigsaw with a saw blade suitable for wood. It must be taken into account that the roof should definitely be installed at an angle so that rainwater can drain away better. It doesn't matter whether you choose a gable roof or a simple pitched roof. The desired slope or the two slopes must first be marked on the two boards with a ruler and pencil. Only then is the cut made exactly along the line.
Tip:
You can achieve a better, more accurate result if you bevel both side boards at the same time. Simply place them carefully on top of each other.
Cutting slots
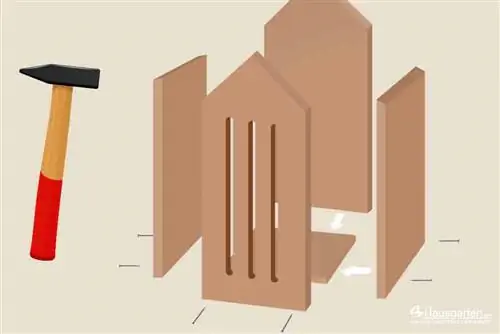
Butterflies appear to us as extremely delicate creatures. First of all, we have an eye on their often wafer-thin wings. It's easy to forget the body that the wings are attached to. In order for a butterfly to get into the butterfly box, it needs an opening through which its entire body can fit. The width of the entry slots on the front is therefore also very important. So that every species of butterfly can penetrate the inside of the box, it should be one centimeter wide. This is usually sufficient. They also have to run vertically and can cover almost the entire front. The number of slots depends on the size of the box - but there should be two to four. How to do it:
- The slots are first drawn on the board with a pencil and ruler
- A top and bottom margin of three to four centimeters should be maintained
- then they are cut out along the lines with the jigsaw
- The edges of the slots must then be sanded smooth with sandpaper
Join
The third step is to put the individual parts together. To do this, the boards are first nailed to the base plate. You should definitely use stainless steel nails for nailing. Under no circumstances should the boards be glued with wood glue, as the fumes that the glue develops can harm the butterflies. Depending on the size of the box, two or three nails per side are usually sufficient for attaching it to the floor. It's best to first nail the beveled side parts to the base plate and then nail the front and back to both the floor and the two side parts. Before attaching the roof, small square or round pieces of wood are simply clamped into the interior of the building at different heights.
Tip:
It is recommended if the roof protrudes slightly beyond the building on all sides in order to protect it from rain.
Design
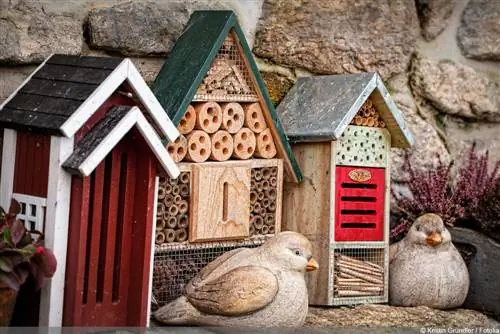
The shell of the butterfly box is now complete. Now it's time for the individual design. A non-toxic, environmentally friendly impregnation or paint that protects against wind and weather is recommended. The box can of course also be painted colorfully. However, only non-toxic paints or varnishes may be used. In principle, there are no limits to your imagination. You can let your own creativity run wild. However, it is always important not to use materials that could be dangerous to the butterflies. When it comes to varnishes and paints, it's best to get advice from specialist retailers so that you don't make any mistakes when making your choice.
Placement
The big question now is, of course, where the butterfly box will be set up or hung up. Basically, any place in the garden that is somewhat sheltered from the wind is suitable for this. The box becomes even more tempting for butterflies if it is placed near flowers or even flowering plants. The proximity of open water, for example a garden pond, is also ideal.

