- Author admin [email protected].
- Public 2023-12-17 03:39.
- Last modified 2025-01-24 12:45.
Flowers from your garden or a bunch of cut flowers from the supermarket can be refined into a magnificent bouquet of flowers with a little skill and these instructions. Dive into the basics of floristry here. Step by step, you'll learn how to transform flowers and greenery into a picturesque spiral bouquet or a modern standing bouquet. A practical example would serve as an incentive and banish initial uncertainties.
Tips for choosing flowers
There are no limits to the choice of flowers for your hand-tied bouquet. Whether picked yourself from a wildflower meadow, from your own garden or bought cheaply in the supermarket - as long as the flowers have not yet opened, each flower serves as an ideal component in the creative flower bouquet. For a container with an impressive presence, we recommend a minimum number of 15 flowers plus greenery.
Cut green is mandatory
Please do not underestimate the importance of the right cut greens in creative floristry. Only the binding green gives your bouquet loose fullness and a representative appearance. Of course, the name does not imply that the addition is limited to the color green. White and pastel tones can also be considered, as can subtle nuances. Dark red, brown and silver are trendy, matching the color of the flowers without outshining them. Popular species may already be thriving in your garden or can be purchased inexpensively online. The following binding green plants are very popular with beginners and professionals:
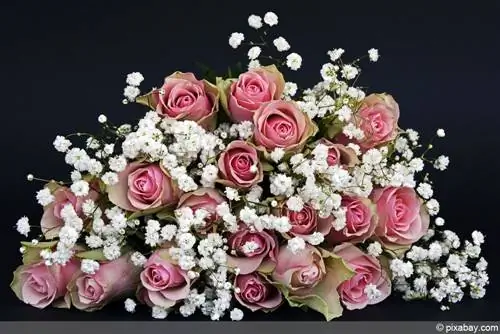
- White or pink gypsophila (Gypsophila paniculata) with delicate starry flowers
- Large-leaved lady's mantle (Alchemilla mollis) with fresh-green decorative leaves
- Seaberry (Lysimachia cilliata), the variety 'Firecracker' with dark red foliage
- Waterbird (Ageratina rugosum), the variety 'Chocolate' with brown pinnate leaves on reddish-brown stems
- Silver rue (Artemisia ludoviciana), the variety 'Valerie Finnis' with silvery shimmering leaves
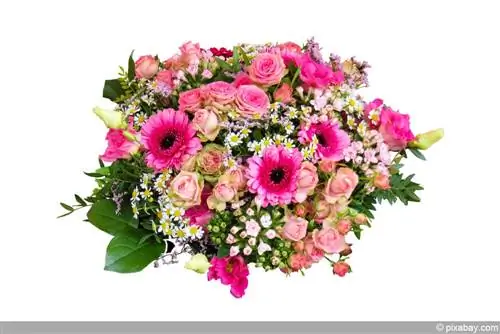
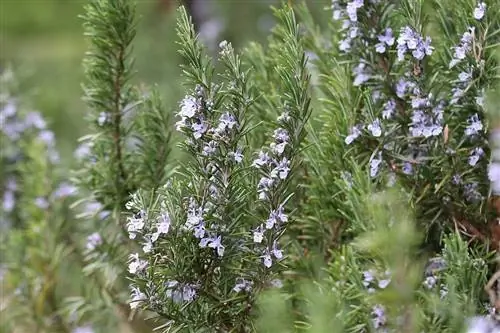
Euphorbias of all kinds serve as an enchanting addition to the imaginative bouquet. Golden spurge (Euphorbia polychroma) impresses with golden-yellow leaves that turn reddish-brown in autumn and reddish fruit heads. Give your bouquet a special scent with non-flowering herbs as a binding green, such as sage (Salvia officinalis). It adds delicate elegance to a bouquet with ornamental grasses, such as diamond grass (Calamagrostis brachytricha). The green fronds of the small shield fern (Polystichum setiferum) as well as the evergreen leaves of the false berry (Gaultheria shallon) and carpet berry (Gaultheria procumbens) have crystallized into the decorative, external frame.
Preparatory work
Please place the selected flowers and green plants on a table so that they are within easy reach. Additional accessories you will need are rose or garden scissors, floral wire or raffia ribbon and a small knife. How to prepare the binding work professionally:
- Remove excess leaves on the lower half of the stems
- Strip thorns from the stems using a towel
- Sharpen and disinfect blades of scissors and knives
There should be no plant residues on the stems of flowers and greenery where the bouquet will later stand in water. If all components in the bouquet are carefully cleaned, no rot can form in the water later, causing your floral masterpiece to wither prematurely. This premise also applies to small side buds that do not contribute to the overall appearance of the finished bouquet. Even if the gardener's heart bleeds, cut off the side buds and flowers rigorously, because that's what the professionals do.
Basic instructions for a spiral bouquet
If you want to learn the art of flower arranging with representative results right from the start, we recommend the tried and tested spiral shape. With a little practice, you will master the following tying technique in no time and get a round and at the same time voluminous arrangement of all floral components. How to do it right:
- Choose the main flower and take it in your working hand (for right-handed people this is the left hand)
- Place your thumb over the flower stem
- Lay a cut green in an X shape at the selected binding point
- Open the thumb and close it again around both stems
- Insert flowers and greenery alternately
- Arrange a wreath of large-leaved greenery as an outer frame
- Wrap the finished bouquet with floral wire or raffia ribbon and decorate with a bow
- In the last step, cut all stems to the same length

The successive clockwise rotation during tying creates a spiral-like formation of the flowers. The result is a round flower head and a slim waist with a prima donna in the center. The X-shaped staggering ensures that each of the floral beauties in the bouquet is appropriately showcased and cannot be covered up. By placing each flower over your thumb, opening it and closing it again, the slanted yet harmonious alignment is ensured. This trick also prevents a stem from slipping out of the formation and being accidentally cut too short.
Tip:
In a partially shaded location without the risk of drafts, you can enjoy your self-made bouquet of flowers for a long time. If you change the water every 2 to 3 days, flowers and greenery will stay fresh for an extra long time.
Extra tip for beginners
Don't you have the hang of the perfect spiral bouquet yet? That's no reason to throw in the towel straight away. With beanstalks from your own garden, you can create a stable framework for your bouquet in no time, without any complicated twists and turns. This is how it works:
- Make a wreath from runner bean tendrils
- Wrap with floral wire in 3 places
- Twist the 3 wire ends together in the center to create a framework with a handle
- Grip the twisted wire with one hand
- Use the other hand to insert the flowers and greenery into the wreath and hold it in place
Turn the wreath in stages to identify gaps and fill them with flowers or greenery. The holding hand picks up each stem individually, comparable to the 'place the flower over the thumb' method for a spiral bouquet. Last but not least, wrap the stems with floral wire or raffia and cut the ends to the same length. In this case, the wreath function is performed by the winding beanstalks, which gives the bouquet a natural flair.
Basic instructions for a stand bouquet
The trendy standing bouquet is trendy in modern floristry. As you can see from the following basic instructions, the binding technique scores with its uncomplicated working method and produces results that are worth seeing. Flowers with sturdy stems, such as tulips, daffodils, roses or knight's stars, are ideal. Instead of cut greens, narrow branches up to the thickness of a thumb with beautiful bark are added to the bouquet to give it the necessary stability.
How to do it:
- Cut flowers and branches to the same length
- Put long raffia ribbon on the table
- Alternately place flowers and branches in the middle of the raffia ribbon
There are no limits to your imagination when it comes to the composition of flowers and branches. Whether you combine the herbaceous and woody stems in small bunches or individually to form a bouquet is your individual decision. Once all the components have been processed, hold the bouquet with both hands, gently push it onto the table several times and tie everything together with the raffia ribbon. A pretty bow adds the finishing touch to your bouquet. Place your finished container in a modern glass bowl that is filled a few centimeters high with room temperature water and a nutrient solution.
Practical example of a colorful bouquet of flowers

This basic guide has familiarized you with the fundamental techniques for creating a bouquet of flowers yourself. So that you can put what you have learned into practice without hesitation, we have put together a concrete example below, including a list of materials. Let's go!
Flower and material list
Make a bouquet of flowers in pink and purple tones from the following flowers and greenery for a vase 20 cm high and 12 cm in diameter:
- 3 pink roses
- 1 purple alstroemeria (Alstromeria)
- 1 purple chrysanthemum
- 2 dark pink or pink gerbera
- 3 red-leaved purple bells (Heuchera) 'Obsidian' or loosestrife 'Firecracker' (Lysimachia ciliata)
- as binding green: 3 to 4 stems of evergreen false berry, salal (Gaultheria shallon) and 12 stems of pistachio green (Pistacia lentiscus) or lady's mantle (Alchemilla mollis)
- Binding wire, approx. 40 cm long
- 2 flower wires, approx. 30 cm long
- Garden scissors
- sharp knife
Step-by-step instructions for tying
Stabilize the two gerberas with floral wire. To do this, insert the wire a small piece into the flower from below, without it being visible from above. Then wrap the wire around the stem to the bottom end. This measure does not affect the durability of the flowers. Now place flowers, greenery and accessories on a table so that they are within easy reach. Proceed as follows:
- Take the first flower into your working hand
- Add a stalk of pistachio green or lady's mantle
- Continue alternating, following the basic instructions for the spiral bouquet
As an outer frame, place the stems of the mock berries in a wreath around the flowers. Wrap the bouquet with floral wire below the false berry leaves without damaging the flower stems. Two hand widths below the binding wire, cut all the stems to a uniform length. An elegant bouquet of flowers in enchanting pink and purple tones, accompanied by a wreath of fresh green leaves is ready.

