- Author admin [email protected].
- Public 2023-12-17 03:39.
- Last modified 2025-06-01 06:48.
Potatoes are rarely found in the supermarket or at weekly markets in a wide variety of shapes, colors and tastes. Old potato varieties in particular offer an unexpected amount of variety and, above all, interesting taste experiences. Buttery, creamy, nutty - in blue-violet or even with a stripe in the flesh, they are highlights on the plate. And with the right knowledge, it's surprisingly easy to grow yourself.
Old varieties
For reasons of economy, the commercial selection was limited to a few types of potatoes. Here you will mainly find the variants that are particularly high-yielding and easy to grow. This is understandable but also boring in the long run. If you want to add a little more variety to the bed and to your plate, you should take a look at the old potato varieties. Still available today and not only interesting in terms of color are:
- Edzell Blue with blue skin and white flesh, slightly floury and ideal for mashed potatoes
- Shetland Black yellow flesh and a purple ring inside, creamy-buttery taste
- Roseval slightly red grained and particularly fine in taste, ideal for baked potatoes
- Bamberger croissants are elongated and have a particularly spicy aroma, making them ideal for potato salad
- Sharon Blue are waxy and blue-purple both outside and inside
- Hermanns Blaue is strong in color and taste
- Ackersegen is buttery, creamy and spicy at the same time
- Highland Burgundy Red is old but a real exotic, because it is red inside and out and is also extremely versatile
Location
The potatoes thrive underground, but the green parts of the plant still need plenty of light. A sunny location is therefore ideal. If there is a lack of sunlight, there is a lack of photosynthesis, which means that starch production is low and the storage organs - i.e. the potatoes - remain rather small. Blazing midday sun on the south side is not necessary, but it should not be darker than light shade either.
Substrate
Potatoes can thrive on both poor and nutrient-rich soils - but better yields can be achieved with nutrient-rich substrate. Manure and mature compost are recommended for enrichment. In addition, the optimal substrate for growing potatoes should meet the following points:
- Easy to moderately difficult
- Profound
- Not prone to compaction
- Moist but not wet and not susceptible to waterlogging
- Best enriched with natural fertilizer
Preparation
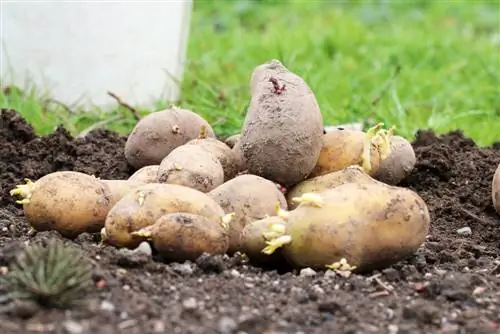
When preparing to grow your own potatoes - whether they are an old or a new variety, two steps are crucial. On the one hand, the preparation of the bed and on the other hand, the use of properly grown potatoes. Deep digging and enrichment with manure and compost are important for the bed and the substrate. This preparation is best done in the fall before cultivation begins.
In this way the nutrients can settle and be processed and distributed by soil inhabitants. It is possible to grow potatoes without these measures, but the yield will be lower and the susceptibility to diseases, pests and care errors increases.
It is important for the potatoes that they have already germinated. Although it is possible to grow seed potatoes without pre-germinating, existing green shoots shorten the time until harvest and also make the potatoes less susceptible to diseases, such as so-called late blight.
Advance
So that the seed potatoes can pre-germinate, the following factors are crucial:
- Four to six should be planned for bringing forward.
- The seed potatoes require temperatures between 10 and 15°C and a bright room.
- Make sure there is low humidity in the area and between the potatoes. This is not absolutely necessary, but high humidity increases the risk of mold formation.
- Checks should be carried out at least weekly in order to detect mold and rot at an early stage and to be able to sort out infected potatoes.
Planting
The cultivation of potatoes can begin between April and May, depending on the region. A soil temperature of 9°C is important. If this is the case, the steps in the following instructions are required:
- The soil is loosened again and ridges about 60 centimeters wide are piled up. The ground warms up more easily in these. Harvesting is also simplified.
- Grooves eight to ten centimeters deep are made in the dams. Alternatively, planting holes of this depth can be pressed in.
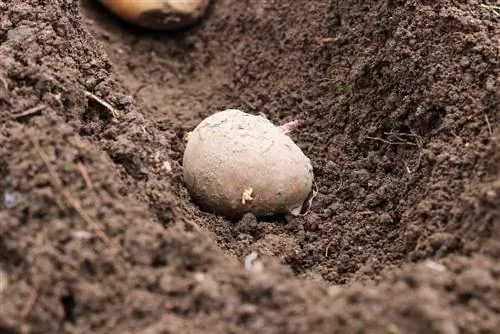
- The seed potatoes are now placed in the soil at a distance of around 30 centimeters and covered with the substrate.
- The ridges are lightly tapped all around with your hands to prevent soil from being removed when it rains or waters.
- The substrate is moistened.
Pouring
Potatoes like moist substrate, but not waterlogging. Watering is therefore only done when necessary, when the soil is dry or there has been no rainfall for a long time. Care should be taken, especially at the beginning, not to wash the soil away from the dams when watering.
Fertilize
If the soil for growing potatoes has been prepared with horse manure and compost, the subsequent effort required for fertilizing is very low. About four weeks after laying the potatoes, a little more compost or manure or even horn shavings can be lightly worked into the surface of the substrate.
Tip:
In order to be able to fertilize specifically, it can be useful to carry out a soil analysis.
piling up
As soon as the above-ground, green shoots of the seed potatoes reach a height of around 25 centimeters, it is time to pile them up. More soil is raked onto the ridges and pushed until only about ten centimeters of the shoots stick out of the substrate.
This care measure is important so that the potato tubers are not exposed to sunlight. This irradiation causes them to turn green and slightly poisonous. As a rule, it does not need to be done more than once or twice until the harvest is ready.
Growing without a garden
It is entirely possible to grow potatoes without a bed. Large sacks or plastic bags are well suited for this. The seed potatoes are placed in the bags with little substrate and the edges are rolled down so that the green shoots receive sufficient sun and warmth. The higher the shoots grow, the more substrate is added.
It is advisable to mix the soil already mixed with mature compost or a small amount of manure to carry out the hilling and fertilizing in one step. When watering, great care must be taken to avoid waterlogging.
Harvest
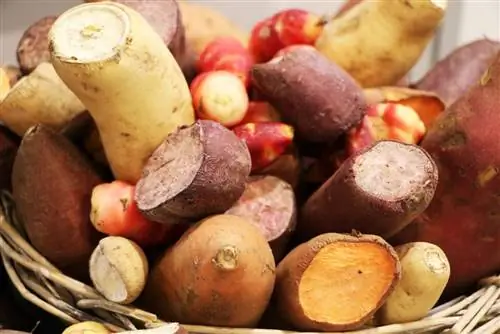
The potatoes are ready to harvest when the plants bear flowers. These are an indication that small tubers have already formed that can be harvested and eaten as baby potatoes. As a rule, the potatoes are only harvested when the green shoots wilt and dry out. The tubers are carefully dug out, for example with a planting fork.
Storage
Moderately dry, cool, airy and dark - this is the ideal way to store potatoes. To prevent rot or mold from forming, the potatoes should be harvested when the weather is as dry as possible and allowed to dry in the air and in the sun for a few hours before storage. Damaged or discolored tubers are sorted out.
Diseases, pests and typical care mistakes
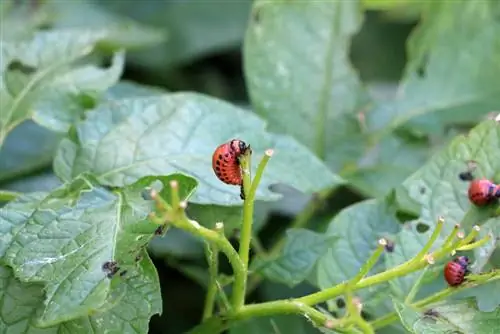
Blight and Colorado potato beetles are typical problems when growing potatoes. As already mentioned, the risk of late blight can be reduced by preferring seed potatoes. If it does break out, leaves with brown spots and white deposits should be removed and destroyed and the plants should be treated with an appropriate fungicide.
An unpleasant but necessary measure is helpful against the Colorado potato beetle: collecting by hand.
The typical care errors are:
- Inadequate preparation and loosening of the soil
- Lack of nutrients in the substrate
- Persistent dryness or waterlogging
- Omitting piling
- Lack of controls for disease and pest infestation
Conclusion
Growing your own seed potatoes becomes varied and versatile by choosing old potato varieties - both in taste and color. If you pay attention to the few important points of care and cultivation, you can enrich the diversity in the garden and on the menu.

