- Author admin [email protected].
- Public 2023-12-17 03:39.
- Last modified 2025-01-24 12:45.
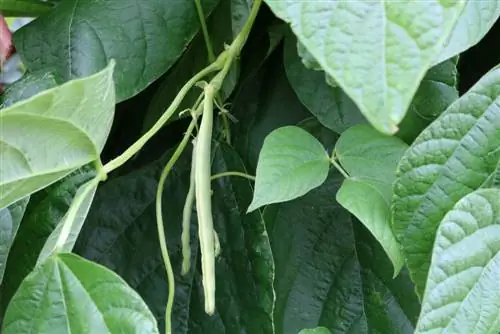
Growing bush beans is relatively easy; they thrive in almost every vegetable garden. The bush beans are classified as legumes and, in contrast to the climbing runner beans, have a low growth of around 50 cm. The variety of varieties is large, ranging from fine fillet beans to yellow wax beans.
The Quirk
A popular vegetable in the garden are bush beans, which can not only be harvested after just eight weeks of cultivation, but are also easy to grow. As a vegetable variety, it is an annual and very sensitive to frost. Under no circumstances should the vegetable be eaten raw because it contains phasin, a toxic nitrogen compound. However, the toxic substance is completely killed when cooked. Since the bush beans are low-growing, they do not require any climbing support. They only grow to a height of around 50 cm. Since the bush beans are small, they can also be grown well in balcony boxes or other containers, and the cold frame is also suitable for this. Bush beans use the pods, which can be cooked as a vegetable. With other types of beans, the kernels are used more, with the pods left hanging until the kernels have ripened. There are flat- and round-podded beans that can be grown and harvested several times a year.
Cultivation of bush beans
The vegetable plant needs a wind-protected but sunny location to develop well. If the plant is next to chives, garlic, peas or leeks, this can affect its ability to grow. Sowing should only be carried out from mid-May, after the Ice Saints, as the beans are sensitive to frost. If you have enough space, you can grow the seeds in a small greenhouse or in a cultivation container from March onwards. This ensures that the plant has already developed a certain level of resistance before it reaches its actual location. Since bush beans have deep roots, the garden soil must be well prepared and the soil must be dug deep accordingly. If you use good compost when digging, this is usually sufficient fertilizer.
Blue seed can only be incorporated if the garden soil is particularly poor in nutrients. To find the ideal soil for the beans, the gardener can take a soil test. This can be achieved using a test that can be purchased from gardening stores. If the test does not show a pH value of 7 (which should be for good growth of the beans), the hobby gardener can sprinkle lime powder into the soil and then water well.
The Planting
You can plant the beans as a clump. Five to six seeds are planted in a circle about 2 cm deep in the soil. The next eyrie should be about 40 cm away.
When planting in rows, seeds are inserted every 6 to 8 cm.
If you want an early harvest of bush beans, grow the seeds in a seed pot for about four weeks. The pot should have some kind of drainage covered with gravel. If small air holes are made in the covering film, mold will not form. If the ground is frost-free, the bush beans can be planted in the prepared garden bed.
Care
If the vegetable plant is approx. 15 cm high, you can strengthen its stand by making small piles of soil around the plant.
Important care instructions:
- water the plants abundantly and regularly,
- free the bush beans from weeds, mulching keeps weeds away
If you prepare the ground with a layer of mulch, you not only keep annoying weeds away but the ground stays moist. Grass clippings can be used as mulching material. It is particularly important that the bush beans are harvested every other day, otherwise they become woody and no longer taste good.
If you want to plant late varieties, they should not be planted in the same place where the previous beans were. Planting should take place at the beginning of July at the latest, as if planted later the beans may fall victim to early frosts.
- The beans do not need fertilization
- from June the beans can be harvested every other day
- the roots should be left in the ground as fertilizer
If you plant late beans, you should choose a different location than the earlier varieties. Planting should take place at the beginning of July so that the beans are not at the mercy of any early frosts.
Bush beans are popular plants in mixed crops because they leave soil that is low in weeds and rich in nitrogen. Lettuce, kohlrabi and tomatoes are recommended as secondary crops.
Pests and diseases
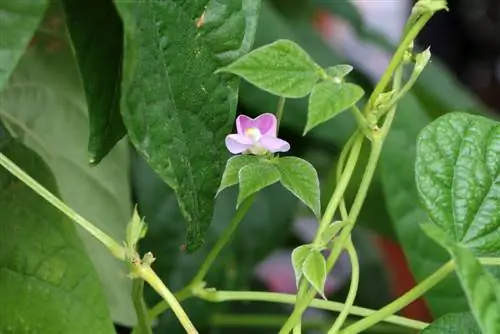
Usually the bush beans are insensitive to pests and diseases. At most, the bean fly can damage the beans because it lays its eggs next to the seeds. There are measures to prevent the bean fly from nesting in the first place.
- Avoid last year's bed or at least keep your distance
- fresh manure should be avoided
- Only sow seeds in warm weather
- A protective net can prevent filing up to the first sheets
- or prefer the seeds indoors
The bean aphid is particularly active in warm weather. Infected plant parts should be removed in good time and spray the beans with one liter of water, 15 ml of soft soap and 1 tablespoon of spirit, repeating this process every few days. Bean rust is manifested by rust spots on the leaves. Since chemical agents are not approved for the private market, removing the affected parts is the best remedy. To avoid rust fungus, the beans should only be watered from below. But there are bean varieties that are resistant to bean rust.
Summary of cultivation of bush beans
Propagation
You don't need to buy new seeds every year. The pods that you want to use for seed extraction are left hanging until they are ripe and dry to the touch. Then they are hung upside down in a dry place protected from rain. If the pods are completely dry, you can remove the seeds and store them in a warm place until next spring.
Varieties
With some other types of beans you tend to use the seeds. In this case, the pods are left hanging on the plants until the kernels are ripe. Depending on how the fruits are shaped, flat-podded and round-podded bean varieties can be distinguished. As they ripen, flat-podded beans develop coarse threads on the pod seams; the round-podded varieties are usually threadless. In addition to the green beans, there are also different colored varieties on offer, such as yellow wax beans, which are considered particularly tasty, or varieties with blue-violet pods that turn green when dried.
Location
To avoid infection by diseases, you should choose a location where no beans grew last year. You should also avoid proximity to peas, chives, fennel, leeks and onions. Because these vegetables inhibit the growth of bean plants. A place protected from the wind is advantageous, as beans are very sensitive to strong winds. The bean grows best in light, well-drained soil and a sunny location. In the autumn before sowing, the soil should be dug deeply and fertilized with around 10 liters of garden compost per 1 square meter.
Cultivation
Since beans only tolerate cold to a limited extent and cannot tolerate frost at all, they are not sown until around mid-May, when there is no longer any risk of frost. With so-called clump seeding, up to six bean seeds are placed in 2-3cm deep troughs at intervals of approximately 40cm. Sow in rows with a distance of 3cm between seeds.
Care
In early summer, mulch the bean bushes thoroughly. Sufficient watering should be done, especially during the flowering period. The roots of harvested plants can remain in the soil because beans fix nitrogen with the help of bacteria, leaving behind well-fertilized soil.
Harvest
The first beans are ripe about 8 weeks after sowing. If you harvest continuously, new pods will grow again and again, for some varieties from June until autumn. Check the plant for new pods every 2-3 days. You snap them off with your finger or cut them with secateurs. If the beans stay on the bush longer, they become strawy and the pods no longer ripen.
Extraction of bean seeds
To harvest bean seeds, leave the pods on the plants until they are ripe and turn white in the fall. In dry weather, remove the plants from the ground and hang them in a place protected from rain. As soon as the pods are brittle, remove the kernels and dry them on the paper.
Pests
The voracious larvae of the pea moth attack ripening kernels. An open, airy location can help. Yellow, oily spots indicate greasy spot disease. It is therefore important to pay attention to he althy seeds and to destroy affected plant parts. The same procedure applies to focal spot disease, which can be recognized by black-brown spots on leaves and pods.
Conclusion
Bush beans are easy to care for and enrich the table with he althy food. If the soil is well prepared and the location is selected to suit the beans, the bush beans will grow quickly and easily. Planting the beans several times always guarantees a rich harvest with little effort.

