- Author admin caroline@plants-knowledge.com.
- Public 2023-12-17 03:39.
- Last modified 2025-01-24 12:45.
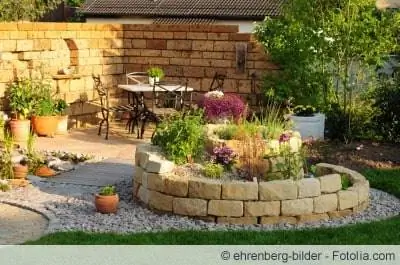
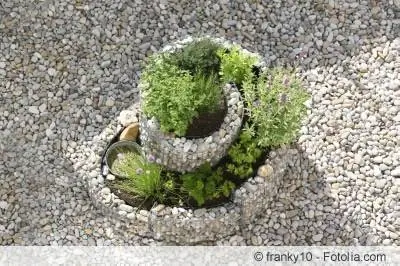
For hobby gardeners who like to use their own herbs when cooking and have a little space in the garden, a herb snail, also known as a herb spiral or spice snail, is just the thing. Because it offers optimal conditions for growing many different herbs and at the same time is a real eye-catcher in the garden. A herbal spiral can be built from a wide variety of materials. Whether made of bricks, natural stone or impregnated wood - you can choose the material according to your own taste.
Short profile
- other names: herb spiral, spice snail
- three-dimensional bed for different herbs
- simulates different climate zones
- offers different location conditions
- requires full sun spot
- Combination of annual, biennial and perennial herbs
Zones of the herb snail
A herb snail can be divided into four different zones, with the transitions between the individual areas flowing smoothly. This creates a variety of location conditions for the individual plants. If you have a pond in your garden, it is best to place your herb spiral north of the pond bank. The water ensures a good microclimate (high humidity).
1. Dry zone (Mediterranean zone, Mediterranean zone)
The plants get the most hours of sunshine at the top of the herb snail. In addition, the water can drain easily in the raised area. Sun-hungry Mediterranean herbs feel at home here.
- full sunny
- Soil well drained (contains sand)
- rather lean (low nutrients)
- pH value: neutral to slightly calcareous
2. Normal Zone
This zone is slightly humus-rich and provides shade for the herbs for a few hours a day. The plants that grow here have a slightly higher nutrient requirement, so it is a good idea to enrich the soil slightly with compost.
- Partly shaded to sunny
- slightly humus-rich soil
- well permeable to water
- ideal for local herbs
3. Humid fresh zone
The further down the zones in the herb snail move, the moister and more humus the soil becomes. Here too, the plants are offered a partially shaded location.
- sunny to partially shaded
- Soil permeable to water
- better water storage capacity than upper zones
- nutrient-rich (humic)
4. Water zone (wet zone)
Ideally, the herb spiral ends in a partially shaded area in the west or east (tip in the south). Here all plants find ideal location conditions that prefer moist, nutrient-rich soil.
- partly shaded
- good water storage capacity in the soil
- humos
Possible materials
A herb snail is best planted in an open area in the garden that is protected from the wind. It has proven to be very practical if the herb spiral is as close to the kitchen as possible so that the distance is not too far (especially in bad weather). A herb snail can be built from a wide variety of materials.
- Stone
- Wood
- Plastic
- Metal
- Gabions
Herbal spiral made of stones
A weather-resistant and stable version is made of stones. These store heat well and protect the sensitive roots from damage on cold days. You can easily build a herb snail out of stones yourself. Materials needed:
- sufficient stones for the dry stone wall
- Gravel or gravel (for drainage)
- Garden soil, compost, sand
- Spade and Shovel
- String and two sticks
Construction instructions
Once you have found the right, full-sunny spot and obtained all the materials, you can start building the herbal spiral. The majority of herbs require a lot of light and heat. The system should not be too small so that the plants have enough space to develop. Depending on the size of the garden, you should plan at least two to three square meters for a herb snail. The height then depends on the base area of the herb snail. The larger the base area, the higher the herb spiral can be built.
Step 1: Preparing the soil
Very few people can draw circles freehand. It is therefore advisable to use a compass for the outline of the herb snail.
- String (length: slightly more than the diameter of the herb snail)
- two sticks
- Tie string to the sticks
- Put a stick in the middle of the later herb spiral
- Tighten the cord
- draw a circle around the first stake with the other stick
- Mark center point
- Dig up soil about a spade deep
The shape of the herb snail is, as the name suggests, based on the shape of a snail shell or spiral. The herb snail should later open towards the south and have at least two turns.
2. Step: Create drainage
So that the water can be easily drained from the herb snail later, it is advisable to create a drainage system right away when setting it up. This consists of a layer of gravel or chippings about ten centimeters high.
Tip:
It is best to smooth the surface a little after filling with a rake or the back of a broom so that the stones lie on a flat surface.
3. Step: Build a wall
Now the first row of stones is placed. For reasons of stability, this should start slightly below the normal height of the ground. The lower row of stones consists of a spiral that opens to the south and has two turns. It is recommended to build a dry stone wall (without mortar). Such a wall looks much more natural and offers additional drainage options. Stones that have relatively straight side surfaces are suitable for a dry stone wall. Very round shapes or small stones do not provide enough support. First, part of the wall is built.
- Align elongated stones towards the middle of the snail (ensures more stability)
- Pull stones up like stairs
- There should be enough space for the plants between the individual turns
- leave out a stone for each row starting from the wet zone
- the wall remains flat on the outside
- it rises further towards the middle
- in the middle is the highest point
- make sure that the wall does not tilt outwards
- Tilt the wall a little inwards
Step 4: Fill and continue building
If the inner part of the drywall is around 50 centimeters high (knee-high), the herb snail should first be partially filled.
- fill the inside with coarse gravel about 50 centimeters high
- flatten the gravel layer towards the outside
- Do not fill with gravel in the last half turn (wet zone)
- Continue building the wall step by step with stones and earth
- use mixtures of sand, soil and compost for the different zones
- add at least 50% sand in the middle
- the sand content decreases towards the bottom
- The proportion of compost and soil increases steadily towards the bottom
Tip:
Only use soil and compost in wet areas.
Before planting
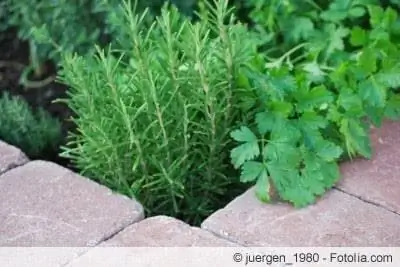
Before planting the herbs, you should wait a little until the soil has settled. It's best to let a few rainy days pass. Alternatively, the herb snail can also be carefully sprayed with a garden hose or moistened with a lawn sprinkler. If necessary, soil needs to be refilled now.
Planting herb snails
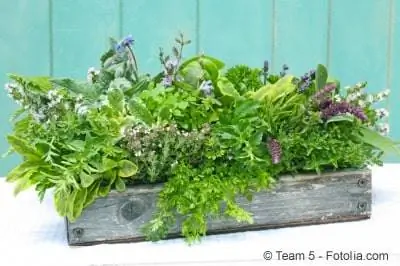
The ideal time to plant a herb spiral is spring. Mediterranean herbs in particular are somewhat sensitive to frost if they are planted outdoors very late in the year. The herbs can be bought ready-made in pots or you can grow them yourself from seeds.
1. Mediterranean Zone
In the middle (upper) area of the herb snail, Mediterranean herbs with high light requirements that prefer to be a little drier feel comfortable:
- Thyme
- Sage
- Rosemary
- Provence lavender
- Marjoram
- Hyssop
- Curry herb
- Savory
2. Normal Zone
All herbs that thrive in normal garden soil can be planted here.
- Lemon balm
- Coriander
- Chives
- Tarragon
- Mugwort
- Borage
- Chervil
- spiced fennel
- Arugula
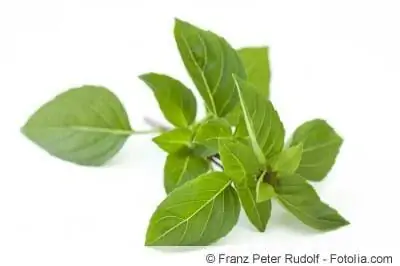
3. Humid fresh zone
- Basil
- parsley
- Chives
- Wild garlic
- Dill
- lovage
4. Water zone
All herbs that prefer a little more moisture and shade have found an ideal location in this zone. These include:
- Peppermint
- Watercress
- Wild garlic
Tip:
Plant large or overgrown herbs (such as mint or lemon balm) a little further back and in a larger pot so that they do not take up space and light from the other herbs.
These herbs don't go together
While some herbs complement each other quite well, such as chives and garlic herb, other combinations look bad. Don't match:
- Parsley and chives or borage
- Basil, marjoram and dill
- Dill and sage
- Caraway and fennel
- Chervil and coriander
Conclusion
A herbal spiral can easily be built yourself from a wide variety of materials or bought ready-made from a hardware store. When planting a herb snail, it is always important to have a location in full sun and good drainage. From top to bottom, the soil contains less and less sand and more compost and soil. A wide variety of herbs can be planted or sown in a herb snail. However, you must always pay attention to the location requirements and compatibility with the neighbors.

