- Author admin caroline@plants-knowledge.com.
- Public 2023-12-17 03:39.
- Last modified 2025-01-24 12:45.
Homemade and labeled signs not only ensure order in your herb garden, but also in the cooking pot. You can name all herbs exactly and are not limited to purchased plant labels with the common names. For example, if you have planted different types of mint, thyme or sage, you can easily identify them using your precisely labeled herb labels.
Plant signs made of cardboard and paper
If you only need your plant signs for one season or if you grow your herbs in the kitchen on your windowsill, then a fairly simple sign made of cardboard, cardboard or paper may be sufficient. However, they are not weatherproof. You can make these cardboard signs yourself in just a few minutes. Write the herb names with a felt-tip pen on colored cardboard or (colorful) paper and cut the signs into the desired shape. Alternatively, design the paper signs on your computer and then print them out on colored paper. Attach the finished signs to kebab skewers with adhesive strips and insert them into your herb pots. When watering your herbs, be careful not to get your paper signs wet.
Advantages:
- costs almost nothing
- low time investment
- environmentally friendly
Disadvantages:
not long lasting
Tip:
Your paper signs will last a little longer if you use wide, transparent packaging tape instead of narrow adhesive strips and stick it all around the entire sign.
Foil herb signs/laminated plant signs
Plant signs made of foil can be made very quickly and can last for several years. Either write on cut polypropylene film with a permanent marker or on standard paper with any pen. Of course, you can also design and print the paper using your PC. You then cut it to size and laminate it using a special laminator. You can laminate several paper signs in a film with a sufficiently large gap between them and then cut the film. Wooden sticks or shish kebab sticks are suitable for fastening.
Advantages:
- low cost
- hardly any time required
Disadvantages:
- You need a laminator and/or special foil
- Plastic is not very environmentally friendly
Wooden herb signs
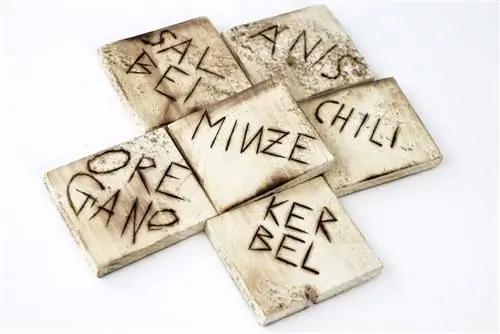
Wooden signs with burnt herb names are very decorative and last for several years. If you make these from leftover wood or used wooden spoons, the costs will be kept to a minimum. If these plant signs are left in the garden all year round, they will of course weather more quickly than if they are kept protected over the winter. However, you will need a burning pen or soldering iron to write on the wood. Typographical errors cannot be corrected and are difficult to conceal. It's best to practice writing quickly on scraps of wood first, then you'll know straight away what size your wooden signs should be for readable labeling.
Tip:
It is best to place your signage immediately when planting or sowing in the herb bed. Later the assignment is sometimes a bit difficult. This is especially true if you have different subspecies of an herb.
Colorful wooden signs
The best way to create colorful wooden signs is to use waterproof acrylic paint and a light-colored paint pen. For example, dismantle an old fruit crate. The flat boards are easy to paint and write on. Depending on your taste, saw or break the boards into sections of different lengths. You can get round wooden sticks to which you can attach the wooden signs in different thicknesses by the meter at any hardware store. If you prefer to use poster paint instead of acrylic paint, then paint the wooden signs with a commercially available clear varnish before labeling with the touch-up pen.
Signage “for eternity”
If you would like to make your own herb signs so that they can be used for many years, then there are various options. Although all variants are a little more expensive than paper, foil or wooden signs, they are very decorative and almost made to last forever.
Extra-durable plant signs:
- pottery signs
- painted stones
- Slate
- embossed metal foil
Painted stones
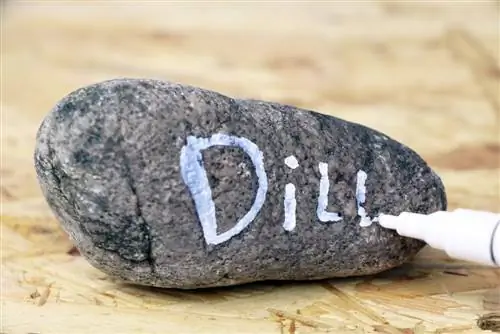
You can easily make your herb signage from collected stones. They should not be too small and should be as flat as possible so that they can be easily labeled. Depending on your taste, use a brush and acrylic paint or a touch-up pen. Whether you prime the stone in color beforehand, paint it artistically or leave it natural is up to your taste and skill. If you paint an unpainted stone, its grain will stand out just as clearly as on wet stones. Children also enjoy painting the stones. Here you can find detailed instructions on how to label stones in a weatherproof manner.
Advantages:
- very cost-effective
- low time investment
- numerous design options
Disadvantages:
- Stones must be collected and cleaned beforehand
- Stones do not always stay in place and can be easily moved
Pottered Plant Signs
If you like pottery and have a kiln, then you can easily make the signage for your herb garden out of clay yourself. However, air-drying modeling clay is not suitable because it is generally not weather-resistant. When making pottery you have different options for labeling. Either paint and label the fired clay sign or scratch the label into the unfired clay. With or without glazing, such clay signs are decorative and environmentally friendly. Children can also help with the design.
Advantages:
- no high material costs
- very individual design options
- weatherproof
- high-quality appearance
- very decorative and durable
Disadvantages:
- Kiln required
- relatively time-consuming due to drying, burning and cooling times
Slate
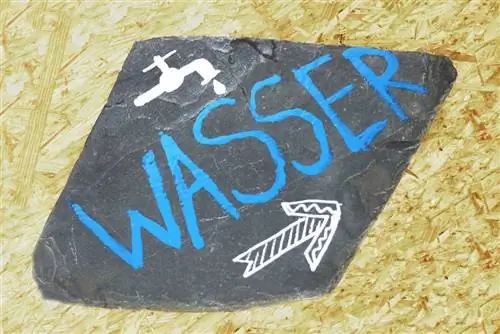
You can get plant signs made of slate pre-made from garden centers or craft stores. But you can also make these yourself. However, it requires some skill to break the slate into the desired shape. These slate signs are unique and individual. Slate panels and roof tiles are suitable as starting materials. You may also be able to get cheap slate quarry. If the pieces are big enough, you can also use them to make your plant signs. For your indoor herb garden, you can simply write on the plates with chalk. If your herb bed is in the garden, then it is better to use a light touch-up pen, otherwise the next rain will wash off your lettering.
Metal foil
Plant signs made of shiny gold or copper-colored metal foil look elegant, but are not that difficult to make. However, you need a special embossing pen for this. Use this to press the label into the foil. It shouldn't be too thin so that your signs don't bend with every touch. Whether you cut out the desired shapes before or after the labeling is up to you. You can get embossing pens and foils in different thicknesses from craft stores or online. Since the metal foil has quite sharp edges, it is not suitable for crafting with small children.
Advantages:
- look classy
- no special knowledge required
- low time requirement
- very individual design options
- weather-resistant without additional treatment
Disadvantages:
- average acquisition costs
- Material not available everywhere
- Foil has sharp edges, not suitable for smaller children!

