- Author admin caroline@plants-knowledge.com.
- Public 2023-12-17 03:39.
- Last modified 2025-01-24 12:45.
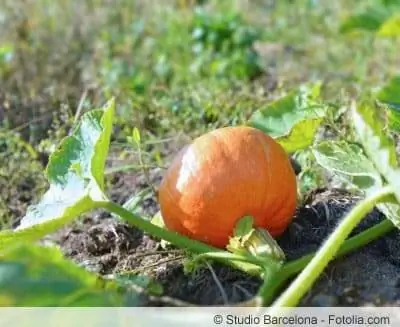
Impressive pumpkins are an integral part of any well-stocked kitchen garden. At least one magnificent specimen should thrive here in order to attract envious glances over the garden fence. Pumpkin also enriches the local menu or adds decorative accents. Experienced hobby gardeners therefore insist on growing pumpkin plants themselves. This can be done easily by sowing on the windowsill or directly in the bed. The following instructions explain step by step how to sow pumpkin seeds professionally and thus create an excellent basis for a rich harvest.
Preparing pumpkin seeds
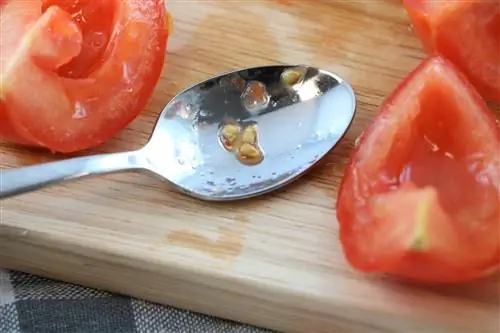
If seeds thrive in the pulp, they have a natural germination inhibition in this permanently moist environment. In order to put the robust pumpkin seeds in the best germination mood, adequate pre-treatment is necessary. Here's how to do it:
- Roughen the hard shell of the seeds with sandpaper or a file
- Fill a thermos with lukewarm water to soak the pumpkin seeds for 24 hours
Pumpkin seeds germinate even more quickly if they have been allowed to soak in 0.2 percent potassium nitrate for 12-24 hours. With this procedure, there is no need to sand the seed coat beforehand. Potassium nitrate can be purchased in any well-stocked pharmacy for little money.
Sowing behind glass
With a culture period of an average of 100 days, the time frame for growing pumpkin is tight in the Central European climate. Experienced hobby gardeners therefore decide to grow them by sowing them on the windowsill or in the greenhouse. First and foremost, you benefit from a ripening time that is shortened by a whopping 3 weeks, so that even after a cool summer, the time window for the autumn harvest doesn't close in your face. How to sow pumpkin seeds correctly:
- Small cultivation pots or a seed tray fill with seed soil, peat sand, coconut hum or perlite
- Place the pre-treated, still moist seeds individually 1-2 centimeters deep into the substrate
- Moisten the seeds moderately with water from the spray bottle
- Cover each pot with cling film and place in a partially shaded, warm window spot
- Ideally spend in a heated indoor greenhouse
At a constant 25 degrees Celsius, you can look forward to the first germination leaves after just 1 week. Any cover has done its job and can go. Given this short germination time, we recommend starting sowing in mid-April. If everything goes according to plan, the seedlings will be fully mature by mid-May so that they can be relocated to the open field precisely and with a vital growth advantage.
Prick out seedlings and harden them off
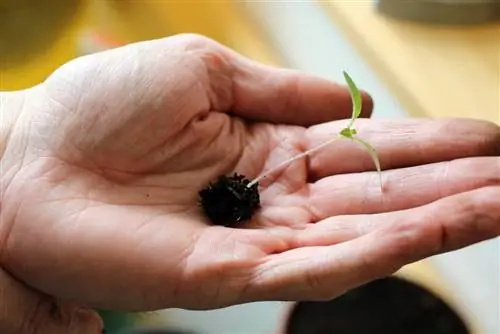
Under normal conditions, 3 to 4 weeks after sowing, pumpkin seedlings have not only developed their cotyledons, but are already growing 10-20 centimeters high with several pairs of real leaves. If this growth phase goes faster than expected, the Ice Saints have not yet passed. In this case, delayed ground frosts could cause significant damage to the young pumpkin plants. Since the growing pot or seed tray is now too narrow for the younglings, the strongest specimens are pricked out. This is how it works:
- 9 or 12 cm pots half fill with potting or herb soil
- Make a depression in the substrate with the pricking stick
- Lift each individual pumpkin plant out of the seed soil with a spoon or the pricking stick
- Insert in the middle of the minimally pre-fertilized substrate so that the soil reaches up to the cotyledons
Press the soil all around with the pricking rod and water a little. Temperatures of 25 degrees Celsius are now not necessary for further growth, so a bright place on the windowsill is a suitable location at 18 to 20 degrees. A week before being planted outdoors, early pumpkin plants spend the days in a partially shaded, wind-protected garden spot to harden off. At night, your pupils move into the sheltered ambience of the house. From mid-May, the young plants grown by hand are ready for the final move into the bed.
Direct sowing
In regions with a mild climate, you can sow pumpkin seeds directly into the bed. Seedlings that emerge from direct sowing usually have a more robust constitution. In addition, you avoid the work involved in sowing seeds behind glass. The choice of location, the preparation of the soil and the sowing itself are of crucial importance for the successful process.
Location
May 15th traditionally marks the start of the planting season with 'Cold Sophie'. This also applies to direct sowing of pumpkin seeds. At this date, look for a location with these requirements:
- Full sun, warm, sheltered location
- nutrient-rich soil, rich in humus
- Fresh and well-drained, without the risk of waterlogging
Under no circumstances should there have been any pumpkin plants or heavy feeders in cultivation at this location in the previous two years.
Soil preparation and sowing
At the chosen location, the soil is deeply loosened and thoroughly cleared of weeds. Sandy soil receives a generous portion of compost, while soil that is too clayey is loosened up with a shovel of sand. Place the pre-treated pumpkin seeds about 2 centimeters deep into the soil at a distance of 100 centimeters. If you use a climbing variety, the distance should be 200 centimeters. Then water the seeds with a fine spray. Ideally, you should protect the seeds from cold and moisture with a mulching film or garden fleece. Daily weeding is a top priority so that the germinating seeds are not immediately overgrown by weeds. In addition, the seedbed must not dry out at any time.
Tip:
As soon as pumpkin plants start to flower, a protective cover must be removed. Otherwise, pollinating insects will not reach the female flowers and the desired fertilization will not take place.
Planting early pumpkin
The departure of the Ice Saints signals the beginning of the planting season for early pumpkin plants. Plant the hardened young plants in the sun-drenched, nutrient-rich location in this sequence:
- Enrich the loosened, weed-free soil with compost and horn shavings
- Dig holes at a distance of 100 to 200 centimeters with twice the volume of the root ball
- Unpot the pumpkin and place it in the planting pit along with the soil
- Press the soil well and water generously
Growing pumpkin varieties provide you with a climbing aid at the same time. In windy locations, all pumpkin plants are provided with a support post so that the sensitive plants are not knocked over again.
Tips for care
The list of pumpkin care tasks is not particularly long. Of course, every single aspect is relevant so that the small seed develops into a majestic pumpkin. After sowing and planting, this care is important:
- Water pumpkin plants regularly, because growth stops in dry conditions
- Always give the irrigation water to the roots and not over leaves and flowers
- The heavy feeders fertilize organically every 14 days with compost, horse manure, guano or plant manure
- A layer of straw mulch keeps the fruit clean for longer
- If a pumpkin reaches the size of a football, a base made of wood or Styrofoam protects it from rot
If the first flower is eliminated, this measure promotes further growth. You will be rewarded with a particularly large pumpkin if you cut off all but 2 or 3 excess leaves in June. If you want to grow numerous small pumpkins, the plant does not need to be cut back. The only exception is an infestation with mildew. If a mealy-white coating covers the foliage, cut off all affected parts of the plant. Then spray the pumpkin plant with a mix of 1 liter of water, a tablespoon of liquid soap and a splash of alcohol.
Conclusion
So that heat-loving pumpkin plants can mature within the short Central European summer, most hobby gardeners favor cultivation by sowing behind glass. In this way, the cultivation period is shortened by up to 21 days, because the young plants start the outdoor season with a vital growth lead. If the garden is in a mild wine-growing region, direct sowing can be successful from mid-May. In a sunny, warm and nutrient-rich location, pumpkin plants find ideal conditions to mature in time before the first frost. Care is all about a balanced water and nutrient balance, because a pumpkin plant only produces the mighty berry when it is not thirsty or hungry.

