- Author admin caroline@plants-knowledge.com.
- Public 2023-12-17 03:39.
- Last modified 2025-06-01 06:48.
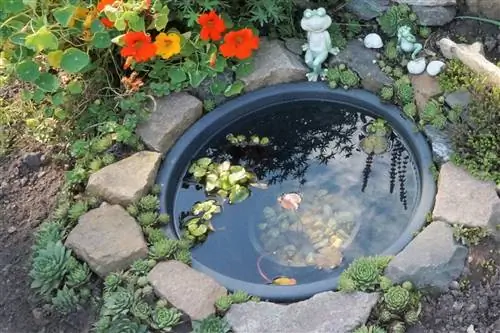
Many people dream of a pond, but most either don't have space or are afraid of the work. But there is the possibility of creating a mini pond, even in the smallest of spaces. However, it must be clarified beforehand whether the load-bearing capacity is sufficient, especially if the mini pond is to be placed on a balcony or terrace. Because such a small pond can easily weigh 100 kg. This is therefore an important component, because if the balcony cannot withstand this weight, the landlord would not be happy if a construction site were to arise here.
Very many containers are suitable for a mini pond
You don't always have to buy a new container; you can use an old bucket, beer barrel or zinc tub. However, these small ponds are not suitable for keeping fish in, but there should be plants in the pond. The location where the mini pond should be is also important. Partial shade is best, otherwise algae can quickly gain the upper hand. Therefore, all of this should be taken into account first before the pond is created. Because once the water has been filled in, it becomes difficult to move it again. As already mentioned, such a mini pond can weigh up to 100 kg. It is also important whether the container is tight so that the water does not leak out through overlooked holes. If this is not the case, the pond can still be built in the vessel using a pond liner.
Important items needed
If the right container has been found, then you have to go shopping. The shopping list then includes:
- possibly pond liner
- Gravel, sand and clay
- Pond soil
- Plant baskets
- Aquatic plants
These things can be bought in many hardware stores, otherwise they can also be purchased online or at a specialist store. Then you can get started so that success becomes visible soon. There is no need for a water pump in such a mini pond because it is a small ecosystem of its own. However, the water level must be checked as it can evaporate quickly. Of course, this is not necessary after it rains, but otherwise check every day and if necessary fill up with water again.
A mini pond must be created in layers
Just like a normal pond, a mini pond also needs to be created. Therefore, the pond liner must be laid out first so that the container is really tight. Steps should be installed so that the plants feel comfortable afterwards. To do this, simply stack bricks on top of each other, but be careful not to damage the foil. Then add a layer of gravel to the stones and bottom of the pond. Now you can start planting so that the water always has enough oxygen and no algae can form. It is best to line the plant baskets with foil. Then add pond soil into the baskets and a little gravel on top. This prevents the baskets from floating back up and prevents the pond soil from being washed out.
Create three zones in the pond
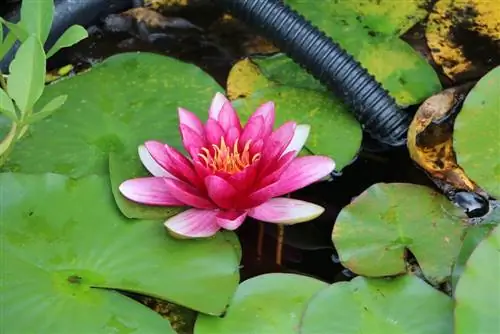
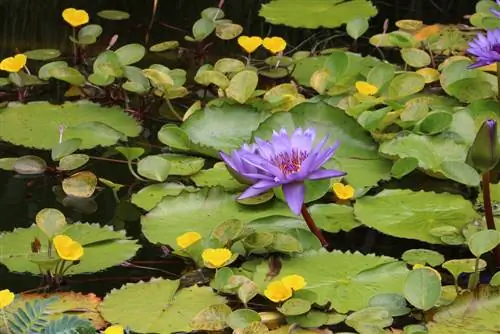
The lowest zone is best planted with waterweed, as it keeps the water in the mini pond in balance. Swamp or wet plants such as pine fronds or watercress should be planted in the middle zone. The top zone is more of a sight for the eye and that's where the mini pond rose is best suited. These float on the surface of the water and ensure a good look and the necessary calm. If you would like to beautify the mini pond a little, you can use a mini fountain or underwater lighting. Of course, both are possible, but both have to be removed again in the fall. Because if it gets frosty, both can freeze and break. Now the mini pond can finally be filled with water. Normally such a pond is far too small for fish as they cannot be supplied with sufficient oxygen. If small fish are still used, then a pump must definitely be installed.
Get a mini pond without much effort
Many containers are suitable for a small pond that can fit even in the smallest place. Even if there is no garden, they are still a small biotope. Of course, some compromises have to be made here, such as a waterfall, but they are nice after all. Especially when smaller animals and birds feel comfortable there. This means everyone can treat themselves to a beautiful pond in a small space. Because the water brings peace and beautifies the plants in a very special way. Whether with fish or just the appropriate flowers, everyone can decide for themselves. The only thing that needs to be done regularly is to check the water level. Because the plants need the water just as they were planted. Above all, all components can be purchased at most hardware stores, even containers for the mini pond.
The mini pond - a cheap alternative
However, normal ponds in the garden are not exactly cheap and so they are often out of the question. With a mini pond like this, everyone can afford it without breaking the bank. But for many it is even more important that old containers can still be used. Because not everything that is old has to be thrown away, but can be given a new and beautiful purpose. Above all, the effort is very low and with the right planting, algae growth is unlikely. If some algae do appear, they can be removed very quickly. Simply remove it by hand and the water is clear again.
What you need to know about creating a mini pond
The right location
Mini pond - cool water on the balcony, terrace or in the garden: wherever you want to put a mini pond - it is always a visual eye-catcher. Basically, any location is suitable except the cool and shady north side. Six hours of sun per day is optimal for the mini pond, although full sun at midday should be avoided, as a lot of water evaporates in summer and of course this then has to be watered. In this case you should only use soft rainwater.
Suitable containers
- If you want to place a larger bucket on a balcony, you must definitely consider its load capacity!
- Several things are suitable as vessels for a mini pond: old wine or beer barrels, large plant pots,
- Mortar tubs and buckets, large ceramic pots and prefabricated ponds.
Old zinc bathtubs, contrary to popular opinion, are not very suitable for mini ponds, as the humic acids contained in the soil dissolve zinc, and in dissolved form this impairs the growth of plants and animals (snails). Clay pots look very nice, but are usually not completely waterproof - you should pay attention to a glaze on the inside.
Large stone troughs made of granite or sandstone have also proven to be very effective, but they should be coated several times on the inside with sealing mud. Plastic tubs and buckets work just as well and are easier to move than heavy stone troughs. If you don't like the unnatural look, you can cover your plastic bucket with a straw mat or something similar.
Additional materials required:
- Pond liner,
- Gravel (as light as possible),
- Plant baskets,
- possibly bricks
and if necessary a water feature or a water pump. Pond soil can be largely avoided - unless the plant cards for the aquatic and marsh plants purchased expressly state this.
Construction instructions
- First, however, the container in question should be lined with pond liner or coated with sealing mud on the inside.
- Then cover the ground with gravel. For the individual plants you need plant baskets that are made of plastic and are water-permeable.
- As long as the correct water depth is maintained, you can arrange the plants to suit your taste.
- The less water surface is uncovered, the fewer mosquitoes will plague your mini pond.
- Cover the bottom of the respective plant baskets with gravel - place the plant on top and sprinkle with some gravel again.
- If you wash the gravel briefly before use, the water in the new mini pond won't get too cloudy.
For the first filling, it is best to take water from a pond or garden pond: tadpoles (mostly from toads, as they like to settle in freshly filled water), water striders and, with a little help, snails and crabs, you will soon feel at home with them. Installing a pond pump or water feature is advisable as this reduces algae formation. However, it should be borne in mind that plants such as water lilies only like still waters - in this case you should use a few pond snails - the natural enemies of algae.
Tip:
Different heights or depths can be achieved by stacking bricks on top of each other or turning flower pots upside down in the bucket.
Plants in the mini pond
The most important thing when it comes to plants for the mini pond is the right water depth. The so-called zoning is groundbreaking: swamp and wet plants live in zones one to three and get by with relatively little water (minimum water level should be 15 cm), floating leaf plants grow in zone four, such as the water lily (minimum water level 40 centimeters), and Zone five includes those plants that float in or on water. This zoning should also be noted on the respective plant cards.
It is best to choose small plants for a mini pond, otherwise the planting will quickly outgrow the owner. Suitable examples include: water feathers, moss ferns, bobheads and conifers, watercress, pine fronds and dwarf water ferns, swamp forget-me-nots, calla lilies and frog spoons, dwarf bamboo, dwarf rushes, frogbits and dwarf water lilies, water hyacinths, swamp lilies and Brazilian waterweed, chameleon plants, pondweed and mussel flowers, cotton grass and lizard tails, the small and large duckweed, tussock fern and pond liverwort, cyprus grass, pennywort and water mint.
Keeping fish in a mini pond is less advisable, especially since it only works with a closed glass container that is sunk into the actual pond. Such a biotope cannot tolerate fish food, nor can ornamental fish survive in it. Do yourself a favor and focus on other animals - fish belong in the aquarium, if at all.

