- Author admin caroline@plants-knowledge.com.
- Public 2023-12-17 03:39.
- Last modified 2025-06-01 06:48.
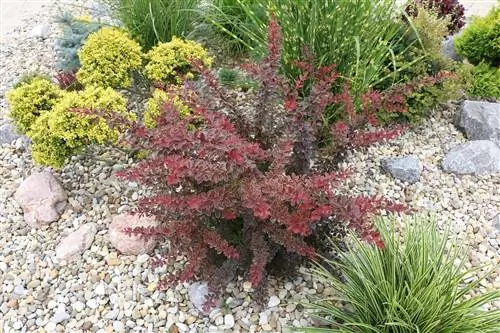
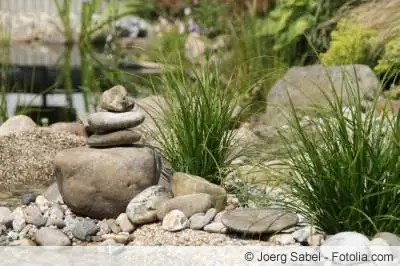
Luxurious and decorative or rustic, wild and rough - a gravel garden offers numerous design options and can add a highlight to your own greenery. Beginners are often intimidated by the artfully created gravel beds, but their easy-care properties make them ideal for this. Provided, of course, that a few factors are taken into account when planning and creating the bed. Otherwise, cleaning becomes a problematic matter that can spoil your enjoyment of the gravel bed.
Planning
If you want to make it easier to create the gravel bed, look for an area in the garden with clay, sandy or gravel-rich soil. The effort is particularly low here and the strenuous digging and mixing of the substrate can be completely eliminated. If such an area is not available, the gravel bed can still be created.
However, when planning, it must be taken into account that a layer of at least 20 to 30 centimeters high must be removed. If tree roots or adjacent bushes and hedges are found here, whose roots run into the future gravel bed, this could damage the plants. In addition, the large amounts of leaves falling in make cleaning difficult. The ideal place for a gravel garden is therefore:
- Free from larger roots
- Not located in the immediate vicinity of deciduous plants
- Can be clearly demarcated
In addition, the conditions at the location should of course suit the requirements of the desired plants. For the rest of the planning of the gravel garden, a sketch is sufficient, which includes the perimeter and paths, possible boundaries and the plants themselves.
Preparation
Before the gravel bed itself is created, the area must be prepared accordingly. If the soil is already well-drained and contains sand or gravel, the effort is minimal. All you need to do here is the following steps:
- Dig up or loosen the future bed in the upper layers.
- Remove weeds carefully, including the roots.
- If desired, delimit the bed from the outside using lawn edging stones.
Once these steps are completed, the actual investing can begin. If the soil is moist and compacted, a little more effort is required. The procedure is as follows:
- The desired area is cleared of weeds - again including the roots.
- The bed is dug up deeply.
- The top 20 to 30 centimeters are removed and mixed well with sand or fine gravel. Depending on the nature of the substrate, one part of soil can be mixed with one part of loosening material. In addition, and depending on the following planting, a portion of compost must also be mixed in.
- The loosened substrate is returned to the bed and pressed lightly to create a flat surface.
- Lawn edging stones can be used to create boundaries.
Tips for Investing
After the bed has been prepared accordingly, you can proceed to actually creating the gravel garden. However, applying the gravel directly is not advisable. Instead, a weed fleece should be applied that does not rot but allows water and air to pass through. The growth of unwanted plants is suppressed and the stones are prevented from being washed out. This barrier between earth and stones is useful on several levels and makes subsequent care easier.
If several pieces have to be used when laying out, they should overlap at least a hand's breadth. It's better to have a little more so that the weight of gravel or grit doesn't create gaps in the cover. The paths will then be laid out if special running routes are planned in the gravel garden. Flat, larger stones or finer decorative chippings can also be used for these. So that the edges of the paths do not “blur” they should be limited. Medium-sized stones or low lawn stones are well suited for this. If lawn stones are to be used, the fleece can be cut open with a sharp knife or laid afterwards.
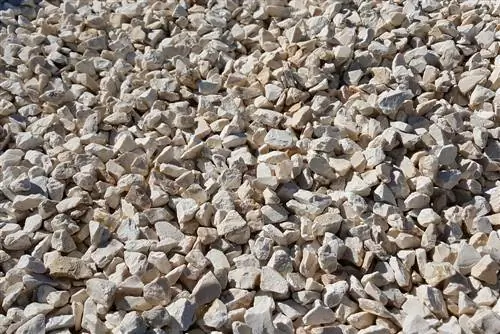
As soon as the paths are finished, the planting and the first layer can follow. If coarse decorative split is used as the bottom layer, it creates a visual finish and covers the fleece well and evenly. The split is also cheaper and is therefore particularly recommended for larger gravel beds and small budgets. Coarse gravel is placed on this lowest layer. How high this layer can and should be depends on the preferred type of planting. In advance, when planning and purchasing the material, it should be clear what will later grow in the gravel garden and how it will be used.
Planting
There are basically two variants available for planting the gravel garden. On the one hand, the plants can be used in pots and containers. This type of planting is recommended for plants that are not hardy. In addition, hobby gardeners do not have to decide what should grow in the gravel bed; changes are possible without any problems and very easily. However, watering then becomes a little more complicated because the plants cannot provide themselves with the substrate.
Anyone who decides to plant the gravel garden directly and permanently must start doing so after laying out the weed fleece. To do this, proceed as follows:
- Crosses are cut into the fleece at the desired locations using a sharp knife.
- The corners are opened and the substrate is dug out to match the size of the root ball.
- The crop is planted and the soil is pressed down.
- The fleece is placed over it as tightly as possible.
- The first layer is applied. Care must be taken to avoid damaging the plants.
- The watering only takes place when all the gravel has been spread.
Care
If the soil has been prepared accordingly, all that is necessary to care for the plants in the gravel bed is regular watering. However, this is only during the first year. Afterwards, water is only watered when necessary. Since rain can easily pass through gravel, grit and fleece, but the covers significantly reduce evaporation, the plants can largely take care of themselves. An exception to this are, of course, plants that are in tubs or pots.
Fertilization is done via the irrigation water.
Cleaning
Larger debris, such as leaves and twigs, are collected on the gravel or picked off by hand. A leaf vacuum or leaf blower can also be used. If finer accumulations of dirt are visible, the gravel can be turned superficially or simply moved so that the contamination sinks downwards - i.e. disappears from the field of vision.
Only if these measures do not help, the gravel bed filling must be removed and replaced or cleaned with high water pressure.
Suitable plants - overview
Depending on the flair you want the gravel garden to exude, the plants must also be selected appropriately. It gets Mediterranean with:
- Lavender
- Rosemary
- pearl basket
- Ball Thistle
- Rockrose
- Mediterranean Spurge
- Curry herb
- Tall Bearded Iris
For an exotic, minimalist impression, cacti and succulents, among others, are recommended. If these are to be planted directly in the gravel bed, attention must of course be paid to the winter hardiness of the respective species and breed. Suitable are:
- Agaves
- Yucca
- Opuntias
- Sempervivum
- Aloe Vera
If, on the other hand, it is to be a gravel garden in the style of Japanese plants, a combination of the following plants can be placed in the gravel bed:
- Bamboo
- China reed
- Japanese Maple
- Anemones
- Flower dogwood
- Dwarf Lilac
- Magnolias
- ornamental cherry
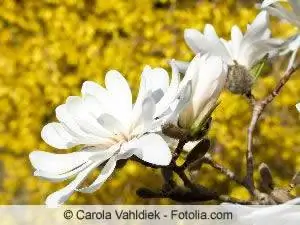
Somewhat more traditional for the temperate climate zone are rock garden plants, such as sedum, catnip, stonecrop and cushion saxifrage.
Tips for beautiful gravel gardens
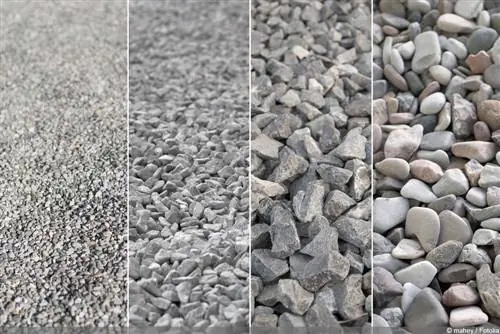
- If you want to cover a larger area, you should choose gravel size 16/32. The advantage here is that the stones are heavy enough to, for example, clear leaves without any problems. A disadvantage can be that large cavities are created in which the leaves get caught.
- To prevent weeds from spreading, a dump height of six to eight centimeters is necessary.
- If you want to create a free-form bed, we recommend laying out a garden hose first and moving it until the shape you want is achieved. It is often recommended to place a film underneath to reduce weed pressure.
- A curb made of bricks, wood or stones prevents the fill from slipping into the lawn. When planting, you should start with the long-lived and tall varieties. Depending on the season, short-lived varieties are then placed in the gaps. Before planting, you should immerse each pot in water until no more air bubbles appear and the pots sink. Then good watering and thus good growth is ensured right from the start.
Conclusion
Whether it's a small gravel bed or a large gravel garden, flat or with small hills - this special eye-catcher is an easy-care decoration if planned correctly and thoughtfully laid out. Minimalist or lavish, it always offers a lot of creative freedom and saves water and effort. It is therefore also fully recommended for beginners.

