- Author admin [email protected].
- Public 2023-12-17 03:39.
- Last modified 2025-01-24 12:45.
Digging up the lawn is sometimes the only way to renew the green space. In garden beds, the measure serves to loosen the soil, which is why the effort is worth it here too.
Lawn
If there are bare spots, weeds or moss on the lawn, the garden looks unkempt. In this case, a complete renewal can provide a remedy, but if the measure fails, the only solution to the problem is to dig up the area.
Tools and materials
To dig up the lawn you need the following materials and equipment:
- Lawnmower
- Scarifier or rake, shovel and weeder
- Spade, motor rake or tiller (depending on the size of the area)
- Digging Fork
- Lawn roller
- low-lime quartz sand or play sand
Note:
If not all of the devices are available, you can borrow them from a machine rental company or hardware store.
Time
The best time to dig up a lawn is in early fall. This gives the soil time to settle over the winter. The frost also kills weeds and grass plants that are still in the ground.
Alternatively, you can also carry out the work in early spring when the ground is no longer frozen. In this case you should plan three to four weeks. Because the soil needs this time to settle. If you are unsure whether your soil is ready for sowing, you can carry out a simple test:
- step on the floor with one foot (flat shoes)
- Shoe print no deeper than one centimeter
- start sowing
Instructions
1. Mowing
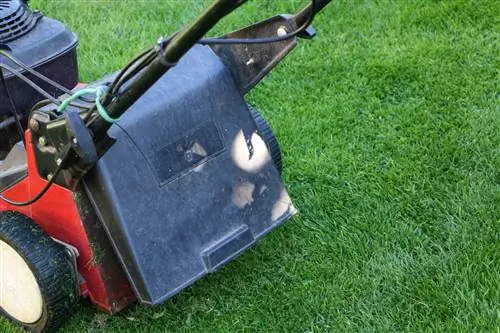
Since the grass is removed when digging, mow it as deep as possible.
2. Remove weeds and moss
For manual weeding and moss removal, use a weed cutter and/or a small shovel. You can then clean the floor with a rake. Alternatively, a scarifier can be used.
3. Remove old turf (not necessary when scarifying)
Loosen the old turf a few centimeters deep with a spade. You can stack the sod upside down, i.e. with the root area upwards, on the compost heap. If you put other plant waste in between, the grass will rot faster.
Tip:
The soil should be dry before removing the turf and then sanding it.
4. Sand the area
Once the lawn has been cleaned and the old turf has been removed, spread a layer of sand on the ground:
- about five centimeters thick
- Sand properties: washed, grain size between zero and two millimeters
5. Digging
To ensure that no disruptive material remains in the ground, follow the instructions below:
- Sear the surface to the depth of a spade (alternatively: milling machine or motor rake)
- breaking larger clods of earth apart
- Loosen the soil until finely crumbly using a digging fork
- remove roots, stones or objects such as wire etc. to a depth of 15 centimeters
- if applicable Flatten mouse or mole burrows with a spade
- if applicable Level individual areas by removing or filling
- Smooth the floor with a rake
- Let the area rest for about five days
Note:
To improve the soil, you can mix in some sand and a large amount of mature compost before raking.
6. Roll the floor
The lawn roller is used to smooth the ground. Whether you have to roll the surface once or several times depends on how uneven the surface is.

Note:
While you wait in the winter months, you can have a soil analysis carried out to ensure that the new lawn thrives.
7. Sowing
Before re-sowing in spring, you should
- loose the soil superficially
- remove newly emerged weeds
- Rake the soil into fine crumbs
- calculate smoothly
- leveling with the lawn roller
Beets
Digging up vegetable or ornamental beds is no longer considered sensible today, because the intervention (destroys) the habitat of the many microorganisms that are important for the growth of plants and vegetables. An exception is heavy, clayey soils. Because with these, only rearranging the soil leads to a profound loosening.
Time, weather and tools
According to the calendar, there are two times to dig up (garden) beds:
- in autumn
- in late winter (in mild weather)
Autumn has the advantage that the rough work is already done before the finishing work in spring. In addition, the clods of earth are broken down by the winter frost. If you start work in late winter, pests that overwinter in the ground will be removed right away.

Regardless of the season, you should only carry out the work when the soil is dry or slightly moist at most. If the soil is wet, there is a risk that the soil will become (even more) compacted. It is also much lighter when dry. There is no need for a tool list as you only need a spade.
Instructions
To work effectively, proceed in sequence. The size of the individual rows is determined by the spade blade. Because every clod of earth dug corresponds to this in width and depth.
1. Cut off the first row
The first row is at the edge of the bed. Cut off the clods and place them next to the edge of the row outside the bed.
2. Cast off more rows
From the second row onwards, do the following:
- Cut off the plaice
- Turning clods of earth
- place in the row (ditch) in front of it
The clods from the first row go into the ditch in the last row.
3. Fine machining
When fine-tuning in spring, proceed as follows:
- loosen the top layer of soil
- Crush remaining chunks of earth
- Remove weed roots, overwintering pests etc.
- if applicable incorporate mature compost
- Level the ground with a rake or rake
- get set
Note:
When planting in autumn, you should let the soil rest for one to two weeks before finishing work.

