- Author admin [email protected].
- Public 2023-12-17 03:39.
- Last modified 2025-01-24 12:45.
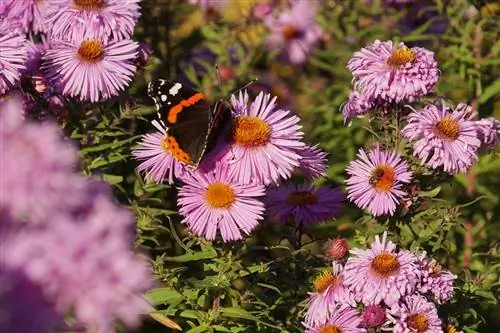
There are different varieties of decorative aster that beautify the autumn garden picture. Caring for perennials is usually easy. The article explains what else should be taken into account when overwintering and cutting.
Profile
- Asteraceae family
- many different varieties
- annual to perennials
- many different flower colors
- from brown to purple, blue, red, yellow to white
- Ray or ray flower with yellow flower head
- Growth height of ground cover up to three meters high
- Flowering time by variety from May to winter
- also suitable for cultivation in pots
- usually hardy
Flowering time
The flowering time for the many different varieties of aster varies greatly. If you want decorative flowers in the garden or on the balcony and terrace all summer long, it is advisable to cultivate different varieties:
- first flowering in May
- this includes the ground-cover varieties
- Autumn asters bloom late
- but then until December
- is climate dependent
Tip:
Put many different varieties in your garden bed, then you can enjoy an abundance of flowers and a variety of colors from May to winter.
Soil texture
The soil condition for most aster varieties should be loose and permeable. However, the soil requirements also depend on the variety. Not every aster can therefore tolerate the same mixture in the substrate:
- Enrich the soil with compost before planting
- applies to all aster varieties
- brings lush flowers
- Cushion asters also prefer loamy soil
- Autumn stars like a mixture of sand and clay
- avoid peat
- Soil becomes too wet
Tip:
So that the soil does not become too hard and solid for the asters in summer, it should be loosened up with a rake more often.
Fertilizing and watering
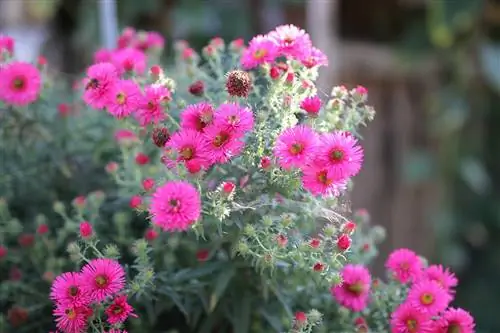
When fertilizing, you should also pay attention to the different varieties that have been cultivated in the garden or pot. Because not everyone needs the same fertilizer doses. Otherwise, the following should be noted:
- do not expose to prolonged drought
- water daily, especially in hot summer months
- one day of drought will be forgiven
- also a little more water for a short time
- However, avoid waterlogging over a longer period of time
- especially for plants grown in pots
- do not use artificial fertilizer
- natural fertilizer is better
- and compost
Tip:
To prevent drying out, you can mulch the soil in the bed around the plants. This also has the side effect that nutrients are continually released into the soil as it decomposes.
Diseases and pests
Aster wilt is unfortunately a disease that can affect many decorative perennials. However, there are already hybrids on the market that have been bred to be wilt-resistant:
- black shoots and limp leaves signs of wilting
- Plant dies completely after a few weeks
- Mildew infestation
- due to drought or heat stress
- Make sure you water adequately
- take plants grown in pots away from heat areas
- choose better heat-tolerant varieties in the garden
- Use net sulfur against mildew
- right at the beginning of the infestation
Aphid infestation can also occur if the asters are not cared for properly. This can be combated with a mixture of water, dishwashing liquid and vinegar, which is applied to the affected areas, usually the fresh flowers and young leaves.
Note:
Asters should only be planted in a garden bed with plants that require little nitrogen. If the perennials get too much of this fertilizer, they also become susceptible to mildew.
Cultivation in pots
An aster also looks very decorative in a balcony box or a large pot. Even several pots with individual plants put together create a harmonious picture on the balcony or terrace:
- Use normal potting soil from the market
- alternatively mix garden soil with compost
- Create drainage over drain hole
- Clay balls or shards or layer of gravel
- above plant fleece
- then fill half with soil
- Remove the plant from the pot and water the roots briefly
- insert and fill in remaining soil
- Press well and water again
Tip:
Every two years the plants should be removed from the pots and filled with fresh substrate. At the same time, it is now recommended that you divide the plants and use them for propagation.
Plants
Asters are sold as perennials all year round, and discounters or supermarkets often also offer the decorative plants. These can also be used for your own garden or container cultivation to make it decorative. Planting and care are the same as for perennials from the nursery or self-propagated perennials:
- Dig planting hole
- as deep as before in the pot
- Distance of the holes between 20 and 40 centimeters
- depending on the size of the variety
- Create drainage to prevent waterlogging
- on the bottom of the planting hole
- Fill in stones or gravel
- Insert plant
- fill in prepared soil
Cutting
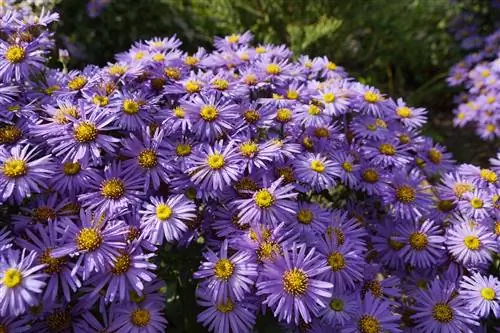
Pruning of each aster should be done after each flower has bloomed. Because then the plants will wilt slightly overall, show yellow to dry leaves and no longer look so beautiful:
- cut directly at the base
- remove all shoots
- even if they still look good
- Aster will sprout again from below next season
- Leave autumn asters over winter
- can be cut back in spring
- cut back early and summer flowering varieties in autumn
Tip:
By cutting directly at the base, you can encourage new growth of all varieties of the popular aster and the plants will grow back dense and bushy next season. So not only division helps, but also cutting before aging.
Location
All aster varieties want the same location conditions. It is irrelevant whether it is the ground-covering cushion asters or a tall-growing perennial:
- sunny location preferred
- Partial shade can still be tolerated
- A shady place is not recommended
- tall perennials sheltered from the wind
- in front of a fence, wall or house wall
- should be supported in the open bed
- don't put it too close
ground-covering varieties also freely on the bed
Tip:
So that the tall autumn asters do not feel cramped and airy, they should not be planted too close together. This allows the air to circulate better and rainwater to dry off, which can prevent fungal infestation.
Wintering
The perennial varieties are actually winter-proof both in the garden bed and in a pot. This means that the asters in the garden bed do not need any help overwintering. However, the perennials grown in a pot should be protected a little:
- Prune plants as described
- mulching an aster bed before winter
- protects against cold and drying out
- cover a bucket with brushwood mats
- also mulch the soil
- place in a protected corner
- Potted plants increasingly vulnerable to cold
- otherwise asters are hardy
Note:
You shouldn't forget to water even in winter. Plants often die in winter because they can dry out quickly in dry periods. It is not the cold and frost that is usually responsible for plants dying in winter, but forgetting to water.
Propagate
So that the aster perennials do not age, they should be divided regularly every few years. If you want to propagate the asters more often, you can do this every year by dividing them:
- share at least every two to four years
- use divided perennials for propagation
- also stimulates flowering
- Dig up the aster and remove it from the ground
- appropriate time always before budding
- is therefore dependent on the variety
- Divide the root into three to four large pieces
- place in three more prepared holes
- or plant in pots
Tip:
To get a colorful picture, you can also mix the plants with different flower colors and sizes. This works just as well in a garden bed as in pots, which you can mix and match, both in size and in flower colors and variety height.

