- Author admin [email protected].
- Public 2023-12-17 03:39.
- Last modified 2025-01-24 12:45.
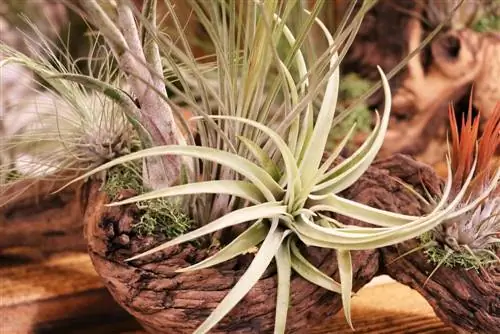
Tillandsia are fascinating plants from the species-rich Bromeliad family. Well over 500 different species and hybrid varieties are known worldwide. In specialist shops you can often find some of them placed on stones or roots. The delicate plants are much more robust and easier to care for than they often seem at first glance. The unusual plants exude an exotic atmosphere and are available in stores at relatively low prices. But in order to enjoy Tillandsias for a long time, at least the plants' basic needs should be met.
Location
The herbaceous plants are particularly widespread in South America. The different Tillandsia varieties differ not only in their growth habit, but also in their choice of location. Some species grow on other plants and benefit from their height. Others, however, make do with rocks; only a few varieties can be found on the ground. Tillandsias are divided into gray and green varieties. The gray colored species, such as “Tillandsia fuchsii”, require a warm, sunny location with relatively high humidity. Green tillandsias, on the other hand, prefer things a little darker and can easily cope with places in the shade. The climate can also be a little cooler here. You can tell exactly what type of bromeliad family it is when you buy it: Gray varieties are almost exclusively attached to stones and roots, while green types are available in planters.
Give the sun-hungry representatives of the succulent species a place at the south window or directly in the winter garden. Varieties planted in pots can also cope with less light output. Here, however, you should pay attention to a low room temperature, especially in winter.
Attach and glue tillandsias correctly
Gray tillandsias are mostly rootless plants that have tiny suction scales between the leaves and shoot axes. This surface allows them to absorb light and water. These trichomes are responsible for the “gray” appearance of the plants. The number and size of the scales make the plant appear white. The roots of these epiphytic plants provide support on trees, cacti and stones. Very little effort is required to attach the bizarre-looking plants with their attractive inflorescences to stones or roots. You can either glue the plants or tie them up directly. Use materials that are rot-free and residue-free. You should also avoid stones with a high lime content. Here's what you need:
- Silicone or acetone-free superglue
- to tie on natural colored tights
- Stones or long roots
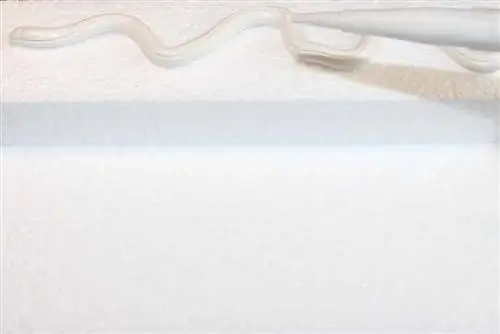
Before you finally attach the plants, first roughly arrange them on the surface. Because you can still make changes without causing any damage to the succulents. Hot glue is often recommended in connection with the gluing method. However, refrain from doing so. Because you have to find the right time to press the tillandsias into the cooling glue and fix them correctly. A transparent silicone from the hardware store or pet store is better suited for this. But a residue-free adhesive has also proven effective. Only bring as much plant surface into contact with the adhesive as is necessary for a firm hold. With both attachment methods, you should pay attention to the natural growth direction of the individual varieties. Some Tillandsia species, for example, grow hanging.
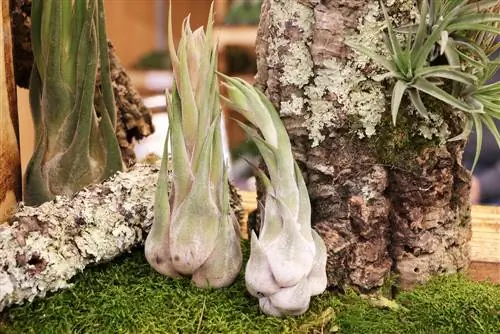
It is much gentler to attach the succulents. However, you need a little skill and sensitivity to do this yourself. Nylon fabric is extremely flexible and hardly puts any pressure on the plants. To do this, cut a pair of women's tights into 4 to 6 cm wide strips. Wrap the woody shoots or trunk of the tillandsia and knot the nylon fabric on the underside of the stone or piece of wood. Not all gray Tillandsia form a trunk. In this case, the ribbons are carefully threaded through the leaves of the plants. Make sure that no plant parts are damaged unnecessarily.
Tip:
Only tie or glue tillandsias together that require the same location and care.
You don't have to worry about the overall visual impression when untying. After a while, the succulents will be able to stay on the selected substrate on their own. Carefully remove the nylon fabric. Instead of women's tights, you can also use fishing string. However, caution is advised because the rigid thread can pinch off the tillandsia shoots and leaves.
Watering and fertilizing
You should refrain from traditional watering for tillandsias. The fine roots of epiphytic species in particular are unable to absorb the valuable liquid. Depending on the room temperature, you should spray the plants several times a week with stale, lime-free water. If you don't have rainwater on hand, you can also use non-carbonated mineral water from specialist retailers. Despite their exotic lifestyle, succulents are also dependent on nutrients and minerals. You can use a conventional liquid fertilizer as well as products specifically tailored to the bromeliad family. During the main growing season, tillandsias are fertilized every 4 to 6 weeks. Either you give the plants a short bath in fertilized water, or you add the fertilizer directly to the “watering water”.
Repotting
When you look at the plants attached to wood or stones, you might not believe it at first, but these plants also have to be moved to a larger base every now and then. However, due to the slow growth of tillandsias, this measure is only necessary about every 3 to 5 years.
- Transfer succulents in the planter into a larger pot.
- Carefully remove stuck growths with a scalpel or carpet knife.
- Carefully remove rooted tillandsias using light, constant pressure.
Glue residue on the underside does not harm the plant itself. Fix the bromeliads as usual with nylon fabric or stick them directly onto the new, larger base.
Propagate
The exotic beauties can be propagated by children. However, patience is required. The offshoots often only develop after a few years. You just have to break out the young shoots or cut them off with a sharp blade. Glue or tie these cuttings to a stable surface as usual. Some tillandsia species die immediately after flowers and fruit have formed. Pull cuttings from these plants in good time.
Cutting
You can do without a classic back or shape cut with the Tillandsia. You should still remove wilted inflorescences and dead shoots with a sharp knife or scissors. Be careful not to cause unnecessary damage or mechanical pressure to the plant itself.
Wintering
Tillandsias, together with their pot or plant base, can definitely be moved to the sunny terrace or bright balcony in summer. However, as soon as the temperatures outdoors fall permanently below 14 °C, the move back into the house is necessary. Even in the winter months, the “gray” succulent species in particular require a location in full sun. You should avoid direct proximity to active radiators; the ideal temperature for the rest phase is between 15° and 20°C.
Conclusion
The popular exotics are extremely robust and place few demands on the passionate hobby gardener in terms of location and care. Since many tillandsia species are already threatened with extinction, you should choose local breeding when purchasing. In order to successfully cultivate the succulents for several years and encourage them to bloom, you should not leave them completely to their own devices. It takes little effort to securely fix the bromeliads on stones and roots. However, the following applies to pet owners: Protect the exotic animals from your four-legged friends. Consuming the plants is completely safe.
What you should know about Tillandsia in brief
- Tillandsias have a very bizarre shape and are therefore very attractive.
- They are usually sold as houseplants on stones or branches to which the plants are glued.
- They don't need a substrate because they absorb water and nutrients from the air.
- Tillandsias are a genus of the bromeliad family that is very species-rich with over 500 varieties.
- Most species grow on other plants, mostly trees, but some also on rocks.
- Very few thrive like other plants on the ground.
- Tillandsia are not parasites, as is often assumed.
- There are two main groups, namely the green and gray tillandsias.
Green and Gray Tillandsias
- The gray tillandsias have many small scales on their leaves.
- The plants absorb moisture through these scales and store it there.
- When these scales have filled with water, the plant looks green.
- When the water gradually evaporates again, the leaves are white to gray again.
- The green tillandsias lack these scales, which is why they always look green.
- However, most species are gray tillandsias.
- The few existing roots of these plants are not used to absorb water or nutrients, but only for attachment.
Care
- Tillandsias need a lot of light and should therefore be placed directly by the window, but not exposed to the blazing sun.
- Because they absorb water through the scales on their leaves, they also need high humidity.
- In all other rooms, their leaves must be sprayed regularly at intervals of a few days.
- Only rainwater or soft, decalcified water should be used for this.
- In winter there is a risk that the tillandsia will not dry quickly enough after spraying and will then begin to rot.
- Therefore, as a precautionary measure, it should be kept in a room with high humidity and rarely be sprayed.
- The tillandsias absorb nutrients through the air, so they do not need to be fertilized. Fertilization is often even harmful.
- A Tillandsia also likes to spend the summer outside, but it should be slowly accustomed to the sunlight.
- If it is left outside in the warm months, it is easier for a flower to form.
- Tillandsias reproduce through seeds, but also form children, i.e. offshoots that grow on the plant and can be cut off.
Tillandsia species
- The Tillandsia aeranthos blooms with beautiful red flowers every year if well cared for.
- It forms many offshoots and can therefore be easily propagated.
- In its native Brazil it grows on trees and is therefore cultivated as a houseplant on wood.
- The Tillandsia crocata is well suited for beginners. It blooms yellow to orange and also smells very good.
- And the tiger tillandsia also looks very interesting with its red and white striped leaves.

