- Author admin [email protected].
- Public 2023-12-17 03:39.
- Last modified 2025-01-24 12:45.
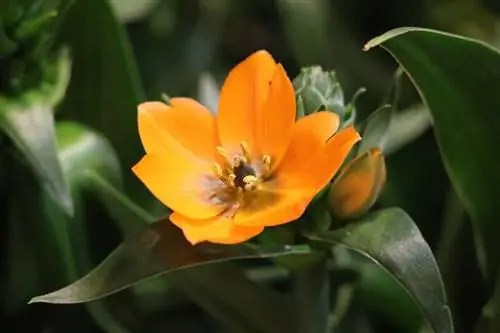
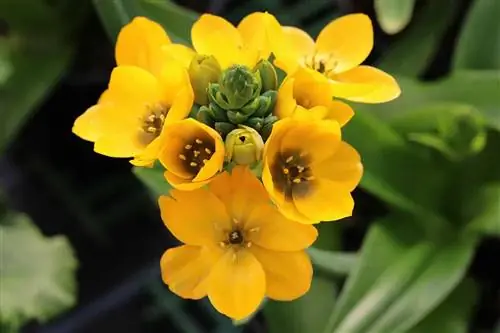
An orange milk star provides attractive accents in the home. The intense coloring of the flowers creates an eye-catcher that can be maintained without much effort.
Profile
- Plant family: Asparagus family (Asparagaceae)
- Genus: Milky Stars (Ornithogalum)
- Synonyms: gardener's terror, gardener's death
- Origin: South Africa (Cape Province)
- Growth form: herbaceous, perennial, forms bulbs as a survival organ
- Growth height: 15 cm to 30 cm
- Leaves: 10 cm long, 2 cm wide, ciliate, green
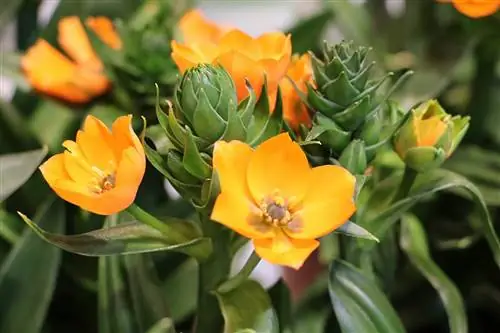
- Flower: orange, white (rare), flower cluster, cylindrical, 20 mm to 25 mm diameter
- Flowering period: mid-July to the end of September
- toxic to humans and animals in all parts of the plant
Location
If you have decided on a milk star, the location must be right. Caring for the farmer's fright is not difficult if they are in a suitable place and can establish themselves there. You should always accustom newly acquired specimens to the sun, otherwise it could be too strong. Milk stars are mainly kept in containers, which makes it easy to adapt the location. When planting, however, you have to select the location a little more precisely. The following points will help you with both variants:
- Light requirements: sunny to bright
- Avoid midday sun
- not too hot
- ideal temperature 18°C to 22°C
- not over the heater
- well suited: window sills, winter gardens, greenhouses
Floor
Milk stars can be planted in the bed over the summer if temperatures do not fall below 8°C. So that they maintain their vitality and can really enjoy the warm season, the soil conditions must be adapted to the needs of the asparagus plant.
It should have the following properties:
- easy
- permeable
- containing nitrogen
- not too humid
- loose up with quartz sand if necessary
Substrate
The choice of substrate when planting in a container is just as important as the soil you have prepared in the bed. It relies on various properties that make it necessary to adapt the substrate using the appropriate means. It should be as follows:
- easy
- calcareous
- Cactus soil is suitable
- alternative pot plant soil
- mix in enough quartz sand with potted plant soil
Plants
If you want to enjoy your Ornithogalum specimens in the flower bed, you must plant them in a timely and correct manner. This guarantees that the bulb sprouts well and ensures a vital plant. The ideal time to plant bulbs is in spring, when the first green shoots have formed and there is no longer any risk of frost. In most regions this is only possible from mid-May after the Ice Saints. The gardener's fright bulbs are not planted too deep in the soil and at a distance of 15 centimeters to 20 centimeters.
Repotting
Ornithogalum dubium is repotted either annually or only after a few years when the substrate is severely depleted. If your orange milk star is to be repotted every year, its vitality will increase significantly because fresh substrate contains more nutrients. When repotting, you should always choose a container with enough space, as you can place more than one onion together. Just don't forget the planting distance, otherwise they will become lazy to bloom. The bucket should have drainage holes and be drained at the bottom using one of the following drainage products:
- gravel
- expanded clay
Note:
The bulbs of the Ornithogalum species in particular contain poisonous cardenolides and should therefore be repotted carefully. If consumed, the steroids lead to severe poisoning and cardiac arrhythmias.
Pouring
Watering Ornithogalum dubium is a little more difficult because the plant requires a finely tuned amount of water. The following points will help you:
- water only as needed
- Avoid waterlogging at all costs
- Let the first substrate layer dry slightly
- check with finger test
- water with low-lime water
- Stale or filter water is also suitable
- planted specimens hardly need any additional water
Note:
Make sure that there is never any water left in the bottom bowl. This could increase the risk of waterlogging, which could lead to root rot, which is fatal to the plant.
Fertilize
An orange milk star needs to be fertilized depending on the frequency of repotting. Once you have repotted the plant, you no longer need to fertilize it until next year. The plant obtains all of its nutrients from the substrate and can easily survive without any due to the energy stored in the bulb. If you do not repot the onion after winter, it will require additional nutrients because the substrate no longer contains enough.
Fertilization is done as follows:
- Use liquid fertilizer containing nitrogen
- Flowering plants or universal fertilizers are suitable
- administer via irrigation water
- only add small amounts of fertilizer to the irrigation water
- every 4 weeks
Cutting
Ornithogalum dubium itself is not cut. Since the plant only has a certain number of flowers and a maximum of eight leaves, pruning is not necessary. However, you can cut off the flowers and use them as cut flowers for vases and arrangements. In contrast to other plants, the cut flowers remain fresh for several weeks. After the flowering period, the above-ground parts of the plant die and can then simply be pulled out of the ground before winter.
Tip:
Be sure to wear gloves when cutting the milk stars. The escaping milky juice leads to irritation of the mucous membranes and skin and often an itchy rash remains.
Wintering
Overwintering Ornithogalum plants is extremely easy. Since you don't have to worry about the above-ground parts of the plant, maintenance over the winter is minimal. If you have not planted the plants, you can move the pot with the onion to a suitable winter quarters after removing the withered greenery. Over the winter, the onions are sprayed with a little water every four weeks. This way they will not dry out even if it is not necessary to water them. Planted specimens are dug up immediately after flowering and also stored in a dark location that is not too cold. The milk star bulbs should not be stored wet, otherwise they could become moldy. The location should be as follows over the winter:
- Temperature: 8°C to 12°C
- dark
- protect from drafts
Propagation through daughter bulbs
One of the simplest propagation methods for Ornithogalum plants is to use the daughter bulbs. If your specimens have formed daughter bulbs, you can use them immediately for propagation, as they are essentially smaller versions of the mother plant with the same properties. These are particularly noticeable when repotting, which ideally puts the time for propagation in spring. They are used like normal milk star onions. Separate it from the mother plant and simply plant the smaller bulb in a container with suitable substrate. The care is the same as for the mother plant.
Propagation by sowing
The milk star can also be easily propagated by sowing. The seeds are available commercially in pack sizes of two to ten, which you can use for cultivation. If you're lucky, your specimens have been pollinated by insects while outdoors and you can harvest the seeds yourself after the flowers have dried up. Once you have seeds available, follow these instructions:
- Time: directly after the harvest in autumn, spring from March
- Substrate: potting soil, bird sand or pumice gravel
- Fill cultivation containers with substrate
- Place seeds on the substrate
- do not cover
- Location: bright, warm, no direct sun
- Temperature: from 20°C
- Moisten seeds and substrate
- Germination time: 2 weeks
- repot after a while
Aphids
Milk stars are extremely robust plants that only rarely suffer from diseases or pests. If pests feast on your specimens, they are mainly aphids, which you can recognize by the following symptoms:
- Aphids clearly visible
- Honeydew recognizable
- Leaves wither
- Leaves curl up
The infestation occurs mainly over the summer if you take the plant outside during this period. Houseplants are generally not affected. To help your Orange Milky Star regain its strength, there are several solutions you can use:
- rinse regularly with clean water
- alternatively use soft soap solution
- Mixing ratio: 50 g soft soap and 1 l water
- Introduce ladybugs as beneficial insects
Note:
If an ant colony has become established due to the aphid infestation, take action against this as well. It is usually enough to relocate the nest.

