- Author admin [email protected].
- Public 2023-12-17 03:39.
- Last modified 2025-06-01 06:48.
Laying a wooden terrace on exposed concrete is easily possible, even for laypeople, as long as the correct procedure is known. Our instructions and tips will help.
Preparation
Preparation for laying the terrace beams consists of four steps. These are:
1. Dismantle
If there are already beams or slabs on the concrete, they must be removed first. As well as old support beams and fixings.
2. Cleaning
The exposed concrete must be cleaned thoroughly. You can first use a broom to remove any coarse, dry dirt. A more thorough cleaning can then be carried out with a high-pressure cleaner such as a Kärcher.

3. Repair damage
Once the concrete has dried, it should be checked closely. If cracks or holes are found, they must be removed from loose pieces of concrete and dirt and repaired. As a rule, repair filler is sufficient for this. However, cracks or holes must be large enough to be filled. If necessary, they must be widened or enlarged. Even then, they should be cleaned thoroughly again so that the filler can bond reliably to the hardened concrete.
4. Check slope
So that rainwater can drain off easily, the terrace must slope slightly downwards away from the house. A gradient of two percent is sufficient. Over a length of one meter, this means a difference of only two centimeters. However, this slight difference ensures that the water flows safely.
5. Measure the terrace and calculate material requirements
Before the support beams and wooden floorboards can be installed on the exposed concrete, the material requirements must first be known.
Calculate material requirements - examples
So that neither unnecessary money is spent nor additional effort has to be made to procure the material, the material requirements for the wooden terrace should be measured and calculated as precisely as possible. All you need is the length and width, so the area can be calculated in square meters.
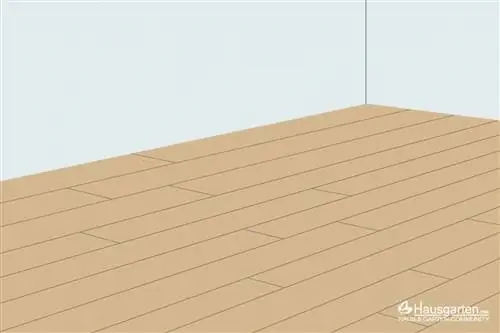
For a terrace that is five meters long and four meters wide, the calculation is as follows:
4 m x 5 m=20 sqm
Because cutting the planks can result in a loss, an additional ten percent should be planned for them.
20 sqm: 10=2 sqm
20 sqm + 2 sqm=22 sqm
The total material requirement for the floorboards is 22 square meters. The calculation for the support beams is similarly simple. The required length corresponds to the length of the terrace. The number required depends on the width. As a rule, a support beam every 50 centimeters is sufficient. This results in the calculation:
4 m: 0.5m=8 support beams
8 support beams x 4 m=32 linear meters (running meters)
In addition, five percent of waste must be planned for the beams. For 32 running meters the calculation is as follows:
32 running meters: 20=1, 6 running meters
32 running meters + 1, 6 running meters=33, 6 running meters
Assembling the support beam - instructions
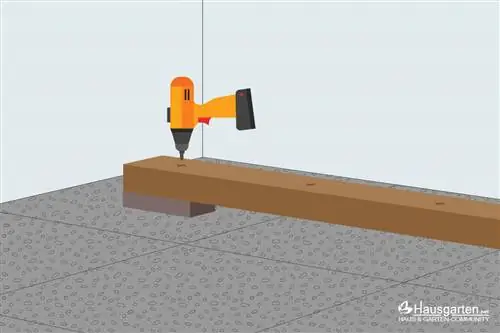
When the preparations have been completed and the required quantities of material are available, assembly can begin. To do this, the support beams are first aligned parallel to the house with a distance of 50 centimeters each. In addition to the bars themselves, you will need:
- Cordless screwdriver
- Drilling machine
- Spirit level
- pencil
- Inch rule
- wooden leaves
- Hammer
- Dowel
- Screws
- two bricks
If these necessary utensils are also available, the procedure is as follows:
- The first support beam is finally placed exactly against the house wall. A spirit level is used to check whether the beam is level. If this is not the case, small pieces of wood can be pushed underneath to align it horizontally.
- Using a ruler, mark crosses for drill holes in the middle of the beam, 20 centimeters from the outer edges. Markings should also be placed in between. Regular distances between 50 and 80 centimeters are ideal.
- The beam is placed on a brick at each end and the marks are drilled completely through.
- The support beam is aligned exactly with the house wall again. Now the pre-drilled holes are used as a template to drill holes through them into the exposed concrete.
- The beam is removed again so that dowels can be inserted into the holes. Each dowel is lightly hammered into the ground with a hammer.
- After a final alignment and checking with the spirit level, the first support beam is now fixed with screws.
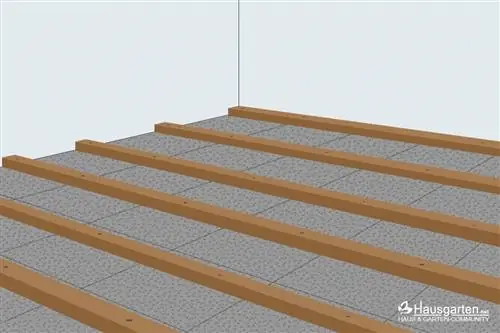
- All other beams are now installed in the same way at a distance of 50 centimeters.
Tip:
So that the distances between the support beams do not have to be measured with a ruler every time, two slats can be sawn to the length of the desired gaps. These are placed between the beams and serve as spacers and orientation.
Assemble the floorboards
As soon as the support beams are fixed to the exposed concrete, the decking boards can be installed. The procedure is as follows:
- Look: If the length of the planks is not sufficient for the length of the wooden terrace, the wooden planks should first be placed loosely on the beam framework. This allows you to quickly determine which distribution and which cuts result in an attractive pattern.
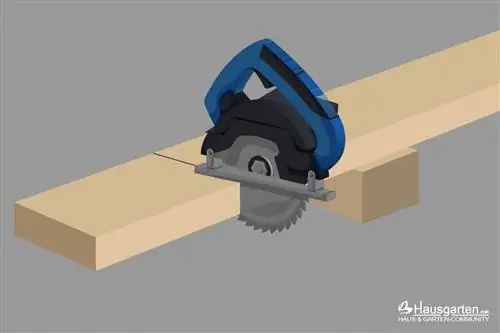
- Measuring, marking, sawing: Once the laying pattern has been determined, the respective lengths are measured and marked. The markings on each beam are then connected together to mark a cutting line. The beam is sawn off along this line. Since only a small percentage was taken into account for the waste so that the costs remain as low as possible, measurements and work should be carried out very precisely.
- The first plank is aligned at the edge and checked for the desired gradient using a spirit level. If this is not the case, wooden plates can be pushed between the floorboard and beam to create the gradient.
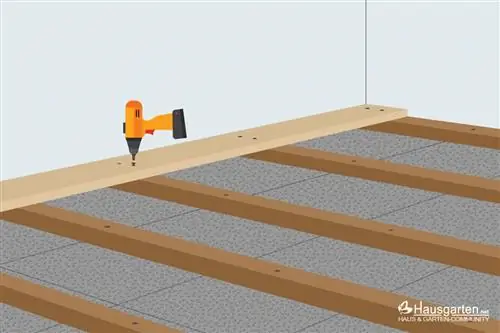
- Two screws are placed per support beam and screwed in with the cordless screwdriver. If the wood is very hard, you should first drill a pilot hole in each hole using the drill. To create a harmonious overall picture, it is recommended that you mark the holes beforehand.
-
First, the plank is fixed with two screws at each end, then it is also screwed to all the other beams. The procedure is repeated for each plank.
In order to maintain the same distances between all decking boards, we recommend using a piece of wood. A thickness of five millimeters is usually sufficient as an expansion joint, but is still comparatively inconspicuous.
Tip:
Both the support beams and the floorboards should be installed with at least one helper. Otherwise, the work will not only take significantly longer, but errors will also occur more quickly. The beams and planks can slip comparatively easily if they are not held and aligned at both ends at the same time. This is especially true when drilling and screwing.


