- Author admin caroline@plants-knowledge.com.
- Public 2023-12-17 03:39.
- Last modified 2025-06-01 06:48.
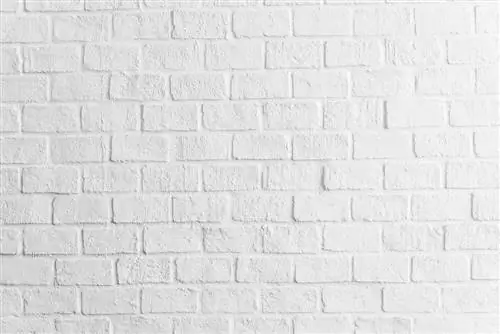
In the original version, lime paint consists of so-called slaked lime, which is called swamp lime. Mix this with water and, if necessary, other ingredients such as paint. However, the lime coating is not suitable for every surface or a special pre-treatment must be carried out before application. Below you will find out everything you need to know from the DIY professional.
Advantages and disadvantages
The chalky color is smudge-proof and does not “chalk” when used correctly. After a fresh coat of paint, a little “chalk” comes off when you wipe the paint with your hand. This decreases with every hour and the older the paint, the more it hardens. It “petrifies” with the air. This is called carbonation.
It can be painted over with numerous paints. The main advantage is that it has a fungicidal and disinfectant effect. It reliably prevents mold growth, regulates moisture in the walls and absorbs odors. It is a purely mineral-based color at an organic level. Lime coating has disadvantages due to the choice of color and its highly corrosive properties. The latter makes it essential that you wear safety glasses and gloves when processing.
Splashes can fly around, especially if you make the paint yourself. If they come into contact with skin or eyes, these should be rinsed off immediately with water. Since no more than 5 percent color pigmentation can occur, a maximum of pastel tones result from a color mixture. Strong colors cannot be achieved.
Suitable surfaces
Soils must have a load-bearing capacity and stability that can hold the lime. Plasters made from lime, clay and cement are ideal. Stone surfaces made of lime sand, cement, aerated concrete as well as clay and bricks can be easily painted with lime paint. Simple stones as well as plaster and wooden substrates are more problematic. Here, a lime coating lasts better if special additives are added.
The production of lime paint is particularly recommended for painting house facades. The prerequisite is that they are not exposed to strong weather conditions such as driving rain. House entrances, bathrooms, kitchens as well as ceilings and walls in living areas are also suitable for lime painting. Cellars have been whitewashed with this color in recent centuries.
Material and costs
The material required and the resulting costs depend primarily on personal needs and the area to be painted. You can expect a higher consumption than you are probably used to with conventional acrylic paint on woodchip wallpaper, as lime paint has poorer coverage and multiple coats are necessary. Overall, the price is still far lower than the cost of conventional paint if you produce the paint yourself. The following material and price information provides an overview of what you need and the approximate costs.
Paint Roller
If white lime is applied, this can easily be done with the paint roller.
- Large paint roller (no virgin wool) - For example, short pile roller including handle, around 8 euros
- If necessary, telescopic rod for high walls or painting a ceiling - around 8 euros
- Replacement roll about 4 euros
- Small paint roller for edge and corner painting including handle around 5 euros
- Paint tray around 2.50 euros or alternatively paint spreading grid for around 2 euros
Paints
For colored lime coatings, you should use a tassel, brush or brush. Please make sure that it is real hair.
- Quast: depending on the quality between 3 and 8 euros
- Brush: between 2 and 6 euros
- Brushes such as surface brushes: from around 4 euros
Lime
Wood-burned marsh lime, which is sold in buckets or sacks, is most suitable. This is one of the highest quality because it has been “swamped” for months or years and becomes finer with each passing day. It has an almost chemical-free purity and contains no sulfur.
You can expect the following costs for producing the lime paint:
- 25 kilograms of white lime: between 2 and 3 euros
- High-quality wood-fired swamp lime: 11 kilograms from around 20 euros (2.5 years swamped)
- if necessary pigment color: 500 grams about 10 euros
- Stirrer depending on material and size: between 1 and 15 euros
- Bucket depending on volume: between 2 and 5 euros
Total costs: between 15 euros and 40 euros for color production
Additional requirements
In addition, when using lime paint, you should ensure sufficient protection so that no splashes of paint get on the floor and surrounding furniture or irritation of the skin or eyes occurs upon contact.
- Protective film - For example 4×5 meters - medium thickness - around 2.50 euros
- safety glasses: from 2 euros
- Gloves: from 2 euros
Manufacturing
When making lime-based paint, mix five parts lime with six parts water in a bucket. A spreadable paste must be created. If a colorful coat of paint is desired, only a lime-resistant pigment paint is suitable, the pigment content of which should not exceed five percent. It should be stirred evenly into the lime paint and then left to stand for at least 24 hours. It is advisable to stir occasionally because lime can settle on the bottom of the bucket, harden easily there and the color pigments cannot be stored evenly here. Basically, the longer the color "draws", the higher its quality becomes.
Tip:
It is optimal if you pre-paint and only mix/paint the color in the last coat. In this way you ensure that the color appears more realistic and is not influenced by backgrounds that may shine through or create shadow effects.
Casein additive
Casein increases the binding ability of the lime paint and ensures increased smudge resistance. It is available as a ready-made product and you can make it yourself. To do this, proceed as follows:
- Mix 250 low-fat quark with around 100 grams of pasty lime
- Stir well until a jelly-like, glassy mass forms
- Add the mixture into the pre-made lime paint (maximum proportion of five percent)
- Mix well with the paint
- Use relatively quickly, as casein shortens the durability of the color
Linseed oil additive
If linseed oil is added to lime paint, this improves the spreadability and minimizes the absorbency of surfaces. It “saponifies” when mixed with the paint and also binds so that the new wall paint can be wiped off for a long time without removing limescale. Add two to three percent linseed oil directly into the prepared paint and mix vigorously.
Difficult surfaces
If wood or a stone wall is to be painted with lime paint, it will not hold up well. You can solve the problem by doing the following when making the paint:
- Use hot water instead of cold
- Add about 500 grams of zinc sulfate to 40 liters of lime milk
- Then mix in 250 grams of table s alt
- Stir the mixture well and use immediately
Pretreatment
If the surface is plasterboard or Fermacell, pre-treatment with a universal filler is necessary, as these are highly absorbent surfaces and a coat of lime paint would not hold. If the substrates are materials such as those described in the “suitable substrates” section, pretreatment is not necessary. All other smooth and well-adhering surfaces as well as coats on old emulsion paint should be pre-treated with a mineral plaster primer. The manufacturer HAGA, for example, offers these as finished products.
Preparatory work
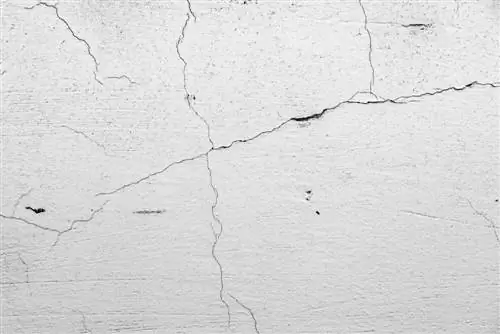
If wallpaper, latex paint or similar is present on the surface, these must be removed unless a primer or mineral plaster is used. It is important that the surface is free of dust and grease. If an old lime coating is to be replaced with a new one, the old wall covering should only be scraped off or milled off if it is classified as unstable. Otherwise, the old lime coating can remain and the new one can be done on top of it. Minor damage, cracks and holes should be repaired with a painter's spatula before painting and/or filled with lime smoother. The surface must be moistened immediately before painting.
Paint
Regular white lime is applied with the roller as usual with conventional paint. When using a brush or a wide brush, the paint is painted crosswise. As a rule, the lime coating is done in two to four layers. This should be taken into account, especially when painting the facade. From the 2nd coat onwards, a conventional paint roller can be used if the lime has been well deposited.
Don't forget that the color pigments should only be added during the last coat. The final coat involves painting the walls from top to bottom. On the ceilings, the rollers or brushes must be guided vertically towards the windows. This brushing technique prevents shadow effects such as those that can arise from the formation of grooves or the like.
Tip:
Don't be confused by possible color variations. Wet paint has a translucent effect and the correct color usually only appears once it has dried. Therefore, wait before using more paint again.
Drying
An important factor is drying. A chemical process takes place during the drying process. This should not be interrupted and the lime coating should be given time to dry thoroughly. For this reason, a waiting time of 24 hours must be observed between the different coats of paint, although it is “hand dry” after three to four hours. The ambient temperature should be between seven degrees Celsius and 18 degrees Celsius. Temperatures above or below this could have disadvantages for the drying process and the end result.
Distance
If old lime paint has to be removed, this usually involves a lot of effort and a lot of dust. Especially when lime was applied to freshly plastered surfaces, it hardened extremely. The only thing that helps here is a sander that can be used to remove layer by layer. Strong blows with a hard object and a spatula also loosened the lime coating, but for larger areas this would require several days of work. In addition, the subsurface could be damaged and create an uneven surface, which requires additional preparation work to attach the new wall covering. It is better to brush off the paint and re-smooth it. You can then wallpaper on this or give the wall a new color with emulsion paint.
Tip:
It will be less dusty if you hold a vacuum cleaner close to the surfaces when brushing and smoothing. Most of the dust is sucked up directly in this way.

