- Author admin [email protected].
- Public 2023-12-17 03:39.
- Last modified 2025-06-01 06:48.
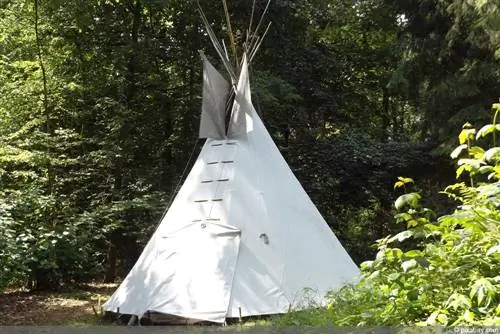
A finished playhouse is simple - but it won't have the charm of a self-made teepee. The construction itself is fun and can involve the whole family. After all, building tepees was not the job of men for the Indians, but rather the job of women and children. With our instructions it's quick, easy and everyone can help.
Diameter and height
Play wild games, hold secret councils or simply read an Indian story in style in the tepee - for all of this the tepee needs the crucial size. Although this also depends on the space available, it should, if possible, be designed so that more than one child can spread out comfortably in it. After all, friends will also be present at the games and will probably take toys with them. There has to be room for all of this.
A diameter of at least three meters should be planned. If there are several siblings or many friends, it should be up to six meters.
The height should be chosen so that a child can still stand comfortably in the middle of the tipi. If the diameter is very large, the height should also be larger. Otherwise the traditional, high, narrow and conical shape of the tipi will be lost.
Tip:
A true-to-scale sketch can help to illustrate the ratios of height and diameter before construction and to adjust them again if necessary.
Materials needed
Only a few materials are required to build a teepee. Below:
- Rods or a suitable alternative to them
- Two ropes or cord
- Tent tarpaulin or cover
- Possibly cover for the floor
Rods
The poles will later form the frame of the teepee, so the more poles you use, the more stable the teepee will be later. Even for small teepees, at least six poles should be used. For larger diameters and heights, there should be more rods.
The following are suitable:
- Plant sticks
- Bamboo sticks
- tent poles
- bundled, straight willow rods
- narrow slats
Of course, in principle any straight and stable pole can be used. So also broom handles, strips or curtain rods. But they should be at least one and a half meters long. A significantly longer length is better. Because they are at an angle and also have to be partially inserted into the ground and should also be slightly higher than the cover. So with poles about 1.5 meters long, the area covered will only be about one meter to 1.2 meters high.
Build scaffolding

Half of the selected poles - at least three - are used as the basic structure. The procedure is as follows:
- The poles are sharpened at the lower ends if possible and inserted into the ground at least ten centimeters deep. In their basic form they can form a triangle, trapezoid or circle depending on the number.
- The upper ends of the poles are brought together, wrapped with rope or cord and knotted several times. This creates a pyramid or cone.
- The additional rods are now placed on the basic structure at as even a distance as possible and the lower ends are then inserted into the ground.
- The upper ends of the still loose poles are attached to the base structure with a second rope or piece of cord by wrapping them around and knotting the cord several times.
Protect soil
If the tipi is intended to provide a bit of shade in the summer and only serve as a playhouse in good weather, floor protection is not necessary. A blanket inserted if necessary is sufficient. If the children want to stay in it even in bad weather or rain and don't want to sit in the mud, the tipi needs an appropriate base.
Good examples for this are:
- Picnic blankets with one-sided coating
- disused tent tarpaulins
- Truck tarpaulins
- rejected walls or roofs of pavilions
- waterproof tarpaulins
So that neither water nor mud can penetrate, the floor protection should be attached to the poles of the scaffolding. In such a way that the edges of the base are slightly elevated and fixed to the bars. This can be achieved, for example, by inserting eyelets into the floor protection and attaching it to the scaffolding with wire. Care must be taken to ensure that the ground protection is larger than the diameter of the tipi and is not under tension. Otherwise, children could cause the scaffolding to fall while playing or simply stepping on the teepee.
Attach the tarpaulin
The scaffolding is in place, if necessary the ground protection is in place - the tarpaulin or the outer shell of the tipi is still missing. The material it should be made of depends on the intended use. If the tipi is only used once for a celebration or only in good weather, the outer jacket does not have to be weatherproof. In these cases the following are suitable:
- Bedsheet
- Blankets
- Tablecloths
- sewn together scraps of fabric
The situation is different if the tipi is to be left in the garden for a longer period of time and can withstand the occasional rain. The ideal ones are then again:
- (disused) tent tarpaulins
- Truck tarpaulins
- rejected walls or roofs of pavilions
- waterproof tarpaulins
The advantage of these materials is that they are waterproof and weatherproof thanks to their impregnation or coating. They keep the interior of the tipi dry and therefore also able to withstand the occasional downpour.
The tarpaulins or the fabric can be clipped together, sewn together or glued together. But it is also possible to wrap them around the teepee in layers. If possible, you should wrap from bottom to top and from the inside to the outside. The instructions help with understanding:
- The first cover is placed at the bottom and should protrude above the floor protection. In this way, even strong winds cannot push it through the spaces between the poles. Rainwater runs off to the outside and cannot get inside.
- Approximately halfway up the bottom layer, attach the second layer and wrap it around the teepee. Due to the overlap, water can drain here again without getting into the interior of the tipi.
- Depending on the height of the tipi, repeat steps one and two until the tarpaulins or blankets reach the top.
If several blankets or tarpaulins have to be attached next to each other in order to completely cover the circumference of the tipi, they should also overlap. Anyone sitting in the tipi should not feel any open spaces, unobstructed light or even a draft. This causes the teepee to leak.
Tip:
Don't forget to create an accessible entrance to the teepee. This must be tight but easy to open in rain and wind. For this purpose, for example, all layer ends can be connected to one another using eyelets and a piece of thread or wire. A string is then pulled through the eyelet and guided around the upper end of the tipi.
Tipi - tight or not?
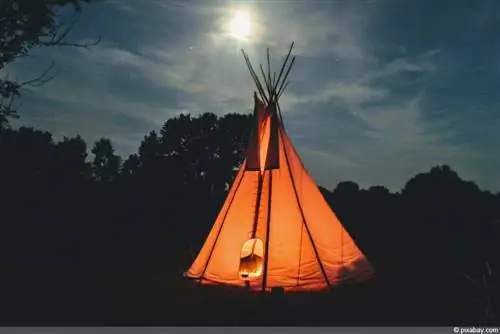
Traditionally, the top of a teepee is open. After all, the buffalo hide accommodations were also used for cooking or were heated if necessary. The smoke and cooking fumes created by the fire had to go away. The open tip was therefore not closed, but served as a deliberate trigger. When it comes to the tipi in the garden, a decision must again be made depending on the design. If it only stands for a short time and is only used when the weather is good, the top of the tipi can be left open.
It should be noted, however, that it has to dry out again after heavy rain. If you want to prevent this, cover the open tip. This is possible, for example, with a circular piece of waterproof tarpaulin, impregnated fabric or the remains of an umbrella. The waterproof textile is pulled over the top ends of the poles and secured with clips or secured with a piece of string.
Decoration
A teepee is not a real teepee for children if the decorations are missing. Paintings, leaves, handprints or lines as “war paint” simply cannot be missed. So that the teepee is well received in the garden and is really a success, you should think about the decoration.
Some children are already satisfied with using different colored fabrics. Others want to be more creative. Finger paints, chalk and textile markers are recommended for this. These don't last forever on impregnated and coated fabrics - but they're a lot of fun to apply.

