- Author admin caroline@plants-knowledge.com.
- Public 2023-12-17 03:39.
- Last modified 2025-06-01 06:48.
With a little skill and creativity, an attractive wooden bed border can be designed to look visually appealing. However, wood is a material that begins to deteriorate after a short time in damp ground. If you decide on a wooden bed border, you should make sure that you use weather-resistant wood or wood that has been specially impregnated with protective agents. The protective agents used should definitely be free of harmful substances and environmentally friendly.
Materials
A good bed border not only looks beautiful, it also prevents the lawn, weeds or even the plants themselves from expanding unhindered. Wooden bed edgings look very natural and fit into almost any garden, whether a cottage garden or a modern facility. The wooden bed border does not necessarily have to follow a straight line; round or curved lines also look attractive, which can be easily built with pegs embedded vertically in the ground. Depending on which type of wood is used, it is necessary to protect it from the elements - especially moisture.
- weather-resistant types of wood: Douglas fir, robinia, oak, larch
- pressure-treated wood: spruce (very light and relatively inexpensive)
- Paint untreated wood yourself with glaze or paint
Various variants
Depending on your taste and the conditions in your own garden, a wide variety of design options can be used for a wooden bed border. Thick wooden trunks or branches, for example, look very natural and can simply be placed on the bed as a border. Other bed borders consist of thick pieces of wood with a round or rectangular cross-section, which are usually driven vertically into the ground or set in concrete.
- Palisades (round timbers)
- Wooden boards, low fences
- Rollboarder (rollboard, roll palisade, lawn edge)
- Round trunks
Rollboarder
Rollboarders are called bed borders or lawn edges in which the individual (wooden) elements are connected with wire. This makes setting very easy and curves are also possible. Wooden rollerboarders usually have a height of 30 centimeters and a length of around 190 centimeters. If shorter pieces are required, the wire can be easily cut with pliers.
- Step: Mark the course - The future course of the bed border is marked using a guide line or fine sand.
- Step: Dig a trench - Use the spade to dig a trench about 20 centimeters deep. The trench does not have to be very wide, a slightly wider slot is sufficient.
- Step: Adjust and insert the rollboard - The rollboard must first be cut to the appropriate width by cutting the wires using pliers. Then insert it into the cut out slot. To ensure good stability, the rollboard should be sunk into the ground up to around the second wire border. If necessary, hammer in a little more with a rubber mallet to align the upper edge evenly (spirit level). Tip: If you don't have a rubber hammer, you should put a wooden board on it so that the surface of the wood is not damaged by the metal head of the hammer.
- Step: Filling - First fill the slot with fine gravel and spread the excavated soil on the gravel. Tread firmly.
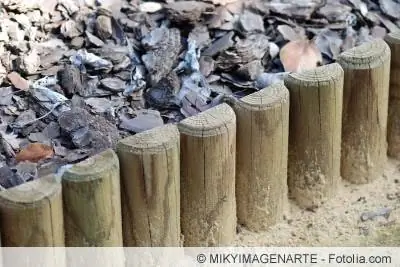
Mini palisades with lace

So-called mini palisades are also suitable for visually separating beds or as lawn edges. For quick and easy insertion, palisades with a sharpened end are recommended. To build a bed border yourself from mini palisades, all you need is the palisades, a spade and a rubber mallet as well as a guide line. As an alternative to the rubber mallet, a normal hammer can also be used if a wooden board is placed underneath when hitting.
- Step: Determine the course - It is best to determine the course of the bed border with a taut cord. To ensure that the palisades later form a precise alignment, a narrow channel should be dug using a spade.
- Step: Hammer in the palisades - The palisades now have to be aligned exactly. For example, a strip can be nailed to two or three round pieces of wood. The palisades are driven into the ground to the desired depth with the hammer.
Palisades as a bed border
With the help of round timbers, so-called palisades, you can easily build a bed border yourself. If you use palisades of different heights, you can achieve a very individual design. Palisades can also be used for beds on slopes or stepped gardens.
Materials needed
- Palisades/round logs (available in different lengths and diameters)
- note that about a third of the wood is buried in the ground
- Gravel or grit
- Nails
Tools needed
- Spade (possibly shovel)
- Wall cord and wooden sticks
- Stead
- Spirit level
- Rubber hammer (alternatively hammer and wooden board)
Construction without concrete foundation
On flat terrain, a palisade acts like a fence that surrounds the bed and divides the garden into areas. If the ground offers sufficient stability and the palisades are not very high, work can be done without a concrete foundation.
- Step: Dig the trench - First, the future course of the bed border should be marked all around using the sticks and the guideline. A trench is dug along the guide line, the depth of which corresponds to about a third of the length of the palisade. There is also an additional 20 centimeters for drainage.
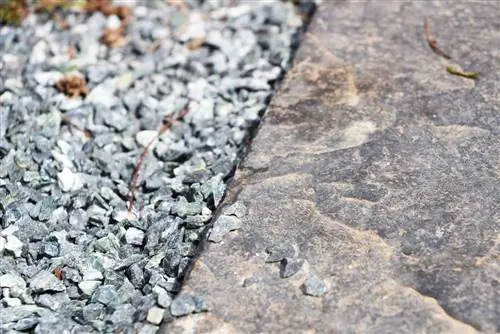
- Step: Create drainage - A thick layer of gravel or chippings (about 20 cm) is filled into the trench. This ensures that water can drain away and the wood does not rot.
- Step: Adjust the palisades - The round timbers are now placed side by side in the trench and aligned in height and alignment using the guide line. To ensure that relatively long palisades do not move, they should be fixed with a nailed-on straightedge (towards the inside of the bed).
- Step: Attach - If short logs have been used, the trench can simply be filled with chippings and garden soil. By stepping on it lightly, the soil is compacted so that it does not become washed out later. Before it can be completely filled, the guide bar must of course be carefully removed.
Bed borders with foundation
If the terrain is of different heights, very sandy soil or high palisades, the round timbers should definitely be cast in concrete. In addition, a barrier with roofing felt or foil is necessary on the raised side so that moisture is kept away from the wood and the soil does not trickle through.
Additional materials
- Garden concrete (concrete, sand, water)
- Foil or roofing felt
Additional tools
- Bucket, bucket or wheelbarrow for mixing the concrete
- Mortar trowel
Step 1: Dig a trench
After the course has been determined using a guideline, a trench must now be dug that is approximately a third of the length of the palisade in depth, plus an additional 20 centimeters.
Step 2: Set the wood in concrete
There are two different options when setting the timber in concrete:
- Longer palisades can be stabilized laterally with concrete. First, an approximately 20 cm thick layer of gravel is filled in for drainage and the round timbers are inserted and aligned. To stabilize it, place a trowel of concrete in front of and behind the palisade and flatten it down the sides.
- Only fill in a thin drainage layer of gravel (5 cm). Then fill in garden concrete about 10 cm high and insert the wood (not all the way down) and align it. If all the wood is in the concrete, add another layer of concrete (about 10 cm) from the right and left. To do this, alternately fill a ladle in front of and behind the wood so that it does not move when filled on one side. This variant is recommended for steep slopes.
Step 3: Cure and fill
The concrete now has to harden over several days (better a week). You can then fill up with a layer of gravel and soil.
Conclusion
If you want to build a wooden bed border yourself, you should make sure to use weather-resistant wood or paint it with protective paint yourself before installation. On flat surfaces, there is usually no need for a foundation for the bed border, but the wood should best be placed on a drainage system made of fine gravel or grit so that the water can drain off easily and the wood does not rot. Sharpened palisades can also be driven directly into the ground without drainage. However, this bed border doesn't last that long. Concrete foundations are always necessary when the bed border is very high, the terrain is sloping or the subsoil has very little load-bearing capacity.

