- Author admin [email protected].
- Public 2023-12-17 03:39.
- Last modified 2025-01-24 12:45.
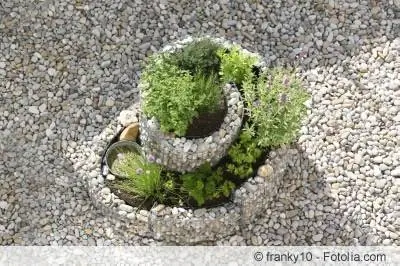
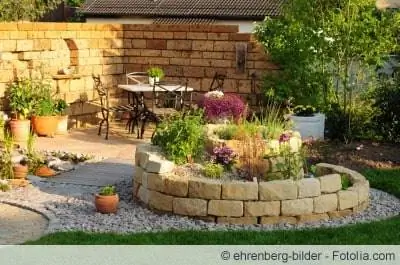
A herb snail, also called a herb spiral, can be built with stones or wood; create large or slightly smaller; with or without a mini pond. The best building instructions for a stone and a wooden variant lead step by step to your own, and above all self-made, herb snail. A wide variety of herbs can be harvested fresh for use in the kitchen almost all year round. In addition, the herb snail is a decorative element for every garden, which can be easily built on your own.
Wood or stone
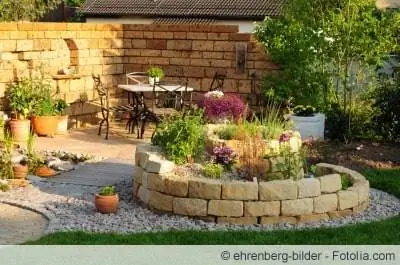
As already mentioned, there are broadly two different ways to build a herb snail. If you prefer something smaller and with less effort, you can choose the wooden version. You can also buy prefabricated elements in stores. If you want something more elaborate, larger and classic, choose the variant with a dry stone wall. Here you can choose whether you would prefer to use natural stone, clinker bricks or bricks for the wall. Below are building instructions for both variants.
Stone
Good planning is everything. These points must first be clarified when building a stone herb snail:
- Determine the look (which stones?)
- Determine location and size in the garden
- Which herbs to plant
- with or without mini pond
The following materials and tools are required:
- Spade
- Gravel, gravel
- Sand, mother earth
- Compost
- Stones
- Wooden sticks, string
- if applicable Pond liner, pond vessel
Location
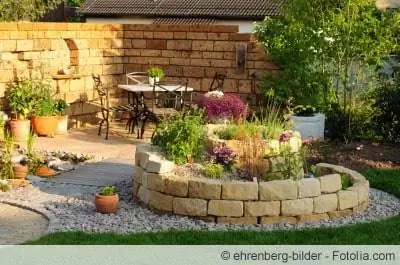
It is best to choose a sunny spot in the garden for the herb spiral. Since it should be a real eye-catcher and will smell wonderful with all its herbs, it can be placed in an exposed place or near seating areas. An average diameter of 3 meters is assumed at the base. This will be enough for ten plants. The highest point is approximately 90 cm high.
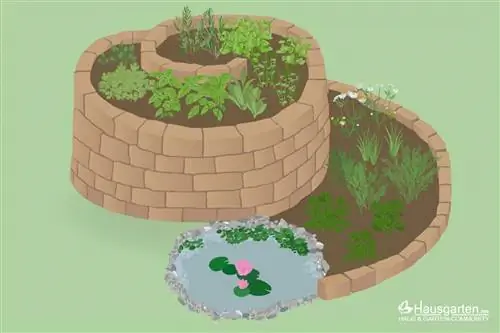
This place is best marked with sticks and a string. The herb snail should taper off towards the south. Here, at the end of the spiral, the outline for a small pond can be marked.
Tip:
To mark the snail, a stake is placed in the middle of the location. A circle is then marked in the ground with a string of the appropriate length (here 1.50m) and another stake attached to it. Mark a small circle in the middle for the dry zone.
Foundation
Now the earth within the marked area is dug well to the depth of a spade. For the water point it should be around 40 centimeters. Now it is filled with gravel or gravel. Leave out the pond area. This layer of gravel ensures good drainage, thus avoiding waterlogging and frost damage, and it also serves as a foundation for the wall.
Wall
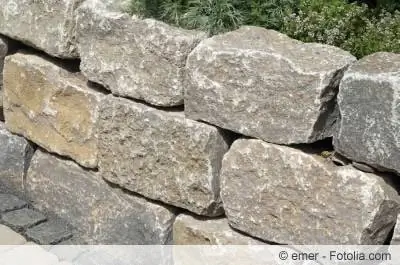
The selected stones are now laid using the dry stone wall system, i.e. without mortar. Herbs can also settle in the joints later and, above all, they become valuable living space for insects and small animals.
Start with the first row by laying the stones in the form of a spiral with two turns towards the center (width of the spiral approximately 60cm). To ensure good stability, choose particularly thick, solid and uniform stones for the first row of stones. Now the remaining stones are distributed, increasing towards the middle, to a height of approximately 80-90 cm in the middle.
Filling
Now the finished wall outlines are first filled with gravel or gravel again. At the very bottom, add little or no gravel and allow the layer of gravel to rise to 50 cm towards the middle. Leave out the pond area completely.
This is now filled with earth. The soil mixture is tailored to the needs of the herbs in these climate zones:
- Lower area: loamy soil, pure soil-compost mixture
- middle area: nutrient-rich garden soil enriched with compost and a little sand
- upper area: garden soil and sand in a ratio of 1:1
Tip:
Basically, the sand content of the soil mixture for the filling should decrease towards the bottom and the compost content should increase.
Create a pond
There are two different options for the pond:
- The area is previously lined with sand so that the pond liner is not damaged. The foil is then laid out, followed by another layer of sand and gravel. The edge is covered with stones.
- A small prefabricated pond (or tub, Maurerbütt) is placed in the hole. The edge is then covered with stones.
Now place one or more hemp ropes or jute strips with one end in the pond and the other end in the soil of the lower zone, the wetland. The wick principle ensures permanent moisture.
Planting
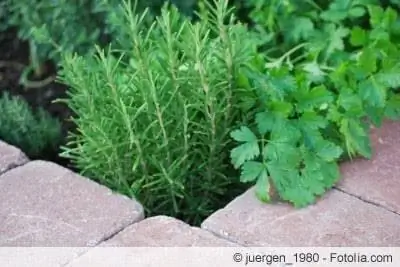
Before planting, let the filled herb snail stand like this for a while. Preferably long enough for it to get a few downpours. This allows the earth to sink and if necessary you can add some more earth in the appropriate mixture. The best time for planting is spring. A few examples of planting in the three different climate zones:
Upper area, dry zone
- Mountain savory (Satureja montana)
- Curry herb (Helichrysum italicum)
- Spice sage (Salvia officinalis 'Berggarten')
- Lavender (Lavandula angustifolia)
- Lavender thyme (Thymus thracicus)
- Marjoram (Origanum majorana)
- Orange thyme (Thymus fragrantissimus)
- Oregano (Origanum vulgare)
- Rosemary (Rosmarinus officinalis)
- Sage (Salvia officinalis)
- Thyme (Thymus vulgaris)
- Hyssop (Hyssopus officinalis)
Middle area, dry to humid zone
- Borage (Borago officinalis)
- Tarragon (Artemisia dracunculus)
- Spice fennel (Foeniculum vulgare)
- Nasturtium (Tropaeolum majus)
- Coriander (Coriandrum sativum)
- Parsley (Petroselinum crispum)
- Pimpinelle (Sanguisorba minor)
- Rocket (Eruca sativa)
- Chives (Allium schoenoprasum)
- Lemon balm (Melissa officinalis)
Lower area, wet zone
- Dill (Anethum graveolens)
- Garden mountain mint (Calamintha grandiflora)
- Indian nettle (Monarda didyma)
- lovage (Levisticum officinale)
- Chives (Allium schoenoprasum)
Pond, shore area
- American calamus (Acorus americanus)
- Watercress (Nasturtium officinale)
- Peppermint (Mentha x piperita)
- Waternut (Trapa natans)
Wood
A dry stone wall is not the only way to build a herb snail. A pretty and also durable, simple alternative is the wooden version. Durability depends on the choice of material. Larch wood has proven to be the best. The resin in the wood has a positive effect on the durability of the wood and on the plants. It insulates, absorbs little water, does not start to rot as quickly and retains its shape. You can expect a wooden herb snail to last around 15 years.
A herb spiral for small gardens is also available from specialist retailers as ready-made kits. The individual wooden elements are strung together with a wire. The advantage is their simple structure. If necessary, a move can also be completed quickly:
- Mark the specified diameter in a sunny location
- Dig up the soil 10-15 cm deep
- Elements are set and tamped with earth at the edges
- fill in a layer of gravel
- fill with soil according to the different areas or simply fill with herb soil, depending on needs and size of the herb snail
- Let the soil sink by watering or raining, then plant
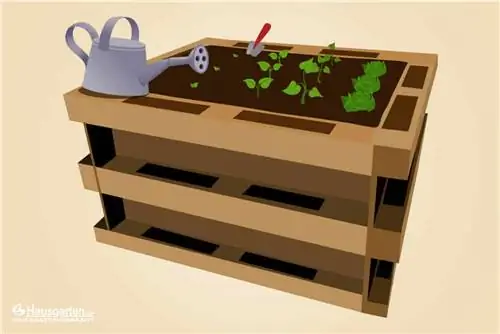
You can also easily build a herb snail out of wooden planks yourself. In principle, you proceed as in the instructions for the herb snail with a dry stone wall. Please note:
- The wooden planks of different lengths are anchored in the earth in a spiral shape and as the length increases from the outside to the inside.
- The planks should slope slightly towards the center
- from the inside, if the planks are filled with soil, they should first be covered with foil
- do not use chemically treated wooden boards
Conclusion
No matter whether you choose a small, economical version or a generous herb spiral system: it is a benefit for the kitchen and garden. The layering principle results in a higher harvest yield than from a bed at ground level. In addition, with this type of herb cultivation you can provide the herbs with their individually optimal habitat. A mini pond fits perfectly into the overall design. However, if you shy away from the additional work, a herb snail also works without a pond.

