- Author admin [email protected].
- Public 2023-12-17 03:39.
- Last modified 2025-01-24 12:45.
Once the aspects of professional orchid care have become self-evident, the hobby gardener is attracted by the challenge of breeding additional specimens on his own. The uncomplicated vegetative propagation produces young plants that resemble their mother plant in all attributes. In addition, the method scores with flowering results within a short time because it is based on the use of reproductive plant components. The following instructions explain in a practical way how to propagate orchids through cuttings and seedlings.
Instructions for propagation with offshoots
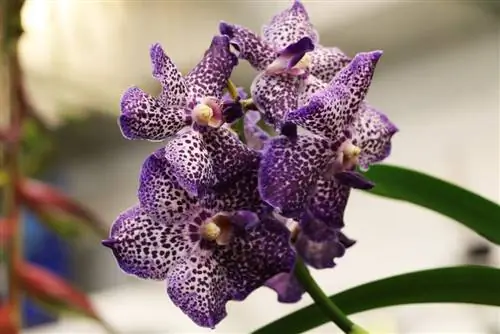
Some of the noblest representatives within the multi-faceted orchid family are recommended for propagation with offshoots in the form of head cuttings. This circumstance is based on monopdialic growth. Orchid gardeners use this term to define the development of a single shoot that is richly foliated at the base and crowned with a racemose inflorescence. A famous genus with this attribute is the enchanting Vanda orchid with its magnificent species and hybrids. With a little luck, small aerial roots will sprout from the leaf axils or directly from the trunk, whereupon a delicate shoot will develop. If you give the side shoot your special attention for a few weeks, you will have a vital head cutting - an invaluable gem for every orchid lover. Follow these steps:
- Promote the growth of small aerial roots by covering them in moist sphagnum
- Keep this moss pack constantly slightly moist with lime-free water
- If the cutting has reached a height of 20 centimeters or more, cut it off with a sharp blade
- Fill a transparent pot with orchid substrate to plant the cutting 5-6 centimeters deep
- Water sparingly in a partially shaded, warm window seat
This form of propagation also acts as rejuvenation when a single sprout is thriving and has become too long. In this case, cut off the end of the shoot with a length of 35-40 centimeters. The more aerial roots there are above the interface, the more successful the process is. Plant this head cutting in a mixture of substrate and sphagnum. The orchid trimmed in this way sprouts again within a short time, so that a compact habit is restored.
Tip:
Meticulously disinfected, freshly sharpened tools are used for all pruning work on orchids. Each tissue wound is treated with pure charcoal powder to prevent infection.
Kindel
One of the leading orchid genera not only scores points with its uncomplicated care, but also produces almost fully developed daughter plants. We're talking about Phalaenopsis, known as the moth orchid. Other popular genera also achieve this botanical masterpiece, such as the graceful, terrestrial Calanthe or the profusely flowering, epiphytic Epidendrum. If small, leafy shoots thrive on the flower stems or in the area of the bulbs, your orchid will give you a Kindel or Keiki. Give the tiny plant several months to develop long roots and at least 2 leaves on the mother plant. Then the mini orchid is mature enough to be used for propagation. The right time can be visually recognized by a yellow discoloration of the connection between the child and the mother plant. This is how it works:
- Separate the daughter plant with a knife or razor blade
- Planting in special pine soil or a mix of peat, Osmunda fibers, expanded clay and vermiculite
- Put a transparent, perforated hood over the container
- Ideally, a heated mini greenhouse is available
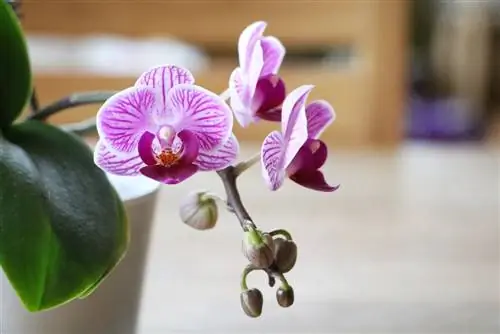
During the following 5-6 weeks, water your child sparingly in order to encourage increased root growth. As a result, care for the young orchid like an adult specimen.
Tip:
To promote the growth of children on an orchid, specialist retailers offer Keiki paste. This is a hormone preparation that is applied to sleeping eyes in order to encourage the growth of a daughter plant.
Propagation in node culture
Magnificent orchids such as Dendrobium Phalaenopsis or Phajus tankervilleae produce countless flowers along their shoot axis. When a young specimen sprouts, there are several leaf nodes on it, known in technical language as nodes. These shoots have the potential to transform into an orchid in their own right. The following instructions show how to do it:
- Cut off a leafless shoot with at least two eyes
- Fill a growing pot with peat sand, sphagnum or commercial growing soil
- Place the cutting horizontally on the substrate, press just a little and water
- Put a plastic bag over it and put it in a partially shaded, warm window
At a constant 23 to 25 degrees Celsius, keep the potting soil moist and ventilate the cover daily. From the sleeping eyes, small shoots grow upwards and delicate roots grow downwards. Once they have reached a length of several centimeters, they are repotted into classic orchid substrate.
Division
If neither offshoots nor children are suitable for propagation, plans for offspring are far from being shelved. A magnificent orchid with 8 bulbs and more is ideal for division. How to approach the project:
- Cut the rhizome in the pot about 4 weeks before division
- Each section has at least 3 bulbs and 2 shoots
- Once the cuts have healed, the orchid is potted out
Now plant each segment in its own pot, filled with special substrate for young plants. There is no reason to worry if the orchids are a little slow to bloom at first. After a period of acclimatization, the flowers develop even more luxuriantly.
Care tips for orchids after propagation
When cuttings, children and offshoots sprout again, there is great joy. In order for the newly awakened plant life to become well established, various aspects of caring for young orchids come into focus. The following overview should serve as a checklist:
Location
- Bright location, without direct sunlight during midday
- Overday temperatures of 19 to 25 degrees Celsius
- Not below 15 degrees Celsius at night
While the popular Phalaenopsis copes very well with the normal indoor climate, other orchids require increased humidity. In this case, humidifiers, an indoor fountain or bowls filled with water serve as a good solution.
Pouring
- All orchids prefer room temperature, low-lime water
- Treat yourself to an immersion bath once a week
- Alternatively, water regularly or spray with soft water
Regardless of the unmanageable variety of orchids, they all prefer a substrate that is alternately moist. The tropical beauties don't want to be confronted with waterlogging or extreme drought.
Fertilize
- Fertilize every 4 to 6 weeks during the growing season
- Use a special orchid fertilizer in low concentration
- Alternatively administer fertilizer sticks
- Never apply liquid fertilizer to dried substrate
Avoid using a classic flower fertilizer. The s alt concentration here is harmful to orchids. The roots suffer irreparable burns.
Substrate
- Use extra fine crumbly pine soil for young orchids
- Crush the pine bark with your hands so that the tiny roots gain a foothold
- Adding pure charcoal reduces the risk of rot when wet
- Moist sphagnum provides additional stability in the first few months
It is recommended to sterilize any substrate before use. This is easily done in a fireproof container in the oven at 150 degrees within 30 minutes or at 800 watts in the microwave within 10 minutes.
Cutting
- Each type of orchid is cut individually
- Basically only cut wilted and withered plant parts
- Cut off excess bulbs without leaves after flowering
- Only cut aerial roots when there is no life left
- Do not remove leaves until they are completely wilted
Conclusion
If the professional care of orchids has become second nature, propagating them yourself has an irresistible appeal. Don't dream any longer of successfully breeding your noble flower beauties, because following these instructions the plan will succeed. Vegetative propagation is highly recommended, as this provides you with reproductive plant parts from which an exact copy of a mother plant is created. In contrast, generative propagation by sowing proves to be very time-consuming, as you can only look forward to the first flowers after 8 to 10 years at the earliest. However, with a little luck, propagating orchids through cuttings and children will be rewarded with fresh flowers after just one year. If you are not granted a cutting or keiki, division is an equally uncomplicated alternative.

