- Author admin caroline@plants-knowledge.com.
- Public 2023-12-17 03:39.
- Last modified 2025-06-01 06:48.
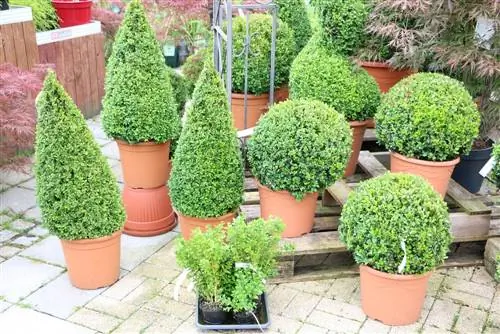
Boxwood topiaries and hedges should be trimmed twice a year so that they retain their shape and grow nicely. There is a basic distinction between a rough cut and a fine cut. With a rough cut, the wood can be shortened significantly, for example to rejuvenate an old hedge. This cut takes place at the beginning of the growth phase. The fine cut only serves to maintain the shape. Only protruding young shoots, which can be recognized by their fresh light green color, are carefully removed. This fine cut can be done several times a year, but at the latest in early autumn.
Right time to cut
The last fine cut of the year should be made by mid-September at the latest so that the boxwood still has enough time to prepare for winter. The weather conditions at the time of cutting are also very important. It is best to prune when the weather is slightly cloudy but there is no precipitation, as this reduces the risk of the leaves burning in the blazing sun and the plant losing too much juice.
- never cut in direct sunlight or heat
- Overcast or cloudy skies are ideal
- alternatively cut in the evening
- rain-free day
Cutting tool
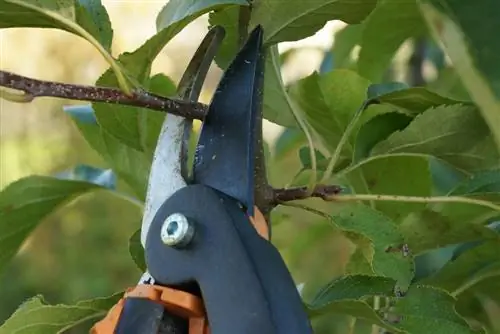
Always choose a good quality cutting tool when pruning the tree. The boxwood tolerates smooth cuts better than bruising on branches and leaves. These not only look unsightly, they also offer entry openings for fungi, viruses and bacteria. For the same reason, the Buxus should not be cut in rain or cold, damp weather.
- only use very sharp and clean cutting tools
- Leaves and branches must not be crushed
- Curves can be better processed with short scissors
- shorten straight surfaces with long scissors
- with a long blade it is easier to cut straight lines
- Tools: broadband scissors, all-purpose secateurs, cordless scissors
Tip:
There are also special boxwood shears. However, they are only worth purchasing if there are several trees in the garden.
How much is cut?
The basic rule is: Do not cut into the wood from the previous year in autumn, but only shorten the young, light green annual shoots. If it is a larger plant that has already reached its final shape and size, all new shoots are cut off. In all cases in which the boxwood is still to grow, about one to two centimeters of the new shoots should remain. The more often the boxwood is cut, the more densely it branches inside and the plant becomes denser and more compact.
Preparation and important rules
How often a boxwood needs to be cut depends on its use (topiary, hedge, etc.) and the variety. If you don't want to give your Buxus a special shape, you should still cut back its shoots once a year. This is the only way the foliage will become denser. In autumn, cutting should not be done too late, otherwise the plant could suffer frost damage.
Check for damage
Particularly in the cold season, fungi and other pathogens easily penetrate the boxwood through injuries. Before the actual fine pruning begins in autumn, the he alth of the boxwood should first be checked. Sick and dead shoots must be removed before winter.
- Extract branches of topiary trees very carefully when inspecting them
- remove dried branches with secateurs
- cut diseased shoots back to he althy wood
Tip:
Freshly planted boxwoods must not be cut in the first year. They have to grow in well first.
Important rules for fine cutting
If the first cut of the young shoots was made in April or May, the boxwood is shaped again towards the end of summer. If you don't value an accurate shape of the boxwood, you can only easily cut around half of the young shoots. This is less work and there is no risk of accidentally destroying the shape or cutting into the old wood. If you want to be in perfect shape all year round, you have to take a little more time. Please note:
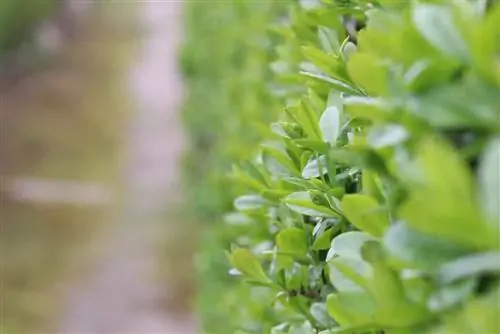
- only cut the fresh, light green shoots
- never cut into the woody shoots from the previous year (dark green foliage)
- only remove protruding young shoots
- better to cut too little than too much
Tip:
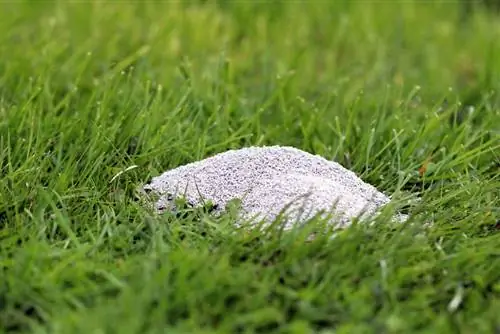
Fertilization with patent potash should also be carried out at the same time. The potassium fertilizer promotes the woodiness of the shoots and thus their frost hardiness.
Cutting boxwood hedges - step by step
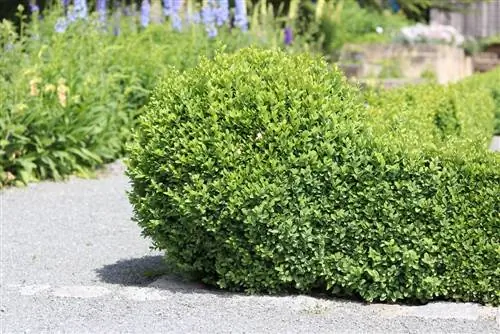
Nothing beats a well-maintained boxwood hedge, regardless of whether it is used as a bed border or even as a privacy screen. The classic boxwood hedge should be one thing above all: straight! In order to injure the leaves as little as possible and produce smooth cuts, sharp, long hand scissors are best, even if cutting with them means a lot of work.
The easiest way to trim a boxwood hedge is to use electric or motorized hedge trimmers with narrow blades. However, with this type of scissors there is always the risk of the branches and leaves being crushed or torn. Therefore only very sharp blades may be used. Since the boxwood hedge grows very densely, you can see small bumps and crooked cuts immediately. Therefore, it is advisable to put a lot of care into the cut.
Step 1: Determine the shape and cutting depth
If you don't have a steady hand or a good sense of proportion, you should use sticks or ropes to draw guidelines that you can use as a guide when cutting. This is particularly important for very long or high hedges, as pure eyesight is not enough to see the entire length of the hedge.
- Stick wooden sticks or other sticks into the ground at the end of the hedge
- Attach the cord at the desired height
- check with a spirit level
Step 2: Precut
Boxwood hedges are easier to trim if they have been lightly sprayed with water from the garden hose beforehand. The cut always starts in the lower area, so that the cutting waste falls downwards and does not remain on the hedge.
- always start at the bottom and work upwards
- cut with long, sweeping movements (for electric hedge trimmers)
- If you cut by hand, you should use scissors that are as long as possible
- the shorter the cuts, the greater the risk of unevenness
- always cut over the entire cutting length of the scissors
- It's better to cut less in several layers than to cut too deep once
- If thicker branches are in the way, shorten them with rose shears or pruning shears
- Remove leftover cuttings regularly from the hedge
Step 3: Clean tool and check cutting surface
As the cut progresses, leaves usually get stuck between the teeth of the electric hedge trimmer. Leaf juice often comes out, which sticks the knives together and makes them harder to cut. When cleaning the scissors, you can check from a distance whether the cutting surface looks straight.
- Clean the cutting tool from time to time
- It's best to provide a bucket of water and a sponge
- Check the cut surfaces occasionally with a long spirit level
- alternatively use a long wooden board or a strip
Step 4: Recut
If unevenness is still visible during the inspection, the affected areas must be corrected again. When using electric hedge trimmers, the long blade should be moved back and forth loosely over the unevenness. With each movement, only a minimal layer is removed until the surface appears flat.
Cutting boxwood balls - step by step
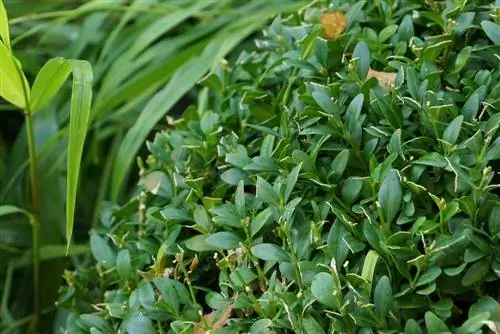
If the boxwood already has a nice, round shape, the annual shoots are cut once or twice a year, depending on the variety. These can be easily recognized by their much lighter green color. If you want the ball to increase in size, leave a few millimeters of these young shoots. Especially with the spherical shape, a lot of care and caution is required when cutting so as not to accidentally completely destroy the shape. If you don't feel comfortable making a freehand cut, you can simply use a purchased or self-made template.
Step 1: Determine cutting depth
For inexperienced hobby gardeners, the easiest thing is to first get an overview of how deep the cut can actually be. To do this, simply bend a few fresh branches to the side and cut them back just before the dark green leaves with smaller scissors (e.g. rose scissors). It is enough if a few millimeters of light green foliage remain. If you want the ball to be even larger, leave 1 cm or 2 cm of the fresh shoots, for example. It shouldn't be more than that, otherwise the boxwood won't be bushy enough. To make these landmarks easier to see, they should be at least 5 x 5 cm. Five of these markings are placed on the ball:
- up at the highest point
- right and left exactly in the middle of the page
- center front and back
Step 2: Horizontal and Vertical Orientation Lines
Once you have gotten a rough overview of how deep you can cut, you can now cut circular lines all around. For very soft shoots, this can be done wonderfully with a sheep shearing machine, but can also be done with normal, medium-length secateurs. Important: The tool must be very sharp.
- work carefully from landmark to landmark
- If necessary, work with an additional template (semicircle)
- first cut out a horizontal line (like the equator line on the globe) all around
- only make short cuts
- with long cuts the curve is lost
- It's better to cut a little bit several times and shorten the length in layers
- every now and then knock down the cut shoots
- then draw four vertical lines at equal distances from bottom to top
- the lines meet at the highest point in the middle
Step 3: Shorten the remaining areas
The most difficult part has already been done and all that remains is to make the remaining surfaces the same length.
- always cut from bottom to top
- Remove cuttings from the ball regularly
- experienced gardeners can prune freehand
- For everyone else, a stencil is recommended
- if necessary, spread out a branch again and again and pay attention to the height of the light green leaves
- It's better to cut less several times than a lot once
- If the cutting tool is sticky or full of adherent leaves, it must be cleaned in the meantime with a sponge and water
Tip:
Specialist retailers offer wire frames in various sizes that remain on the plant all year round and provide a wonderful cutting aid. You can also make stencils in the shape of a semicircle from thick cardboard.
Young plants
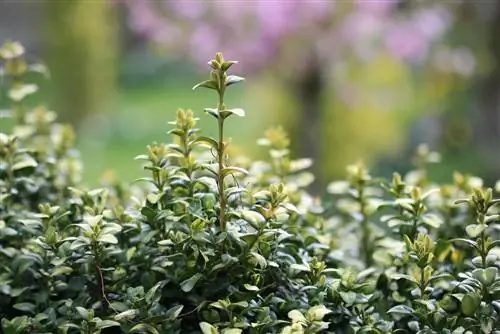
Freshly planted boxwoods are not cut at all in the first year. They must first grow in vigorously. The first cut will not take place until next spring. From the second year onwards, a form can be slowly built up several times a year. At first it is better to just specify the rough growth habit and rather ensure that the plant branches more strongly - especially in the lower area. Young plants may only be cut in autumn if the shoots are processed individually with rose scissors and the leaves remain uninjured.
- Do not cut freshly planted boxwoods until the second year
- use rose scissors when pruning in autumn
- it's just a matter of taking out individual, long shoots
- shorten all shoots that protrude strongly from the boxwood
- always carefully cut the shoot itself and not the leaves
- shorten the shoots more in areas that are still bare (holes)
- these branches need to be forced to branch very early on
- shorten every new shoot over 3 cm long to half
Tip:
The most common beginner's mistake is to simply let the lower shoots grow so that they quickly become long. The result: The branches don't branch.
Conclusion
Since the actual shape pruning of the boxwood is done in spring, the fine pruning in autumn is no longer as much work. The main thing to note is that cutting should be done by mid-September at the latest and only the new shoots (recognizable by their light green color) may be shortened. It is not allowed to cut into old wood before winter, otherwise the boxwood is susceptible to diseases.

