- Author admin [email protected].
- Public 2023-12-17 03:39.
- Last modified 2025-06-01 06:48.
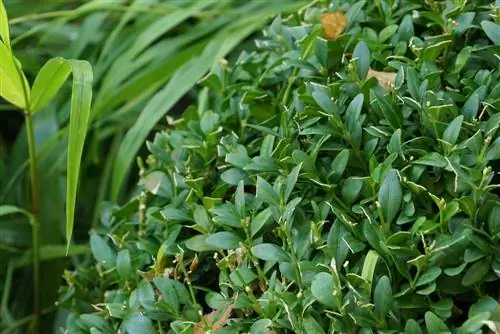
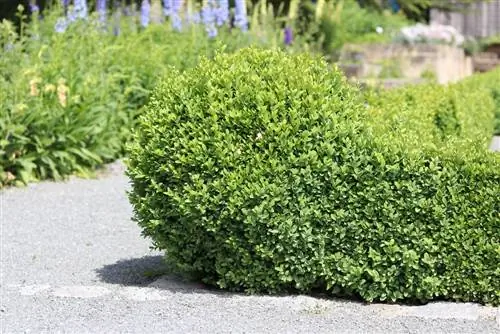
Its changeable shape and densely growing, juicy green leaves make the Bux tree an attractive eye-catcher. However, even experienced hobby gardeners with green fingers often find it difficult to achieve the desired shape or maintain it after purchase. With the right knowledge and the right timing, it can be quite easy to trim the Bux tree correctly. The following instructions will help even beginners in plant care achieve convincing success.
Forming
If the Bux has not yet achieved the desired basic shape, a rough shape cut is required first. Whether ball, cone or heart - without the right base, all further design attempts are in vain.
For this rough cut, scissors are used before the first shoots of the year. Best in early March. All shoots that get in the way of the shape are removed. If the Buxbaum still lacks the necessary mass in some places, i.e. if there are holes, this is not a problem. These will be filled up later with the right approach. An initially “plucked” appearance is completely normal.
The early timing of the rough cut is crucial. If the plant has already sprouted, if it is radically shortened at least in places, an unnecessary amount of leaf mass will be lost as a result of the measure. The Bux is weakened and is then less able to sprout, which means that dense growth takes longer to arrive.
Tip:
Use an appropriate template when rough cutting the Buxbaum, this prevents errors and makes frequent corrections unnecessary.
Fine cut
Of course, a rough trimming alone is not enough for the Bux tree if it is cultivated as a topiary. In order to obtain accurate results, a fine-cut must be carried out at least once a year - preferably three more times. As the name suggests, this is done more gently and cuts only slightly, but all around and evenly. The first fine cut of the year is done when the young plant shoots are two to four centimeters long. The denser the growth should be, the shorter the fresh shoots should be and the faster the fine cutting must follow the rough cutting.
If you want the bux to grow in size and there are hardly any gaps, only half of each young shoot is removed. For larger holes in the mold, compact cutting is carried out first. The second and third fine cuts are carried out when the young shoots are two to four centimeters long.
This measure requires a lot of sensitivity, especially if there are still thin areas. To avoid errors, it is also recommended to work by hand and with mechanical shrub or rose shears.
Tip:
The shorter the shoots, the less leaf mass is removed and the gentler the measure is for the Bux tree.
Corrections

As the Bux tree grows throughout the entire season, individual shoots will appear again and again that dance out of line and stand out from the shape. It is advisable to immediately take out the scissors and shorten them. These corrections make it possible to achieve final and tight exterior surfaces more quickly. These measures can and should therefore be carried out all year round and as close as possible to the appearance of the noticeable sprouts.
Compression
The compaction of the Bux tree is of great importance, especially at the beginning and when the growth habit is still very loose and holey. This is the only way to close gaps as quickly as possible. Once the young shoots have reached a length of at least two centimeters, all of the fresh greenery is removed. The clear difference in leaf color makes differentiation easy. Older areas are dark, younger areas are light.
This measure stimulates growth and branching in the plant and ensures that new branches continue to grow from below. In addition, the size can be easily controlled.
Cutting with templates and aids
Whether round or tapered, it is almost impossible to cut the Bux tree into shape using only eye measurements. The common consequences are dents or even holes. In addition, the design becomes extremely time-consuming. It is therefore better to use templates and aids. For straight shapes but also cones, it is recommended to use tensioned threads or rods that serve as orientation. For the classic ball, the procedure is as follows:
- Detect the current diameter.
- Draw on the edge of a sturdy cardboard, find the middle of the line and draw a semicircle from there.
- Reduce the diameter by two to four centimeters depending on the length of the shoot and the desired type of cut. Apply this to the cardboard too.
- Cut out the smaller semicircle.
- First place the resulting template on the side and press it lightly between the outer shoots so far that the leaves reach up to the current diameter line drawn.
- Cut along the template, always paying attention to the appropriate distance.
- Gradually apply the template and cut the sides all around and then the upper part of the Buxbaum. Freehand corrections are hardly necessary.
A helper who can either hold or cut the template is ideal for this work. Alternatively, the template can be fixed to the planter or attached next to the plant.
care cut
If you want the Bux tree to grow naturally and without artificial shaping, you can avoid cutting it. However, for a denser set of leaves, one or two cuttings per year are beneficial. This is simply shortened all around.
Young shoot lengths of at least two centimeters are advisable as timing.
Cutting tool
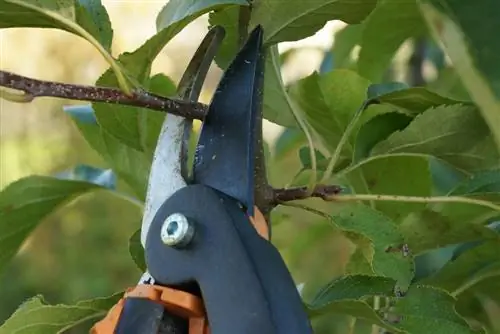
Electric hedge trimmers should not be used on the Buxbaum. These shred the leaves and thereby create a large, burn-prone and visually unappealing surface.
Mechanical versions that are freshly sharpened and cleaned are better.
Time
Early March is usually ideal for the first, coarse blend. After particularly mild winters, the Bux tree should be shaped earlier, as the measure must be carried out before the first shoots.
The first fine cut takes place about eight weeks later. Again, the timing depends on the weather conditions but also on the speed of growth. If the Bux has already sprouted two centimeters after four weeks, it can then be cut. The same is true for the second fine cut. It usually takes another eight weeks, but the decision should be made on a case-by-case basis.
If this is taken into account, cutting times are usually in March, late April or early May and June or July. A third fine cut between August and September is also possible, after which the bux should no longer be trimmed.
In addition to choosing the right growth phase, you also have to pay attention to the daily conditions. The freshly cut surfaces of the Bux tree tend to burn and subsequently turn brown. This damage remains visible until it is covered by regrowing leaves. Alternatively, it will then have to be recut, which could be detrimental to the shape. To avoid this, choose a day that is as overcast as possible when cutting the Bux tree. Under no circumstances should the measure be carried out in the blazing sun. It is also beneficial to prune in the evening and to shade the plants artificially. In this way, the cut surfaces can slowly heal and close. The risk of damage is significantly lower.
Conclusion
Small or large, round or square - the Bux tree can be pulled into numerous shapes if it is cut correctly. This can be time-consuming, especially at the beginning, but it is worth the effort with an attractively decorative look that is second to none. So caution and patience are valuable investments.

