- Author admin [email protected].
- Public 2023-12-17 03:39.
- Last modified 2025-06-01 06:48.
Hydrangeas are one of the most popular garden plants due to their lush colors and relatively undemanding character. But not only is their care uncomplicated and therefore possible even for inexperienced beginners, propagating the hydrangea through cuttings and planters is also easy with the following instructions and crowned with success in the shortest possible time.
Easy to care for, but rich in flowers and beauty - the hydrangea is one of the most grateful plants, and not just for new hobby gardeners. Therefore, it is not uncommon for the desire to propagate particularly beautiful specimens of the hydrangea to arise. With the right approach, this is possible both through cuttings and through the controlled creation of sinkers. Neither experience nor a green thumb nor much effort is required if the following instructions are followed.
Propagation by head cuttings
For propagating hydrangeas through top cuttings, the right time is crucial. The ideal time is mid-summer, around July. The procedure is then as follows:
- To propagate the hydrangea, choose shoots that are at least 5 to 15 cm long. These should have neither buds nor flowers but should have good leaves.
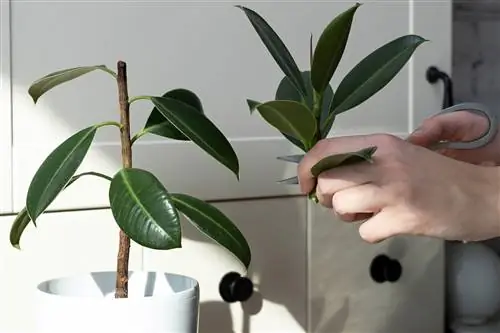
- Cutting is done with knives or scissors that should be sharp and freshly cleaned. The cutting point must be about 5 cm below a leaf node and kept at an angle.
- So that roots can form on the cuttings as quickly as possible, the leaf surface must be reduced. For this purpose, the lowest leaves are removed and particularly large leaves are cut in half.
- Afterwards, the lowest cut surfaces are wetted with a rooting agent, which is available in liquid form or as a powder. This measure is not absolutely necessary, but it accelerates root growth.
- The hydrangea cuttings prepared in this way are used in growing or sowing soil. To do this, depending on their length, they are inserted at least five centimeters deep into the substrate or so that only about half of the shoot is visible above the ground.
- The soil is completely moistened and the planter can either be placed in a greenhouse or covered with transparent film.
- The location should be bright but not exposed to blazing sun. In addition, temperatures should be between 18 and 26 °C.
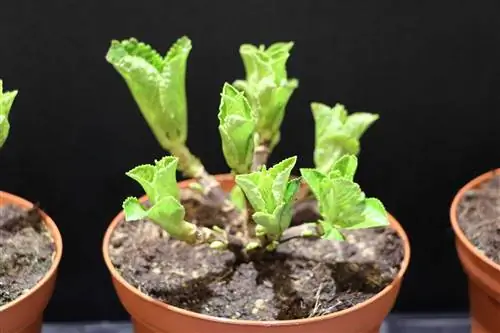
In the first four weeks, the substrate must be kept moist at all times, but must not be wet. To reduce the risk of mold formation, the cover should be removed and ventilated for half an hour to an hour every day. There are two ways to determine that rooting has been successful. If the hydrangea cutting produces new shoots, roots are present. If there is resistance when the cuttings are pulled lightly, they are also connected to the substrate by roots. Of course it is gentler to wait for new shoots.
If roots are present, the cover can be removed. The substrate then no longer needs to be kept consistently moist. However, these changes should not occur abruptly, but rather gradually.
Tip:
Hyrtensia cuttings usually root within three to four weeks. The first checks for successful propagation should therefore only be carried out after one month at the earliest.
Cuttings in water
Rooting hydrangea cuttings in water is possible, but the risk of mold is quite high with this method of propagation. Not least because of this, the success rate when rooting cuttings in water is comparatively low. This method is therefore not recommended.
Form sinkers
The second way to propagate hydrangeas in a controlled manner is to form sinkers. To do this, individual branches that are as long and strong as possible - but still flexible - are carefully pressed onto the ground. As with the cuttings, these should have neither buds nor flowers, but should have several pairs of leaves. The following instructions will then help you propagate the hydrangea:
- The downwardly curved branch is weighted down with a stone as close as possible to the mother plant. This should be done so that the tip of the shoot extends far below the stone.
- The substrate is kept moist, but waterlogging of the soil is avoided.
- After three weeks, the stone can be lifted and the sinker, which is still connected to the mother plant, checked for newly formed roots. If no roots are visible yet, the stone is carefully placed back in the chosen location.
- If the sinker has already formed roots and remains in the ground without being weighed down, it can be separated from the mother plant. This requires a sharp and disinfected cutting tool. The cut is made between the mother plant and the freshly rooted area.
- The sinker is then carefully dug out, making sure that neither the young roots nor those of the adult hydrangea are injured.
- The sinker obtained and dug up in this way can be planted directly at the desired location in the garden or first transferred to a planter.
In the first few weeks after moving, the young hydrangea planter is kept well moist, but again it must not be left wet. If it shows new leaves, watering can be reduced slowly and gradually.
First overwintering
Whether cuttings or planters - young hydrangeas are still quite sensitive to frost in contrast to older plants. They should therefore spend their first winter cool, but not in sub-zero temperatures. Overwintering indoors therefore makes sense. A temperature of 5 but not more than 10 °C is ideal. The winter quarters can be light or dark, since the hydrangea loses all its leaves anyway, it doesn't necessarily need light.
If there is no space available for this, the hydrangeas should be propagated and planted outdoors as early as possible in the summer. This way you have enough time to prepare for the cold season. Nevertheless, winter protection should still be applied. This can consist of straw, brushwood and garden fleece. A thick layer of mulch under the young hydrangea is also useful. However, the winter protection must not seal the plant completely airtight. Foil is therefore extremely unfavorable.
If the young hydrangea is grown in a pot, it can also overwinter outdoors. However, the planter must be sufficiently large and appropriately insulated. It is advisable to place the bucket on Styrofoam plates to prevent ground frost from penetrating. In addition, blankets, mats or several layers of garden fleece are wrapped around the container and then tied together at the top. Furthermore, the bucket should be placed in a sheltered place so that it is not exposed to cold wind, sleet or the like.
Conclusion
Propagation of hydrangeas through cuttings and planters is extremely easy if a few simple rules are followed. If you pay attention to hygiene and have a little patience, you can safely do without your green thumb and instead enjoy your first successes in a very short time.
- For propagation from cuttings you need a soft, annual shoot without flowers or buds.
- The best time for this is June or July. The cut shoots are then cut into parts with 1 pair of leaves at the top and one at the bottom.
- The lower leaves are then removed completely, the upper ones can be cut in half to save space.
- The cuttings prepared in this way are best dipped briefly in special rooting powder (this promotes root growth)
- and then placed in a flower pot or a bowl with potting soil. If necessary, you can mix these with a little sand.
- It's best to have them a few centimeters deep so that they are stable. The soil must then be moistened and placed in the shade.
It is important: no direct sunlight! Otherwise heat would build up under the hood. Anyone who “builds” a kind of greenhouse around it - this can also be done using transparent film - creates a better climate. However, this film should be ventilated again and again to avoid mold. In an emergency, you can even use a preserving jar. The soil should always be kept moist.
- Once the cuttings have started to take root, you can place them individually in a pot and continue to leave them in the shade.
- A small greenhouse or a covering film is also useful for this.
- However, you should not put the tender young plants outdoors in their first winter as they are still very sensitive to cold at this stage.
- So it's better to put it in a cool, bright but frost-free place in the house. The next winter outdoors is usually one more problem.

