- Author admin [email protected].
- Public 2023-12-17 03:39.
- Last modified 2025-06-01 06:48.
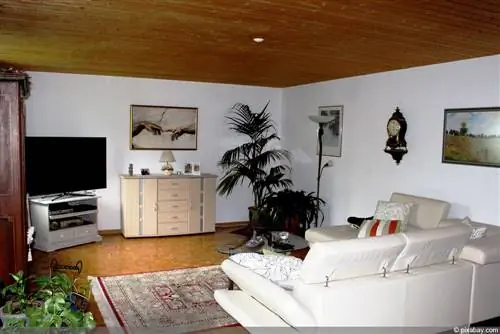
The wooden panel living trend from the 70s and 80s can still be found in countless houses and apartments. They are no longer suitable for modern interior design. In many cases, house and apartment owners only see the option of removal. This is not absolutely necessary, because with intelligent ideas, old wooden ceilings can be given a new shine or clad in a contemporary style.
Renovate panels
Before wooden ceilings are removed and/or replaced with new ceiling cladding, many hobby DIY enthusiasts decide to renovate the panels by painting and/or wallpapering. At first glance, painting seems to be the easiest option for a more modern ceiling design.
Paint
In order to paint wooden ceilings, sanding is essential. This becomes difficult at the edges as well as in the joints and grooves that are usually found between the individual panels. Even sanding is necessary because otherwise visible color differences could be seen. If dirt has settled in the wood paneling, it must be carefully removed. Nicotine in particular has the ability to shine through some colors. For this reason, proper preparatory work is essential and requires a lot of fine work and effort.
Tip:
With a glaze color you preserve the grain and can give the original wood tone a new, fresh color. Wood varnish has a strong covering effect that does not allow the grain to show through.
Advantages
- Most cost effective method
- Easy to implement
- The only materials required are sandpaper, paint/varnish, painting supplies, ladder
- Ceiling color can be selected individually
- Can be repainted at any time
- Easy to do yourself without extensive experience required
Disadvantages
- Meticulous work through small corners and edges
- High work and time expenditure
- Risk of stains/dirt showing through
- White wooden ceilings turn yellow quickly
- Usually unpleasant smell of paint for weeks (especially with varnish)
Wallpapering
Wallpapering a wooden panel is less common, but possible. Because of the overhead work, wallpapering a ceiling is generally difficult, so practice is beneficial. Before wallpapering, the wooden ceiling must be made into a smooth surface. This can be achieved by filling out grooves and furrows. As a rule, sanding/sanding is necessary afterwards, because any unevenness in the applied filler is particularly visible when the light from ceiling lamps shines on it.
Because wood absorbs a lot of moisture, a special primer is required to prevent the wallpaper paste from penetrating the wood. As a result, the wallpaper would not find a hold and would fall off. In any case, a high-performance paste must be used so that the wallpaper stays stuck for a long time, especially after painting, despite its relatively high weight.
Advantages
- Countless design options
- Can be adapted to changing furnishing styles at any time with one coat (exception: textile wallpapers)
Disadvantages
- increased risk of detachments at higher indoor humidity
- Not suitable for damp rooms, such as bathrooms
- Requires extensive preparatory work
- Not every wallpaper is suitable
- Papering experience should be available for ceiling application in order to achieve a clean result
- Almost every bump is visible
Covering panels
Removing a wooden ceiling always involves a lot of dirt and work. A simpler option is to cover wooden ceilings. There are various options for you to choose from.
Styrofoam
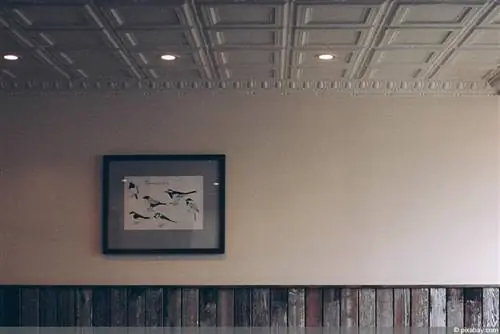
It takes little time and money to cover wooden ceilings with polystyrene panels. These are available in various decors, ranging from smooth surfaces to a plaster look and stucco decorations. They are simply attached to the wooden ceiling with a Styrofoam adhesive. If edge strips made of Styrofoam are attached, nothing can be seen of the wooden ceiling.
Advantages
- Cost-effective
- Easy installation with little work and time required
- Clean work
- Styrofoam panels can be easily cut to size
- Can be painted
- Have an additional heat-insulating effect
- Available in numerous decors
Disadvantages
- Typically coarse Styrofoam structure in which dust settles quickly
- Corners break easily when adjusting/cropping
- Without painting they quickly yellow/darken
- Dust settles in the fine bumps
- Restoration of the wooden ceiling difficult to impossible due to the glue
Piplas
One of the most common cladding methods is with so-called plasterboard. These are panels made from plasterboard. The installation of plasterboard depends on how the wooden panels are attached.
Attachment
Some panels only have tongues and grooves and are only screwed at the ends. If the panels were mounted directly on the panels, you run the risk of the wood paneling not supporting the weight and everything falling down. If you know that the wooden panels are screwed onto a substructure at sufficient intervals, you can safely attach the plasterboard directly to it. Otherwise, you have the option of removing the wooden paneling down to the substructure and then screwing the panels onto it or putting new battens on the wooden ceiling. This must be screwed into the ceiling concrete. A correspondingly long screw connection is required.
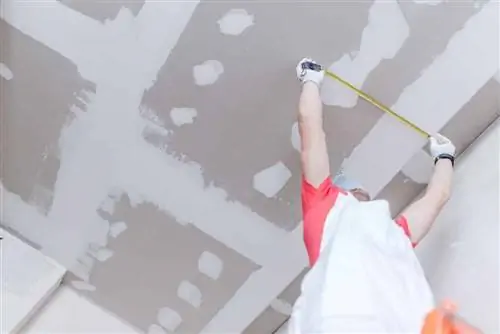
Once the plasterboard panels are attached, the panel transitions must be plastered. After drying, a primer is usually applied. Afterwards, wallpapering, plastering or painting is carried out.
Advantages
- Good alternative to normal concrete ceilings
- Creates a straight ceiling surface
- Recesses for ceiling lamps are easy and clean to cut out
- Years of durability
Disadvantages
- Assembly requires manual skills
- Installation is more complex and time-consuming
- Only serves as a surface - must be painted, plastered or wallpapered
- More material costs than painting or polystyrene cladding
Stretch ceilings
The latest trends for the design of wooden ceilings include stretch ceilings. This is a type of cloth/film that is stretched under the wood paneling. Lacquered stretch ceilings are particularly popular. They reflect light, ensure greater brightness in rooms and look very elegant. The installation is easy and they are more robust than the first glance suggests.
Attachment
For installation, special strips with a clamping function are attached/screwed to the edges of the wall. The cloth/film can then be clamped piece by piece into the strips and tensioned. For some designs, you have to use a hot air gun after installation to pull the material together and smooth it out.
Advantages
- Assembly possible for everyone - no technical experience required
- Dirty-free assembly
- Tearproof
- Opaque - completely covers wooden ceiling
- Easy care
- Durable
- Noble, modern style
Disadvantages
- At least one helper required
- Tact, clean work and patience required when inserting into the clamps
- High purchase price
- Not every lamp can be attached due to heat generation
- Overvoltage reduces the service life
Laminate cladding
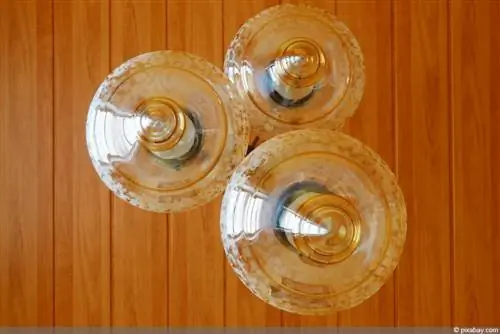
If the old wooden cladding just doesn't look nice anymore, but you don't want to do without the wood look, you can cover the ceiling with laminate.
Attachment
In principle, the installation is similar to laying on the floor. However, screws must be inserted so that a firm hold is ensured.
The only important thing is that the wooden ceiling can withstand the weight of the laminate. If the wooden panels are only attached to the substructure with tongues, grooves, staple clamps or a few screws, the same applies here as with the plasterboard walls: a new one must be placed on the wooden ceiling or the entire ceiling must be removed.
Advantages
- Laminate flooring is available inexpensively
- Stylish wood look
- Easy care
- Easy to install
- Once you get the hang of lining up the individual panels, assembly progresses quickly
Disadvantages
- No insulation ability
- Scratches cannot be removed
- Laminate is not suitable for all ceiling lighting due to its sensitivity to heat
- Have a low stability - heavy cables can cause bending in the gap
Remove wooden ceiling
In many cases, apartment and house owners spare no effort and prefer to remove old wooden ceilings to make room for something new. This makes sense if the wood shows unsightly stains due to water damage, for example, and gives off unpleasant smells. Another aspect is cleanliness. Over the years, a lot of dust and dirt builds up between the panels, which is difficult to get to. Allergy sufferers could have problems here. If you want to remove the traces left by previous tenants and previous owners, you can easily remove a wooden ceiling yourself with the right instructions. The advantage of removing the wooden ceiling is that you can then create any other ceiling design. The disadvantages, however, are the high levels of dirt and the high amount of work required.
Removing strips and panels
If strips and panels are screwed together, we recommend unscrewing the screws. Otherwise, damage could remain in the masonry and/or the substructure could be damaged/torn out. Nailed strips and panels can be easily removed with a crowbar.
Remove panels
Old wooden panels were often attached to the ceiling with special glue. This has the disadvantage that a lot of wall/ceiling plaster comes off when it is removed. If they have nails, they are usually on a substructure. Try to find a line where you pull out the nails one at a time by bending the panels. A hammer with a nail puller head can be beneficial. Depending on the future ceiling design, the substructure may remain in place. In this case, care should be taken to ensure that no damage occurs when the panels are removed.
Dismantle substructure
If the substructure is not needed, it must be removed. As a rule, it is screwed into the ceiling with dowels. A cordless screwdriver makes work easier and saves a lot of time when unscrewing all the screws.
Tip:
If the head of the screws remains in the dowel and is pulled out with pliers, the dowel can be removed immediately.
Repair ceiling
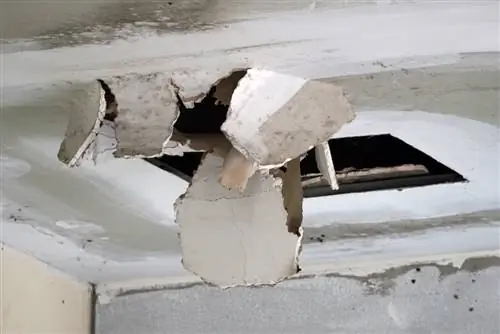
If plaster has come loose and holes in the ceiling are showing through drill holes/dowels, repairs are required to create a smooth surface and optimal subsurface conditions for the new ceiling design. The drill holes in the old panels can be easily closed with plaster or filler. If plaster crumbles, all loose areas must be removed. It's quick to use a hammer, but it makes sense to rework it with a spatula so that fewer loose plaster residues can be removed.
Then paint the ceiling with a deep primer or adhesive primer and then apply cement plaster to the affected areas with a trowel. To create a smooth surface, brush over the fresh cement with a so-called sponge board. After drying, the ceiling is ready for a new ceiling design.

