- Author admin [email protected].
- Public 2023-12-17 03:39.
- Last modified 2025-06-01 06:48.
Growing kiwis is very demanding and comparable to growing grapes. These vigorous, liana-like, perennial plants require stable climbing and climbing aids. Raising and pruning its meter-long tendrils is vital for the kiwi and is the main part of care. They are a prerequisite for a high fruit yield. Now all that matters is choosing the right variety.
The best kiwi varieties for the garden
There are different varieties of kiwi that are divided into “female”, “male” and “self-pollinating” varieties:
Female kiwi varieties
Actinidia chinensis ‘Hayward’
This kiwi variety produces large fruits weighing approximately 100 g. The peel is greenish-brown, the flesh is juicy with a delicately sour taste. It blooms a little later and can be harvested from November. The male variety 'Atlas' is suitable as a pollinator variety.
Actinidia chinensis Starella
'Starella' is a strong-growing, high-yielding and particularly frost-hardy variety with 5 - 6 cm large, aromatic fruits. Ripening time is around the end of October. It also requires a male pollinator variety.
Actinidia arguta ‘Ken’s Red’
An early ripening, high-yielding variety with striking purple 3 - 4 cm large fruits and purple flesh. The variety 'Nostino' is suitable as a pollinator.
Mini Kiwi Weiki (Actinidia arguta Weiki)
The Mini Kiwi Weiki impresses with its very good winter hardiness and from the third year onwards with walnut-sized, smooth-skinned fruits. They have a sweet, aromatic taste. Harvest time is from September to October. There are female and male plants of this variety.
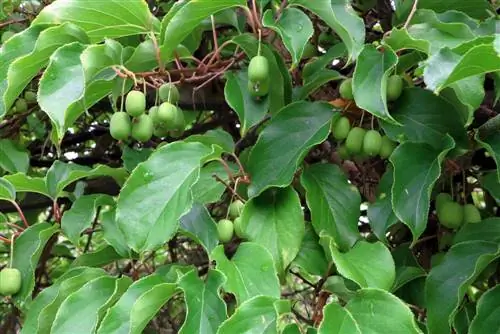
Male Kiwi Varieties
Actinidia Arguta Nostino
This variety does not produce fruit itself, but is a good pollinator variety for all smooth-skinned Arguta varieties. In principle, a single male specimen is sufficient as a pollinator for up to ten female plants.
Actinidia chinensis Matua
'Matua' is a universally applicable pollinator variety up to 100 cm high for all Actinidia chinensis varieties. It blooms early and therefore fertilizes early-flowering varieties particularly well.
Actinidia chinensis ‘Atlas’
This male plant, up to 100 cm high, does not bear any fruit itself. It can be used very well as a pollinator variety for the female 'Hayward'.
Self-pollinated kiwi varieties
Actinidia chinensis ‘Solissimo’ ‘Renact’
Like all self-fertile varieties, this one is significantly smaller than others, growing up to 100 cm tall. The fruits are slightly smaller but have an excellent spicy taste. Harvest is from the end of October to the beginning of November.
Actinidia chinensis ‘Jennny’
The fruits of this variety are large and bulbous to cylindrical with initially firm and refreshingly sweet flesh. They are ready to pick from the end of October to mid-November. High yields can only be expected after 5 - 6 years at the earliest.
Actinidia arguta ‘Issai’
The green, smooth-skinned fruits of this variety are the size of a gooseberry and are very sweet. They only become truly productive after about 2 - 3 years at the earliest.
Tip:
Self-fertile varieties generally do not require a pollinator. Nevertheless, an additional variety could significantly increase their fruit yield.
Location requirements
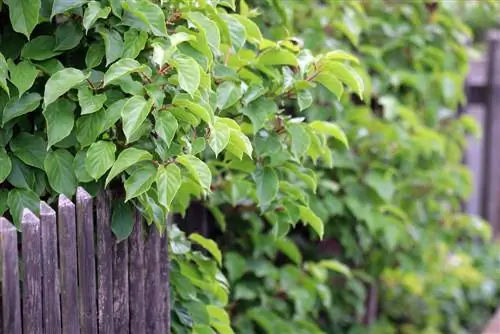
The right location is of central importance for the fruit ripening of the kiwi. They thrive best in warm, bright and wind-protected locations. Fruits, leaves and young shoots of the kiwi are very sensitive to wind. The tender young shoots required for fruit formation can easily break off in strong winds. For example, planting fast-growing wild trees such as dogwood, whitebeam, hawthorn or black elderberry can provide protection. A neighborhood with trees that require a lot of water should be avoided, as they would be direct competition for the kiwi.
Soil texture
Kiwi plants can climb up to 500 cm in height and 800 cm in width. To do this, they need loose, nutrient-rich, humus-rich and lime-poor soil. It should contain at least a third compost. Soils with a pH value in the slightly acidic range are particularly suitable, while soils rich in lime are not tolerated. They can be improved by mixing in some rhododendron soil or peat. If the soil is poor, adding compost is a good idea. Light and very sandy soils as well as heavy clay soils are completely unsuitable.
Plants
The best planting time is from mid-May to August, when there is no longer any risk of late frosts. At least one male and one female variety must always be planted, with one male being sufficient for several females. An additional male plant can also increase the yields of self-fertile ones.
Soil preparation and planting
Planting should be preceded by good soil preparation, ideally with green manure with deep-rooted green manure plants such as alfalfa, field beans, oil radish or manure lupine. In addition, stubborn weeds such as couch grass, morning glories or thistles should be carefully removed. Now it's time to plant.
- First, water the root ball thoroughly
- During this, dig a planting hole measuring approx. 50 x 50 cm
- Loosen the soil in the planting hole well
- Mix excavated material with compost or horn shavings
- Depending on the variety, maintain planting distances of 150 - 300 cm
- Insert the plant as deep as it was previously in the pot
- Fill with excavated earth and tamp it down
- Last step is thorough watering
Kiwis are strong climbing plants that cannot do without an appropriate trellis. This should be very stable in order to be able to bear the weight when the fruit is full. Ideally, the respective scaffolding should be installed when planting.
Tip:
Horn shavings and compost should never be added directly to the planting hole. Since the s alt content of these fertilizers is difficult to estimate, in the worst case the root could be burned.
Pouring
The water requirement of these plants is very high for fruit development and due to the high leaf mass. Consequently, they need to be watered regularly in summer, especially from July to September. Otherwise they could stop fruit growth and the fruit itself would lose its aroma. It is best to water thoroughly once a week so that the soil is well moistened to a depth of 30 - 40 cm. Due to the kiwi's sensitivity to limescale, it should only be watered with rainwater.
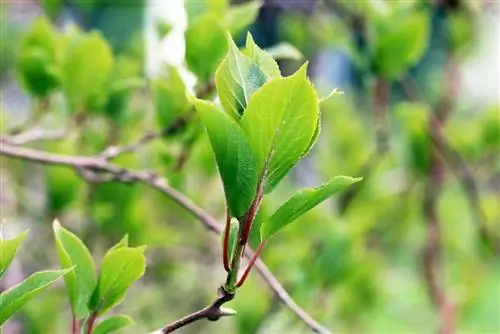
Fertilize
In the first two years after planting, fertilization can usually be dispensed with, provided the soil is humus and nutrient-rich and the pH value is between 4.5 and 5.5. From the third year onwards you can start fertilizing.
- Fertilize three times a year if possible
- Organic and mineral fertilizers are suitable
- The first time in early spring with the leaves emerging
- One more time to bloom in summer
- The last time for fruiting in August
- When fruit formation begins, nutrient requirements are particularly high
- From the third year onwards, additional administration of horn shavings or well-rotted stable manure is advisable
Tip:
When using mineral fertilizers, you should always dose carefully, as over-fertilization can occur very quickly.
Wintering
While some varieties are well hardy, others only tolerate limited frost. The varieties of Actinidia arguta have the best winter hardiness. Varieties of Actinidia chinensis, on the other hand, have limited winter hardiness. Here the root area should be protected with leaves, brushwood or a layer of mulch. What both species and their new growth react very sensitively to is late frosts.
Specimens in pots are particularly sensitive. That's why you should choose hardy and slow-growing varieties for container storage. Young plants should generally overwinter in a frost-free area. For older people, the root area in particular must be protected by wrapping the bucket with fleece, jute or bubble wrap, for example, and filling the hollow spaces inside with leaves.
Cutting
Plant cutting
Due to its twining and climbing growth, the kiwi is grown on trellises, which should preferably have a north-south orientation. In order to build up or train the plant accordingly, the strongest shoot is selected in the year of planting and shortened to 2-3 eyes in order to promote side branching. All other shoots are removed. The remaining main shoot is tied up again and again in the summer. Care must be taken to ensure that it does not wind around the scaffolding. Possible side shoots are shortened to 6 - 8 leaves, but are retained as trunk reinforcement in order to promote the growth in thickness of the main shoot.
Education cut in the 2nd year
- Remove the side shoots on the trunk in February/March
- Shorten the main trunk a little
- Use the shoots emerging from the two upper buds for scaffolding
- To do this, tie these shoots horizontally to the scaffolding on both sides
- Once they have reached the desired length, trim the shoots
- Tie side shoots from the same year to deeper side trellis bars
- Short these shoots around the 8th - 10th leaf
- Completely remove all shoots coming from the base or trunk
Tip:
You should not blend later than mid-March, because then the sap flow begins. There would be a significant leakage of juice from the cuts, which even wound closure agents cannot stop so easily.
Education and maintenance section in the 3rd and 4th years
In February/March of the 3rd year, after the last heavy frosts, existing side shoots are cut back to 3 - 5 eyes. On the other hand, side shoots that come from the leading branches are tied to lower-lying side struts of the framework and shortened again to the 8th or 10th leaf. In summer, these exact shoots must be cut back again to 6 - 8 leaves after an outer fruit.
In February/March of the 4th year, the fruit shoots are shortened to 2 eyes after the last fruit set. New fruit shoots develop from these two eyes. All others are shortened to 3 - 5 eyes. All resulting new shoots are tied to the trellis and cut back to 6 - 8 leaves after an outer fruit. Strongly branched fruit branches should be completely removed after 3 - 4 years and replaced with new young shoots.
Propagate
Sowing
Seeds for sowing can be bought or taken from fully ripe fruits. You also need a suitable sowing container and potting soil. For seeds from fresh fruits, the outer, slimy layer must first be removed. This works quite well with a little kitchen paper or water. If this layer is not removed, it could hinder the germination process.
- First fill the sowing container with potting soil
- Distribute seeds evenly on the substrate
- Do not cover with soil, light germinator
- Moisten the substrate and keep it evenly moist until germination
- Cover with translucent film or glass
- Ventilate the film regularly
- Place the cultivation container in a warm, bright place without direct sunlight
- First seedlings appear after 2 - 3 weeks
- From a size of 3 - 5 cm, separate into small pots
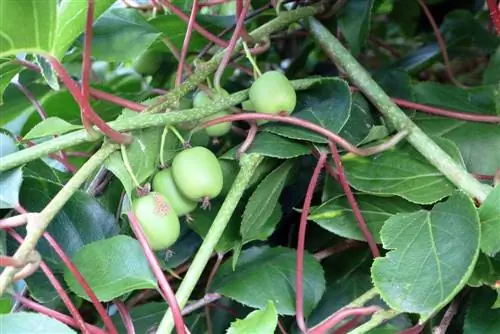
If possible, you should also separate them in potting soil, as this particularly promotes root growth and less the formation of leaf mass. From a size of approx. 100 cm, the kiwi plants can be transplanted into the garden. However, it can take ten or more years for plants grown from seeds to bloom for the first time.
Cuttings
Cuttings for propagation are best cut in early spring before new growth appears. They should be 10 - 15 cm long and about as thick as a pencil. All but the topmost leaves are removed and the cuttings are placed in small pots with lean potting soil or a sand-peat mixture. Then moisten the substrate and place the pots in a shady and wind-protected place. If new shoots appear on the cuttings, rooting has been successful. As soon as the pots are well rooted, the young plants can be transplanted to their final location.
Lowers
Another and probably easiest way to propagate the kiwi is via planters. To do this, choose a lower, young, well-flexible shoot. Then you carefully score the bark in one place, place this part of the shoot flat on the ground and cover it with soil so that only the tip of the shoot sticks out of the ground. The soil is then moistened. To ensure that the sinker stays in the ground, fix it with wires or a small stone. Once the sinker has formed roots, it can be separated from the mother plant and planted separately.

