- Author admin [email protected].
- Public 2023-12-17 03:39.
- Last modified 2025-01-24 12:45.
A check valve can ensure the function of the pump even under difficult circumstances - for example when there are large differences in height - and is of crucial importance. We explain here how it works in the garden pump.
How it works
The function of a check valve can be compared to a heart valve. Your task can be described in three simple steps.
These are:
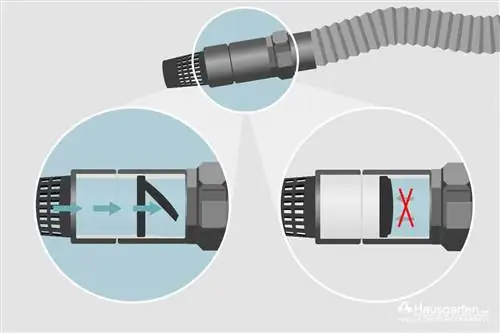
- The water sucked in by the garden pump is passed through the valve. The suction opens the flap and the water can flow through.
- If the suction decreases, the flap in the valve closes again. This prevents the water from the upper part of the pipe from flowing back behind the check valve.
- Due to the closure by the check valve, the water “stands” above the valve and it can be prevented that the pump runs empty or draws air. The pressure and water level are kept stable, which can prevent problems with the garden pump or at least reduce the risk of them.
Tip:
The check valve should be checked at least once a year when venting in order to be able to identify and correct problems at an early stage.
Position
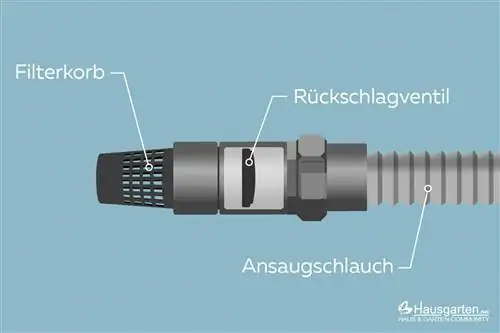
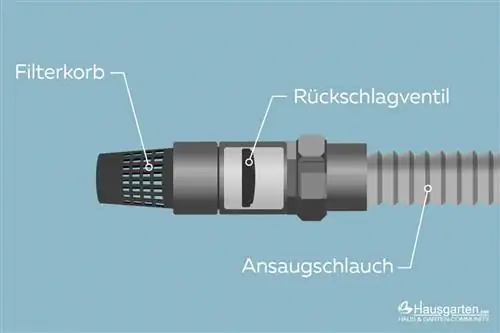
Where exactly the check valve must be positioned depends on the type of garden pump in question. The manufacturer usually indicates the exact position of the valve in the operating instructions. This is important, among other things, when the pump is being serviced and vented or the check valve needs to be replaced.
Note:
The important component can be located between the suction hose and the pump outside or inside the device. In any case, the manufacturer's instructions must be observed.
Possible defects
In order for the garden pump to do its job, it must be functional. If there is damage to the check valve, various problems can arise. Possible defects include:
Broken seal
If the seal is broken, the water can flow back despite the valve being closed. On some models the seal can be changed. This way you don't have to install a completely new valve. The effort can therefore be kept low.
Pollution
Algae, mud or other larger pieces of dirt can clog the check valve and thus hinder or even completely prevent the flow. Rinsing with clear water or manual cleaning is therefore an essential part of the annual maintenance of the garden pump.
Damaged flap
If the valve or flap is damaged, it can draw in air and prevent flow, as well as return water. As a rule, the component then has to be replaced. Whether this measure can be carried out independently or whether a professional repair is required depends on the respective model.
Checks, cleaning, changing
Before the garden pump is put into operation at the beginning of the gardening year, an inspection and preparation should be carried out.
- Cleaning by rinsing with clear water
- Use a bottle brush for heavier and stubborn dirt
- Visual and functional inspection of all components
- If necessary, replacement of seals and valves
- Bleeding the garden pump
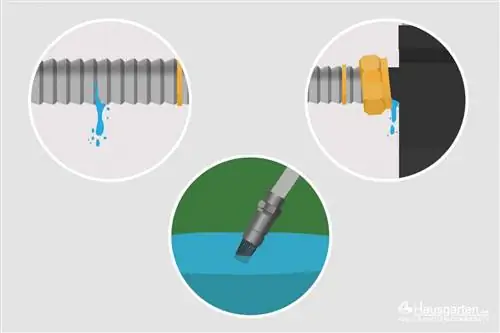
- Checking the pipes for leaks
- Remove rust using suitable means
- Check connections and tighten if necessary
- Wear work gloves for safety and protection from injuries
- Perform maintenance only with the pump switched off and at room temperature

