- Author admin [email protected].
- Public 2023-12-17 03:39.
- Last modified 2025-01-24 12:45.
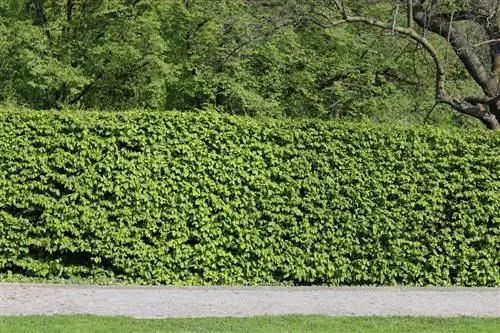
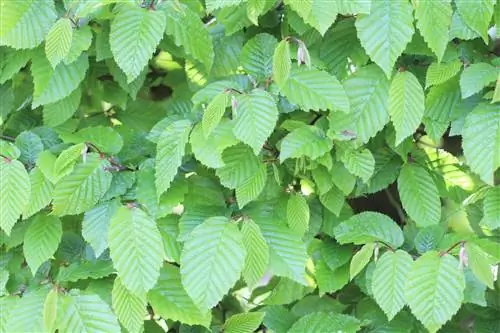
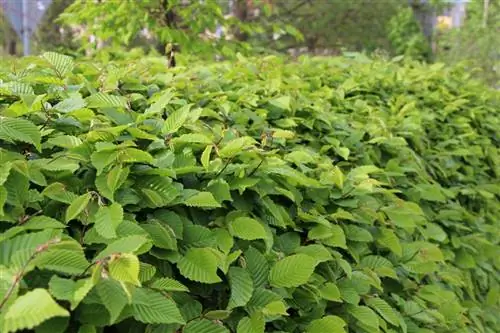
Compared to a beech hedge, the hornbeam is much more robust and easier to care for. It quickly forms compact and opaque hedges. The most important part of care is regular trimming.
Profile
- Plant family: Birch family (Betulaceae)
- Botanical name: Carpinus betulus
- German names: hornbeam, hornbeam
- Origin: Central Europe
- Growth: Small tree, wide, round crown, smooth bark
- Growth height: 15 to 25 m
- Leaves: egg-shaped
- Flowers: female flowers inconspicuous, male flowers kitten-shaped
- Flowering time: May, June
- Fruit: nuts about one centimeter long
- Lime compatibility: lime tolerant
- Toxicity: non-toxic
Location requirements
Care begins with choosing the location. The hornbeam grows in the sun, partial shade or shade as long as it receives sufficient water and nutrients. Even strong winds and air pollution cannot harm it.
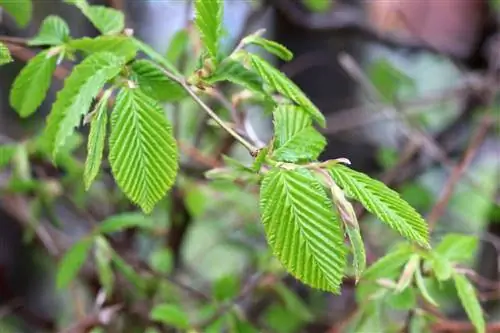
Carpinus betulus does not require a specific soil. It thrives in moderately dry to moist soils, but can also cope with wet ones. They can be sandy to clayey and acidic to alkaline. It is recommended to spread a mulch layer of compost, leaves or grass clippings. Mulch reduces evaporation while adding nutrients to the soil.
Best planting time
- Plant bare-rooted produce in spring or autumn
- Container plants all year round, provided the soil is frost-free
- Best planting time in autumn
- Soil still well moistened
- Spring partly already warm and dry
- Hornbeams grow worse
For planting outside the growing season, container plants should be preferred. Bare-rooted plants lose root mass when cut out, which makes it difficult to grow outside of the usual planting time.
The day of planting should be frost-free and no frost should be expected in the next few days.
Planting spacing
Planting spacing plays an important role in terms of opacity. Each individual plant should have enough space so as not to hinder each other's growth. The optimal planting distance is 50 cm, i.e. two plants per square meter. Distances should also be maintained from fences and walls so that the hedge can be well maintained from every side.
Tip:
The required minimum distances to neighboring properties are regulated in the respective municipal regulations.
Planting instructions
- Water hedge plants well
- Tighten the cord as a guide
- Then dig sufficiently large planting holes
- Short roots
- Do not plant hedge plants too deep
- Do not damage fiber roots
- Avoid cavities by shaking back and forth
- Mix excavated soil with compost, fill up the planting pit
- Tamp down the soil and coat it well
- On clayey soils, water again after a few hours
Tip:
If you tie the plants to supports, the newly formed roots cannot be torn off in the wind.
Watering and fertilizing
In order to optimally care for newly planted hornbeams, they must be watered regularly. Once established, this is only necessary if the drought persists. Older specimens can easily take care of themselves thanks to their long roots. Fertilization is usually only necessary in the first few years. As soon as the plants have grown well, they take care of themselves. It is usually sufficient to fertilize them in spring and, if necessary, again in summer and to supply them with ripe compost and horn shavings.
Tip:
If the hornbeam loses its leaves in autumn, you should definitely leave them on the ground. It fulfills the function of a mulch layer and a natural fertilizer.
Cutting
With the right cut at the right time, the hornbeam stays he althy for a long time and has enough strength to grow again.
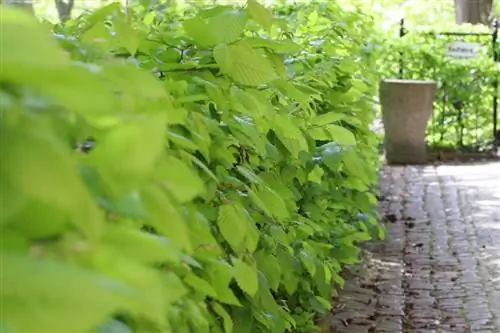
Plant cutting
So that the hornbeam hedge still has a dense green foliage even in old age, pruning plays a key role in care. The first occurs when planting.
- Pruning to promote the growth of the lower shoots
- Occurs when planted in autumn
- Tighten the cord for a straight cut
- Short the hedge by half at the top and on all sides
- Juice pressure is distributed more evenly
- Strengthening the growth of the shoots below the interfaces
- Hedge preferably cut into a trapezoid shape, wide base, narrow tip
- Cut a few millimeters above opposite pairs of leaves or buds
- Don't leave stubs behind
Education or development section
The training cut is used to gradually build up the hedge until the desired size is achieved. The aim is to slow down height growth and thereby distribute the sap pressure evenly.
- Best time between January and February
- On an overcast and frost-free day
- Temperatures not below minus five degrees
- Sprout should not have started yet
- Cut young hedge plants continuously in the first two to three years
- Short every shoot growing outwards and upwards several times a year
Tip:
If the correct cutting time has been missed, it can also be done from the end of June to the end of July if necessary.
Topiary
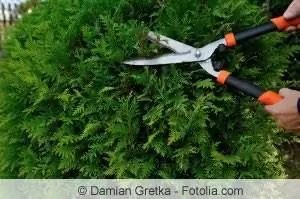
If the intended final height is almost reached, it is time for a topiary. It has a dense growth from base to tip. This cut should also be done between January and February. First, remove dead and damaged wood. Then you mark the cut profile with cords and wooden slats or finished wire mesh in the desired shape. Cutting is always done from top to bottom. Everything that sticks out of the profile is cut off. As soon as branches and shoots grow out of shape again, they need to be trimmed again.
Tip:
It is best to use an electric hedge trimmer for rough cuts and a manual secateurs for fine cuts.
care cut
The grooming cut is practically a light topiary. The best date is June 24th, St. John's Day or two weeks before or after. The cutting measures are limited to this year's growth. All shoots that are out of shape are shortened and weak, dead and annoying shoots are removed.
Tip:
Before making the first cut, you should check the plants for possible bird nests.
Rejuvenation cut
Older and senescent hedge plants tend to become bare, especially in the lower area, and produce significantly less leaf mass. A rejuvenating cut in February can help.
- First cut back one side and top of the hedge
- To a quarter of the desired height and width
- Then opposite side and flanks
- Prune back younger shoots without branches
- Leave three eyes on the shoot part
- Cut out old branches
- Cut off diseased or dried plants close to the ground
Tip:
When cutting the hornbeam hedge, the breeding times of the birds must be taken into account. To protect them, cutting measures are prohibited from March to July.
Wintering
The hornbeam hedge is absolutely winter hardy as long as it is well established. It tolerates temperatures down to minus 20 degrees, winter protection is not required. To prevent the soil from drying out, a layer of mulch can also be helpful in winter, ideally made from hornbeam leaves.
Propagate
There are several ways you can propagate the hornbeam:
Sowing
The hornbeam forms small, winged seeds, so-called nuts, which can be harvested shortly before they are fully ripe. The wings are not yet dried out and the nuts are green-yellow. If you allow them to mature, the shells will have hardened and the seeds will need to be stratified. You sow directly on the spot or in small pots with normal garden soil to protect against squirrels and mice. You cover it with soil, moisten it and place the whole thing in a shady place outside. It can take up to two years for the seeds to germinate.
Cuttings
Cuttings are cut before sprouting in spring or late summer and should be around 10-15 cm long. The lowest leaves are removed and the remaining ones are cut in half to minimize evaporation. Now put them in small pots with potting soil, place them in a shady place and keep the substrate moist.
Lowers
- First select a well-flexible, ground-level shoot
- Dig a small hollow in the ground under the shoot
- Bend branch down to the ground
- Put in the hollow in the ground
- Then cover with soil
- Tip of the shoot should stick out of the ground
- Press down the soil, fix the branch in the ground with wire
- Finally pour
- Cut off after new shoots have formed and plant separately
Diseases and pests
Even the hornbeam is not immune to everything. The following things could cause problems for her:
Mildew
Mildew appears as a white, mealy coating. Infected plant parts should be removed and the plants thinned out. To combat this, preparations based on copper or sulfur are available. As a preventive measure, you can strengthen the plants with a plant broth made from field horsetail.
Leaf spot fungus
Brown spots on the leaves and bulges can indicate an infestation by the leaf spot fungus. Affected plant parts should be cut off and discarded. If the fungus occurs repeatedly, retailers offer sprays to combat it.
Hornbeam spider mite
Mite infestation manifests itself in small spots on the leaves that enlarge and the leaves fall off. If the infestation is advanced, the leaves are covered with a fine network. It can be contained with herbal or chemical preparations.

