- Author admin [email protected].
- Public 2023-12-17 03:39.
- Last modified 2025-06-01 06:48.
Laying paving is not necessarily just a job for professionals. With the right tools, the right materials and professional instructions, even a good DIY enthusiast is able to pave their driveway, terrace or garden paths. There are just a few important points to consider.
Planning paving work
Before you can actually start paving, you should be clear about the maximum load that the future paving area should bear. In addition to the selection of paving stones or slabs, this also affects the substructure, the so-called foundation. The choice of paving stones of course also depends on the price range you want to buy and how high the load will be. It is not recommended to cover a garage entrance with ceramic tiles.
Planning also includes providing the required tools. To carry out paving work you need:
- a vibrating plate with rubber base
- a flex or wet cutting machine
- an aluminum lath or a straight wooden board
- a shovel
- a rubber mallet
- a broom.
The material order should be
- Paving stones or slabs
- the frost protection layer for the substructure
- Edge stones
- Split or gravel as bedding material
- Sand for the joints
include.
Dig foundation for paving
The excavation for the foundation depends on the nature of the soil and the load-bearing capacity of the surface coating. The material of the base layer plays another role. When it comes to the excavated area, the edge fastening must not be forgotten. For footpaths e.g. B. in the garden and terraces, an excavation of approx. 20 cm below the finished top layer is sufficient. Garage entrances should be excavated to a depth of at least 30 cm.
Filled soil, as is often found in new buildings, is just as unsuitable for paving as soil that has been soaked by rain and moisture. If necessary, the soil must be excavated deeper or compacted with a cement mixture to improve its load-bearing capacity.
Installation of the frost protection layer
The edge fastening must be installed before applying the frost protection layer. Lawn edging stones made of natural stone or concrete, large paving stones or palisades are suitable for this. The border attachment is placed in cement, which is pulled higher on the back. Each stone is tapped into the concrete layer with a rubber mallet. To get a straight line, you should stretch a mason's cord.
After the concrete of the border has hardened, the frost protection layer can then be applied. To do this, you should add gravel or gravel with a grain size of 0 to 32 mm, approx. 20 to 30 cm thick. To prevent the layer from settling later, it must be compacted with a vibrating plate. For drainage, the entire area should have a slight slope in the desired drainage direction. The substructure must also have this inclination so that water that seeps in can also drain away. This base layer must be worked on very carefully in order to prevent the base layer from slipping later on, which would result in the upper ceiling shifting and possible tripping hazards.
From the embedding layer to the joint
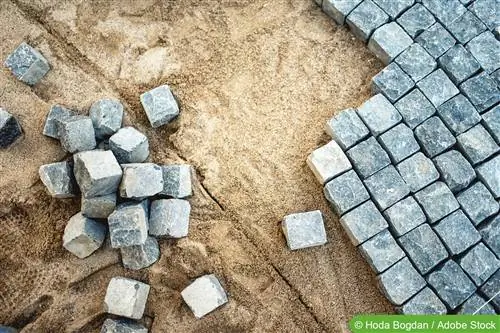
The bed for the paving is called the bedding layer. The question of the type of paving also arises for this layer. With normal interlocking paving stones, it consists at best of fine chippings. Granite heads, whether large or small, are laid in sand.
- The 3 to 4 cm thick bedding layer is roughly applied with a shovel
- and then pulled off with an aluminum lath or a straight board at the same inclination as the substructure.
- You should also remove this layer very cleanly and straight, so that laying the stones will be easier.
- After peeling off, you should no longer enter the area!
- The paving is laid with the slope of the slope, which means you have to start paving at the highest point and follow the slope.
- When paving, the joint spacing should be 2 to 3 mm and the paving stones do not have to be pressed into the bedding.
To prevent the individual stones from slipping prematurely, you should fill the resulting joints with sand after every meter laid.
When laying the paving stones, you should strictly adhere to the manufacturer's laying instructions. If they allow it, you can also incorporate a pattern of your choice. Depending on the type of installation, you may need half or cut stones at the edges. This is where the flex or wet cutting machine comes into play. When cutting the stones, please note that they must be shorter by the width of the joint!
If the area is completely covered with stones, sweep sand into the joints again with your broom. The entire area is then shaken with the vibrating plate. The rubber pad is then used here. This prevents the paving stones from getting visible damage or traces of the metal plate. The shaking usually causes the sand to slide deeper into the joints. For this reason, sand must be swept away again after shaking off.
Possible errors when paving
To create a long-lasting paving pavement, you should avoid possible mistakes:
- Appropriate excavation according to the nature of the ground and a good frost protection layer prevent the paving stones from sinking and shifting.
- The slope also needs to be right so that water that seeps in can drain away. Otherwise, in the cold season, the freezing moisture can raise the substructure and destroy the paved surface.
- The edge border must be secure in the concrete so that the frost protection layer and the bedding layer cannot slip out to the side.
- Lay the paving according to the manufacturer's instructions to create a compact surface. Grouting well means that the paving stones have a good hold.
- Shaking with the rubber mat prevents damage to the paving stones.
If you think you're a good DIYer, creating a paved area for your garage entrance or garden paths shouldn't cause you much trouble. Working carefully with the right tools and the right material will give you the desired result.
Frequently asked questions
How many paving stones do I need?
If you use the tried and tested cobblestones, you should plan around 70 to 90 stones per square meter of path. If the stones are placed very closely, up to a hundred stones may be required.
What you need to know about laying paving in brief
Working on the stones
In order to find the right paving stone, it is not always necessary to process one. Since these are natural stones, everyone is different and you can sometimes find pointed, small or triangular stones that fit in the right place. If you still have to work on a stone, you should use a pointed hammer. Gloves should also be worn to avoid injuries from splinters.
Laying paving stones
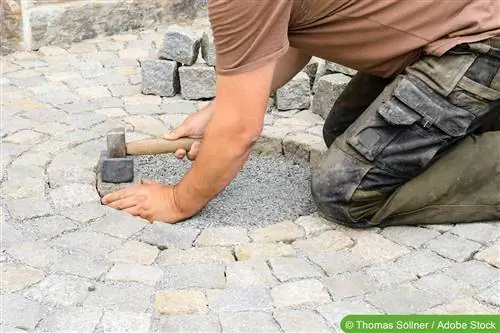
When paving, you gradually place the stones into the sand bed. Each stone is solidified with a rubber mallet. You always work downwards. You should make sure that all the stones are at the same height and that the joint width is 0.5 to 1.5 cm. Thinner joints are not necessary, but can be used. However, larger joints mean less stability for the path.
After you have covered the first meter, return to the sand path until all the joints are filled. There should still be some sand left on the pavement, as this will be washed in with water in the next step. You should be careful not to wash the sand out of the joints.
Once the sand has been eaten, we return again. Then attach the stones with a tamper. When the path is completely paved, the joints are again filled with fine sand and water. Attention: Some plasters, which are very sensitive, should be solidified with a tamper or a vibrating machine before they are coated with sand and water, otherwise sand could attack the surface of the stones or get caught in them.
Filling the joints
Different sand can be used to fill the joints, always adapted to the material of the paving stones. For concrete block coverings, simple filling sand is sufficient. Crushed sand is better for clinker paving. Crushed sand is also used for natural stone or special paving joint mortar based on synthetic resin.
Editor’s Tip
For a garden path to look good and last for many years, it is not just the paving that is important, but above all the professional substructure. If the base layer does not fit properly, the paving surface may shift. If individual paving stones stand out from the crowd, tripping hazards are inevitable. It is important that the subsoil is properly compacted, this is the only way the surface can be evenly flat.
The thickness of the gravel layer is also important. If a car were to be able to drive on the garden path, it would have to withstand more stress. A 20 cm thick layer is usually enough for a garden path that is only used occasionally. By the way, a so-called mineral mixture can be compacted better than pure gravel.
Selection of paving stones (materials)
You can choose between concrete stone, natural stone and clinker:
- Concrete blocks - are available in different colors, shapes, sizes and different surface structures. The deceptively real-looking natural stone imitations are particularly recommended. The color of the stones now also lasts, which was often not the case in the past. Concrete paving stones are available from around 8 euros per square meter, but only the very simple ones. The real stone imitations cost around 30 to 40 euros.
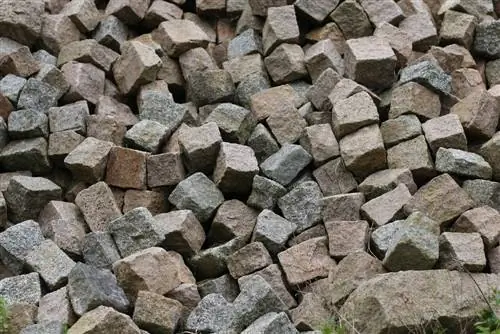
- Natural stone - also in different colors, shapes and sizes. It is a natural material, which is important to many. Prices start at around 40 euros, but can also be significantly higher.
- Bricks and clinker bricks - particularly popular in northern Germany. Bricks usually light red and open-pored, quite soft and not very frost hardy. Clinker bricks are significantly more frost-resistant because their surface does not absorb water. Clinker pavers are not the same size and cannot be laid seamlessly. The variety of shapes is also not that great. The square meter costs from 15 euros. Depending on the color and appearance, the price can be up to 80 euros.

