- Author admin caroline@plants-knowledge.com.
- Public 2023-12-17 03:39.
- Last modified 2025-01-24 12:45.
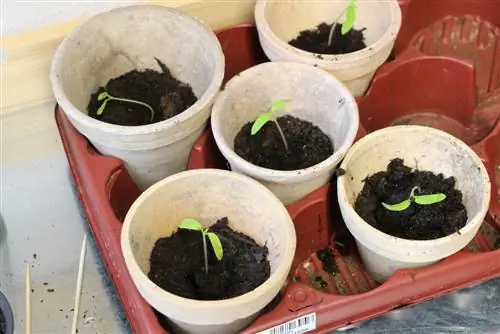
So that the cultivation of young plants from seeds is successful, special growing soil is often used. It has different properties than ordinary soil and gives the young plants the best starting conditions.
Characteristics of Prickierde
- As germ-free as possible
- free from weed seeds or components
- few nutrients
- good permeability
- finely crumbly
The small-grained soil structure makes it easier for the plants to spread their young and fine roots in the substrate. The few nutrients force the plants to develop long and strong roots.
Germfreedom guarantees that no weeds form and bacteria and fungi have no chance. Good potting soil does not mold.
Non-essential substances for potting soil
Peat is still often recommended, but should no longer be used in the garden due to the mining methods. When peat is mined, bogs are destroyed. In addition, although peat stores a lot of water, it can make the substrate very impermeable when it dries out. The same applies to any type of fiber, such as coconut fiber.
Fertilizers are not necessary as an addition as there are enough nutrients in the compost. Too much fertilizer tends to damage the growth of young plants. The fine roots could burn.
Note:
To improve the mineral composition, you can mix in rock dust.
Mushrooms in pricking soil
Unlike mold, other types of fungi can actually help young plants grow. These include so-called mycorrhizal fungi. These are soil fungi that enter into a symbiotic relationship with plants. They help plants absorb water or nutrients. Since the fungal network, even if it is not visible to the naked eye, can spread much better in the soil than the roots of plants, the plants benefit from this symbiosis, grow more vigorously and are less susceptible to pests or diseases.
Use mycorrhizal fungi
The soil improver is available to buy in stores in different versions. These include powder for sprinkling or mixing with water or granules, which also improve the soil structure. Complete fertilizer with mycorrhizal fungi as an additive is not suitable. Mycorrhizal fungi can be mixed into the sowing soil. The fungal network later connects to the roots of the seedlings. It can take a while until a positive effect occurs.
Note:
Never mix in the mushrooms before sterilizing. Like mold, they are killed by high heat.
Homemade sowing soil
Composition
- ordinary garden soil, topsoil
- Compost
- Sand
If you prepare your substrate in spring, you can also use the soil from molehills, which usually has a very fine structure. The compost must be well deposited; rotted manure is not suitable because of its coarse structure and the many nutrients. Any type of sand that is not too fine can be used for young plant soil. It is intended to loosen the substrate and make it more permeable. To improve this effect, you can also mix in some perlite.
Note:
Perlite consists of crushed and heat-treated volcanic rock with a very large, porous surface. It looks similar to Styrofoam.
Make potting soil
- One third topsoil, one third compost and one third sand are used. Additives that you may want to use do not change the basic composition
- Sift topsoil and compost as finely as possible. This will remove roots, stones or pieces of wood.
- Mix the substrate vigorously in a bucket or larger tub.
- To prevent the sowing soil from becoming moldy and to eliminate all animal or plant pests, sterilize the substrate. The easiest way to do this is in the oven.
- Spread your sowing soil on a deep baking tray, you may have to repeat the process several times if you want to make a lot of substrate.
- Put the baking tray in the oven at 120 degrees for about 45 minutes. What matters is less the level of temperature than how long the heat can be applied.
- You can also put the sowing soil in the microwave if it is small quantities.
- Let the pricking soil you have made yourself cool down and only then mix in any desired additives.
- You can then use the substrate immediately.

