- Author admin [email protected].
- Public 2023-12-17 03:39.
- Last modified 2025-01-24 12:45.
A roof must above all protect against rain and snow. However, both come not only from above, but sometimes also from the side. It is therefore imperative to ensure the necessary tightness here too. This applies especially to the verge. There is also a risk that gusts of wind will cover the roof. A special sheet prevents both very reliably.
Borderway
Every roof consists of different elements. For example, there is the ridge or the eaves. The front end of a roof is called the verge. It extends from the eaves transition up to the ridge and, in the case of a gable roof, then down again. Because of this exposed location alone, the verge is a particularly sensitive area. Water can penetrate here relatively easily and get under the roof. It also provides a target for gusts of wind, which in the worst case scenario can cover the roof. Consequently, the open verge must be closed and sealed. This is done either using verge roof tiles or a verge sheet metal. With the exception of the classic hipped roof, this is necessary for all roof shapes including flat roofs. This verge cladding is laid after covering the roof and installing the gutter.
Bedge cladding
The verge cladding primarily has a protective function, although aesthetic aspects can also play a role. The verge itself is undoubtedly a weak point in any roof structure. In order to be able to close it really safely, the utmost care is required. This starts with selecting the right verge sheeting. Depending on the type of roof, different sheets are required. So before you get the right verge sheets from the hardware store, you definitely need to know what kind of roof you actually have on your house. The following roof shapes have a verge and therefore also require verge cladding:
- Gable roof
- pent roof
- Hipped roof
- Ground roof
- barrel roof
- Flat roof
Today, a verge sheet is usually made of either steel or aluminum. Steel sheets must be galvanized so that they can withstand the weather. The sheets are usually offered in a length of one or two meters. How many of these you need depends of course on the length of the verge. It must therefore be measured precisely beforehand. But that alone is not enough. In order to provide optimal protection against water penetration, the individual sheets must overlap. At least an additional ten centimeters must be allowed for per overlap. For example, if a verge from the eaves to the ridge is six meters long, you will need seven individual verge sheets with an individual length of one meter.
Note:
Verge sheets are available in different shapes and colors. When buying, you should definitely make sure that they match both the paint of the house and the roof tiles.
Aids and tools
In order to install a verge sheet, you not only need the sheet metal itself, but also a few aids and tools. Without this it doesn't work. The following is required:
- Scaffolding
- Spenglernails
- Screws
- Screwdriver
- Hammer
- Combination pliers
- Work gloves
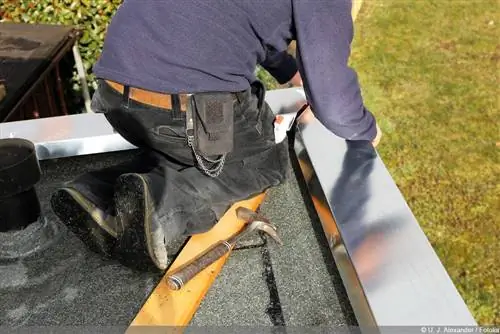
Anyone standing on a ladder who tries to attach verge plates is in great danger. For safety reasons, scaffolding is therefore absolutely necessary - not least because the sheets are nailed on from above. The plumbing nails used are often included with the individual sheets, but can also easily be purchased separately. Alternatively, screws can also be used for fastening.
Note:
The scaffolding must be well supported. It is also recommended to attach it to the gable wall.
Assembly tips
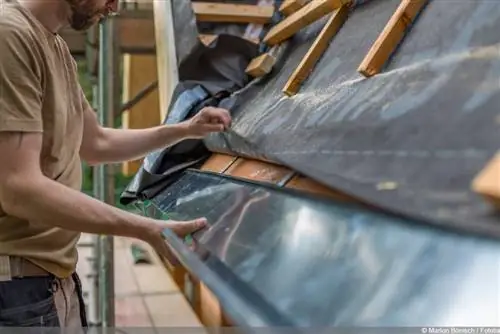
Verge panels consist of two legs at a 90 degree angle, namely a shorter support leg and a vertical cladding leg. Installation is carried out by placing the shorter leg on the final roof batten and attaching it to it. The following tips not only make installation easier in general, but also guarantee optimal protection.
-
Work from the bottom up
The first sheet is always installed from the eaves first. The further laying takes place from there up to the ridge. So you always work your way from bottom to top. This also applies explicitly to the second gable side.
-
Overlap
The individual sheets must overlap by at least ten centimeters. The second sheet is placed on top of the first, the third on the second and so on. Any other approach makes no sense, as otherwise small gaps would arise through which water could penetrate.
-
Adjust length
Thanks to the overlaps, the length can also be easily adjusted. Sheets therefore do not have to be cut to size. The individual overlaps can be easily adjusted so that it fits at the top of the ridge at the latest.
-
Nail or screw carefully
Violence has no place when installing a verge sheet. It is a good idea to fasten the individual sheets well, but not to attach screws and nails too tightly. On the one hand this can lead to damage to the sheet metal, on the other hand a little play is definitely useful.
-
Double-sided installation on tin roofs
If the building is covered with a sheet metal roof, the verge cladding must be installed on both legs of the sheet metal.
-
Always keep the goal in mind
A verge sheet serves primarily to prevent water from entering the roof area. You should definitely keep this in mind when carrying out any work and proceed very carefully.
-
Bend noses
Many verge sheets have a fold or a so-called nose on one of the legs. The noses of the individual sheets must merge into one another. If they don't fit together automatically, bend them carefully using combination pliers or, even better, by hand.
Repair the verge plate
As a rule, the verge cladding is attached in connection with the roofing work. However, it can happen that individual sheets are damaged, for example by a strong storm, and then need to be replaced. If this is the case, it makes sense not only to replace the damaged sheet metal, but also all installed sheets on the affected gable side. This is the only way to guarantee secure interlocking and thus the tightness of the sheets.
Consequently:
First remove all individual sheets and then simply lay new ones.

