- Author admin caroline@plants-knowledge.com.
- Public 2023-12-17 03:39.
- Last modified 2025-01-24 12:45.
Save money on the house connection, illuminate the garden or connect the sauna heater to the power grid? There are many reasons to lay an underground cable. However, when doing this work, certain laying depths and connections must be taken into account depending on the type of connections and the current strength. Here we reveal step by step what is important in each case.
House connection
When building your own home, you can lay some of the house connection yourself to save costs. When laying the cables, you can proceed as follows:
- Type of connection and cables must be determined by an electrician. He will also carry out the connection himself and can provide information on the type and depth of installation.
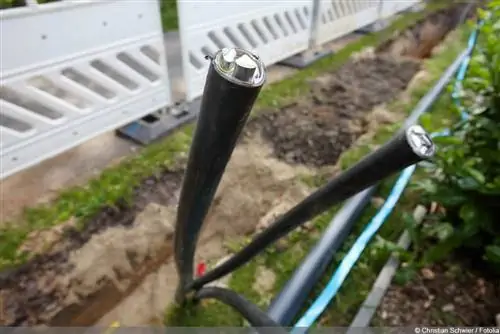
- The ditch itself can be gutted. A depth of 60 to 80 centimeters is usually sufficient for the cables. Stones, roots and other large foreign objects must be removed to avoid damage from them.
- The trench is covered with a ten centimeter deep layer of sand.
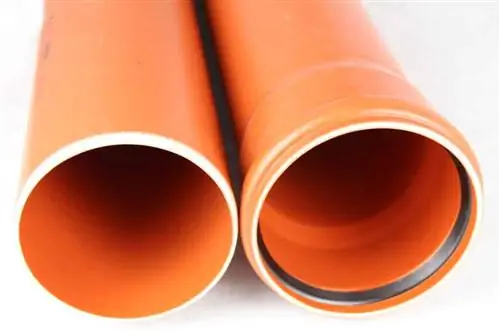
- Depending on the cable and recommendation, the cable can now be routed through a cable protection tube or placed directly on the sand.
- If you choose a cable cover instead of a cable protection tube, the cover is placed over the cable and pressed lightly into the sand. The cover can be made of clay or PVC.
- A “warning” is placed on the cover or pipe. This can be a red and white striped construction site tape or a yellow PVC tape with the inscription “earth cable”. It is important that it is immediately visible when digging, thus reducing the risk of damage.
- A further layer of sand is placed over the protective tube or cover, which in turn should be around ten centimeters thick. The trench can then be filled with earth.
Even if you dig the trench and lay the cable yourself, you often have to pay a corresponding flat rate. The costs usually amount to a few hundred euros. A prior cost comparison can reveal whether doing it yourself is really worth it in terms of price.
To dig the trench, for example, you not only have to plan the appropriate working hours, but also rent a mini excavator. However, despite the personal contribution, flat rates still apply. Especially with longer trench lengths, it may only be slightly cheaper or similarly expensive to write the deed yourself.
Low-voltage technology
You don't necessarily have to put a lot of effort into the light in the garden or the pump in the pond. So-called low-voltage technology is sufficient here. A corresponding transformer is housed in the house or garage and a line is laid from here to the destination. The cables can be laid directly underground. You just have to make sure that they don't get in the way when you're digging up the garden or that they're protected from damage. Again, cable covers or alternatively a cable protection tube can be useful.
The advantages of low-voltage technology are, on the one hand, the low risk and, on the other hand, the low effort required for installation. Since only a small amount of current flows through the cables, they are less dangerous. Due to the low installation depth, the effort is kept to a minimum, even for longer installation distances. However, the basic procedure does not differ significantly from the sequence of steps described above.
That means:
- Dig a trench and remove foreign objects such as stones and roots.
- If possible, line the trench with a layer of sand.
- Place the cable in the cable protection tube or apply a cable cover after laying.
- Mark the cover and cover with sand.
- Fill the trench with soil and lightly compact the soil layer.
Tip:
For future digging or other interventions in the garden, it can be helpful to mark the location or route of the underground cable on a plan.
Cables in the garden
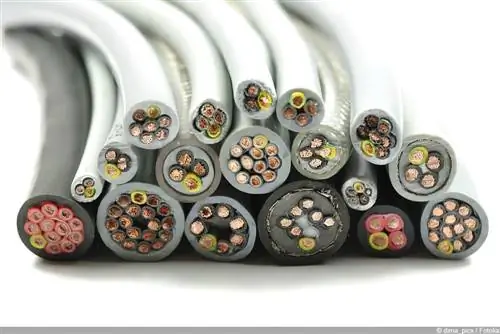
Low-voltage technology is not sufficient for garden sockets or the operation of larger devices, such as a sauna heater. Regular cables must be laid here, just like the house connection.
The procedure is the same as when laying the underground cable for the house connection. This also applies to the installation depth and advice from an electrician.
Proper cables, ports and connections
When planning to run a cable underground, a number of factors generally need to be taken into account.
This includes:
-
Connections and advice from professionals
An electrician makes the connection to the fuse box and installs a residual current circuit breaker. He can also advise on what type of cable can be used and how deep the installation should be. It also provides information about applicable regulations.
-
Cable Type
Not every cable is suitable for outdoor use and underground installation. NYY-J, NYCWY or NAYY cables are suitable because they have a special sheathing.
-
Connections
Simple couplings that are only protected against splash water are not sufficient for routing cables underground. Water-protected plug connections must be used. Further connections and connections, for example to a garden socket, are best carried out by an electrician.
Precautionary measures
It is self-explanatory that no current should flow through them when handling the cables. In addition, care should be taken not to damage the cables.
In addition, the advice and, if necessary, some tasks should be carried out by an electrician. This prevents serious errors from occurring.
Cable costs
The costs for cables start at just one euro per running meter. The thicker the cable, the higher the prices. Normally, however, they remain in the single-digit euro range per meter.
At least 100 euros are due for the connections and advice from the electrician. For garden sockets, expect to pay 40 euros per piece. Cable ducts and covers are available from just over one euro per meter.

