- Author admin caroline@plants-knowledge.com.
- Public 2023-12-17 03:39.
- Last modified 2025-06-01 06:48.
Attaching a bitumen membrane to the roof of a carport, gazebo or tool shed is actually very simple. The roofing felt is cut to size and secured with suitable materials. However, to ensure high tightness and long durability of the top layer, a few points must be taken into account. These depend, among other things, on the type of roof and the speed of water drainage.
Types of bitumen membranes
Roofing felt is available in different versions. The variants are differentiated according to the type of attachment. These are:
- self-adhesive bitumen membranes
- Bitumen sheets for attachment with cold adhesive
- Bitumen sheets for fastening with hot glue or hot bitumen
An alternative is to fasten the roofing felt sheets with roofing felt pins. Simple and very inexpensive bitumen sheets can be used for this. However, they are not suitable in every case.
Types of fastening - advantages, disadvantages, recommendations
The differences in the type of attachment are not only crucial for the effort involved. The tightness also depends on it. Therefore, various factors should be taken into account when choosing:
Roofing felt sticks
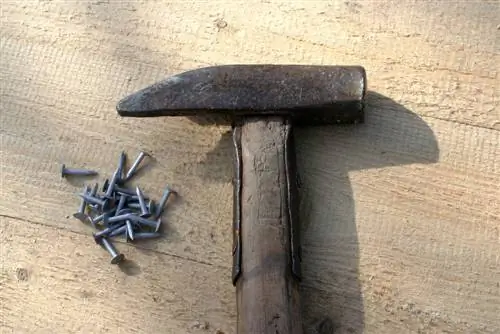
The simplest and most cost-effective fastening option is nailing with roofing felt pins. The roofing felt sheet is placed on the roof, aligned and cut to size. Then it is nailed down at regular intervals. The procedure can be carried out easily even by laypeople without experience. However, it is only suitable for steep roofs from which rainwater runs off quickly. The tightness would not be sufficient on flat roofs. This mounting variant is therefore suitable for steep roofs.
Self-adhesive bitumen membranes
No glue is required for self-adhesive bitumen membranes. This makes installation very easy and is ideal for laypeople and anyone who has no experience laying and attaching bitumen membranes. The seal is also high, making the self-adhesive bitumen variant suitable for flat roofs. The only potential downside is the price, which is higher compared to other variants. However, the effort involved in attaching it is also very low.
Bitumen sheets for attachment with cold adhesive
Attachment with cold glue is suitable for laypeople. However, the effort is greater than with self-adhesive bitumen membranes. However, the tightness of the roof is better than when fastened with roofing felt pins. Again, this variant is ideal for flatter roofs and for do-it-yourselfers who are laying roofing felt for the first time. The costs are comparatively low. However, the necessary steps must be taken into account.
Bitumen sheets for fastening with hot glue / hot bitumen
If hot bitumen is laid, a gas burner must be used to fix the individual strips. Although the roof is sealed well, the effort involved is relatively high. In addition, the risk of injury also increases because a gas burner has to be handled.
Laypeople should therefore not attempt this mounting option. For this reason, the application of hot bitumen is not described in detail here.
Preparation - step by step instructions
Regardless of which type of attachment is chosen, some of the preparatory work steps are the same in every case. These include:
Clean, dry, fat-free
Before bitumen membranes are laid, the roof must be cleaned accordingly. If the roof is dry and comparatively clean, it is sufficient to sweep the surface thoroughly. If there are grease stains, they should at least be removed during installation with glue or self-adhesive roofing felt sheets. In any case, the roof must be dry. Laying should therefore only be carried out when the weather is appropriate.
Experience has shown that it also makes sense if tarpaulins are available to cover and protect against sudden rain. This prevents unexpected cloudbursts during installation from delaying the work for several days.
Plan and crop
The bitumen sheets should overlap each other by at least five centimeters on the long edges. This ensures that water can drain away from them easily. There should also be an overhang on the outer edges. It is ideal if the individual tracks have an offset.
For planning and cutting, exact measurements should be taken and the installation outlined. We recommend using strong, sharp scissors or a cutter knife with a hooked blade for cutting. In both cases, cut-resistant gloves should be worn to avoid injuries.
Foundation
If self-adhesive bitumen membranes or bitumen membranes with cold adhesive are to be laid, a primer must be applied to the roof in preparation. This ensures that the glue sticks really well afterwards.
Instructions for attaching with roofing felt pins

Attachment with roofing felt pins is very easy. All you need are the following steps:
- Clean the roof and let it dry if necessary.
- Cutting bitumen sheets. Pay attention to the necessary overlap between the individual strips and pieces.
- Laying begins at the bottom of the roof. The first strip is aligned with the lower edge of the roof and fixed at regular intervals with roofing felt pins. It is ideal if two people work. One person can hold the track while the other fixes it.
- The second track is laid so that it protrudes about five centimeters over the first track. This is done until the entire roof is covered.
Self-adhesive bitumen membranes
Attaching the self-adhesive bitumen sheets is very easy. All you need are the following steps:
- Clean the roof and let it dry if necessary.
- If necessary, apply a primer and let this dry as well. The manufacturer's information should be taken into account here to ensure optimal tightness.
- The panels are cut, aligned and glued.
Here, too, we work from bottom to top and pay attention to the respective overhangs.
Attaching with cold glue
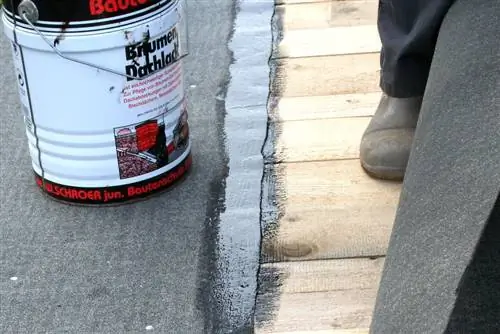
The instructions for attaching with cold glue differ only slightly from those for self-adhesive bitumen membranes. However, there is a crucial difference. Please note the following steps:
- Clean the roof thoroughly and make sure it is dry.
- Apply primer and allow to dry sufficiently.
- Measure and cut bitumen sheets to size.
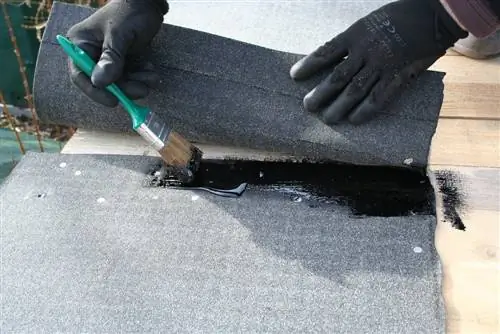
- Apply the adhesive to the roof. It makes sense to apply this only so wide that a strip can be laid in it.
- Align the cut roofing felt sheets on the adhesive bed and press them into place, then weigh down the bitumen sheets.
- The overlapping sections must also be filled and smeared with cold glue from the outside in order to really seal the roof. This is especially important if the roof is fairly flat and water doesn't run off too quickly.
No matter which type of fastening you choose, the tightness should always be checked finally. If edges are not properly taped or fixed with roofing felt pins, rainwater can be pushed into the roof by strong winds, for example.

