- Author admin caroline@plants-knowledge.com.
- Public 2023-12-17 03:39.
- Last modified 2025-06-01 06:48.
In order to significantly save costs, more and more house and apartment owners are deciding to provide services themselves. You can do it yourself almost everywhere when building a house or doing basic renovations, such as laying heating pipes. With a little manual skill, professional, easy-to-understand instructions and the appropriate tools, you can lay your heating pipes yourself, surface-mounted or flush-mounted, cost-effectively.
First consideration - surface-mounted or flush-mounted?
Before you start your project to lay heating pipes yourself, you should consider whether you want to lay the heating pipes under or over the plaster.
Flush-mount installation
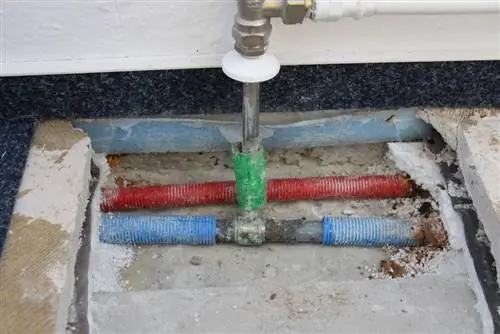
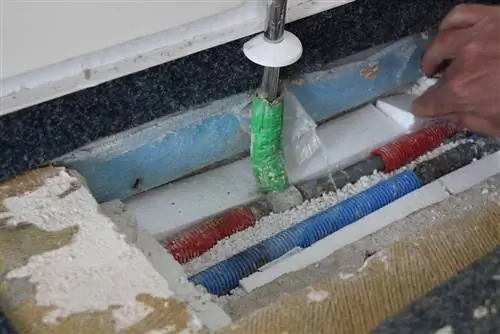
When making a decision, it should be taken into account that concealed work requires significantly more work. The stone must be milled to create channels for the pipes. It is advisable to consult a specialist who is familiar with the subject of statics. Milling work on load-bearing walls can influence the building's statics. The expert carries out the milling work where it has no influence on the load-bearing capacity. In addition, legal building regulations (DIN standard DIN-1053-1) must be adhered to, which specify exactly how deep and wide the milled channels can be.
Surface installation
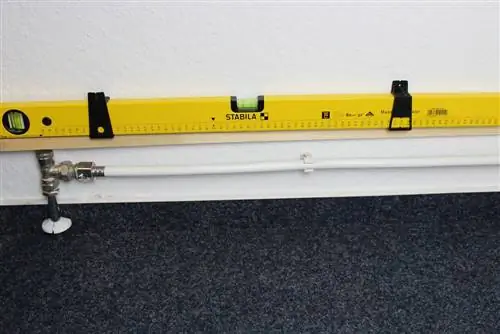
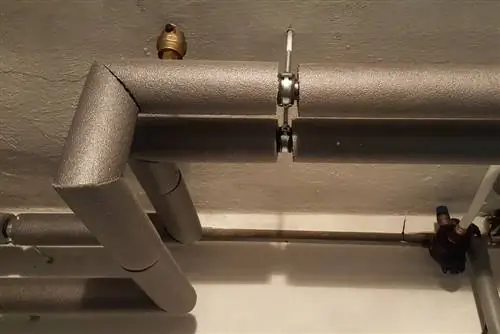
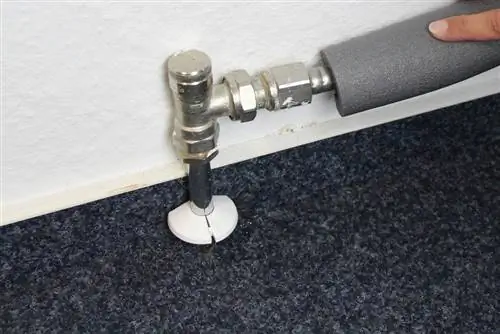
For surface-mounted laying of heating pipes, they are best suited to an inconspicuous or concealable location, such as around baseboards. As a rule, skirting boards surround the entire living space. If you place the heating pipes on the plaster there, you can then attach skirting boards and cover the pipes in this way.
A surface-mounted installation has the advantage that no specialist needs to be called in. That saves money. You will also save yourself a lot of time and work with subsequent plastering. If repair work on the heating pipes is necessary over the next few years, you will be able to access the surface-mounted pipes much more easily than with flush-mounted installation.
Heating pipe materials
Which material you choose for heating pipes should depend on the respective properties based on the existing circumstances. You can choose from steel, copper and plastic.
Steel heating pipes
Steel offers the most robust heating pipes that can easily withstand temperatures of up to 120 degrees Celsius. They impress with their long durability and low purchase price. They are primarily used as threaded pipes, steel pipes with or without welded seams. The disadvantage, however, is the susceptibility to rust when exposed to external moisture. For this reason, steel heating pipes are not suitable for surface-mounting in damp rooms or other places with an increased risk of moisture.
Copper heating pipes
Copper pipes are generally only suitable for smaller heating systems. The maximum flow temperature should not exceed 100 degrees Celsius.
The advantage of copper heating pipes is that they are easy to install, as they are easy to install using press connections. Numerous sizes are available.
Copper is rust-resistant, which is why they can be installed over plaster even in damp rooms without hesitation. The material expansion is disadvantageous when there are temperature fluctuations.
Plastic heating pipes
If the heating temperature is a maximum of 80 degrees Celsius, plastic pipes can be used as an alternative to copper or steel. Their advantage lies clearly in their insulating properties, which is why they help you save energy. Rust has no chance with them. The individual plastic heating pipes are connected with so-called fittings. These are small connecting parts that have to be melted in order to then seal two pipes together. The disadvantage of plastic pipes for the heating system is their low sensitivity to heat above 80 degrees Celsius. The pipes can stretch and lose stability. Composite pipes can help here. These consist of two layers of plastic and one layer of aluminum. These are ideal for laying under plaster on walls and screed as well as for skirting boards.
Laying method
Heating pipes should never be laid without any concept or thought. Here you have to decide between two different types of installation in order to ensure the best possible water flow in the heating pipes.
Ring-shaped laying method
With ring-shaped laying, the pipes are laid from the outside like a snail shell to the inside and back again. With underfloor heating, the pipes run from room to room without interruption. When connected to room radiators, they interrupt the routing and the drain pipe leads back the same way as the inlet pipe leads. This type of installation is mainly used if it is a multi-story house in which the heat flow needs to reach the upper floors through risers.
Star-shaped laying method
The line network forms the center in the middle of all rooms to be supplied. This means that you lay a main pipe from the heating system into a room roughly in the middle and from there distribute all the other heating pipes to the other rooms. This type of installation is generally not used for underfloor heating because it requires an unnecessary amount of pipe material. An exception is made if only certain rooms should be designed with underfloor heating and other rooms are excluded. The star-shaped installation method is used in ground-floor living spaces.
Preparation
Pipe length
In order to be optimally prepared for the work, the length of the entire pipe path must be measured. Please note that the end result must be doubled for radiator connections, as the access and drain pipes must run parallel. Once everything is measured, you know how many heating pipes you have to buy.
Factor in accessories
If you count T and corner pieces at the same time when measuring the distance for heating pipes, you can buy these when you buy the heating pipes and save yourself an additional trip to the hardware store or specialist retailer. The same applies to any connecting pieces. Copper, on the other hand, can easily be connected to one another using a press connection by hand or with tools. Steel pipes are available with threads that allow two pipes to be connected to each other via a connecting thread. Welding is also possible with steel pipes. Insulation hoses should also be purchased to insulate the heating pipes. Plastic pipes already have an insulating effect, but here too an additional insulating tube can save further energy.
Heating water flow calculation
So that the heating energy reaches all desired end devices in sufficient quantities, it is necessary to calculate the heating water flow. This determines the amount of water that should fit in the pipes. For this reason, an appropriate pipe diameter is required.
The heating water flow calculation is made up of the radiator heat output, the specific heat capacity, the flow temperature of the heating circuit and the return temperature. If you have the necessary data, you can find calculation tools online that you can use for free. Since a lot depends on the heating water flow calculation, you should leave this to the heating specialist if you have little or no experience in this area. An incorrect calculation increases the risk of pipe damage and insufficient heat supply.
Overview of material shopping list
- Heating pipes of appropriate length
- T, corner and connecting pieces in the appropriate number
- Hemp or permanently elastic sealant
- Insulation
- Pipe hook for wall mounting when laying over plaster
Tools required
- Soldering iron or welding machine
- Soldering or welding wire
- Solder paste for cleaning connection areas
- Small pipe cutter for shortening
- Combination or pump pliers for copper pressing contracts
- Hammer and chisel for concealed sewer laying
Heating pipe laying
Laying pipes
Before you buy the pipe, you have already decided how you want to lay it. This is where you start now. The starting point is the heating system or the main line that runs to the heating system. If the pipes are to be installed flush-mounted, it is advisable to have the corresponding channels completed before installation begins.
Connecting pipes
Plastic pipes for the heating system are usually sold by the meter. They eliminate the need to connect individual pipe parts. If a connection is still required, a special connecting piece can be used, which is usually made of cast iron. Especially in corners when exposed to wall installation, the flexible pipes often cannot be bent so far that they disappear perfectly under a skirting board and a kink does not slow down the flow of heating water. Corner connections should definitely be used here to solve the problem. If heating pipes are not pulled continuously from the heating system, connection points can arise, especially on the main line. A total of three pipes can be connected to one another using T-pieces. Welding/soldering is only advisable on straight lines.
Soldering/Welding
Do the soldering or welding to connect steel or copper heating pipes yourself, first rub the connection points on the pipe with soldering paste. This not only cleans the area, but also ensures that the melting material contracts slightly inwards when heated. This results in an optimal fit and tightness when pushing two pipes together. When soldering the pipes to the fittings of the heating valves, both ends must be heated so that the ends and the fittings can fuse together well. Hemp or permanently elastic sealing compound can additionally support the tightness.
Tip:
Never cool hot steel and copper pipes with cold water after soldering or welding. The “temperature shock” can cause fine cracks or other leaks to form.
Pipe insulation
Pipe insulation usually has an elongated slot that allows the pipes to be easily pushed through into the interior. Make sure the insulation diameter is sufficient so that the slot area can close well after insertion. Every open gap means a possible loss of energy.
Radiator valve connection
Once the radiator valves on the radiators have been screwed into the inlets and returns, a fitting (usually made of plastic) is attached. The inlet pipe and the outlet pipe must be welded/soldered to this connection piece. It is recommended to have welding and soldering skills. Only the smallest leak or carelessness can result in maximum damage.
Tip:
When attaching to the radiator, the heating pipes should be placed into the valves from below at a slight incline. In this way you create more optimal conditions for later ventilation.
Completion
If all pipes are properly connected and connected, they should not be immediately covered by skirting boards or plaster. A look from a competent heating installer is always advisable. If you have overlooked something or have worked improperly in one area, the specialist will be able to quickly identify this with trained eyes. In this way, you may be spared any consequential damage. In a new building, the installer can inspect the laying of the heating pipes when commissioning/assembling the heating system.
Costs
The costs are difficult to estimate across the board. These primarily consist of the material costs and possible assistance from experts. If you do everything yourself, you can expect the following prices:
- Plastic heating pipe - an average of 0.70 euros per running meter
- Plastic heating pipe with aluminum layer - between 0.80 euros and two euros per meter
- Aluminum composite pipes including insulation - around five euros per meter
- Copper pipe - 2.50 meters long around ten euros
- Steel pipe - six meters around 20 euros
- Pipe insulation for heating pipes with a diameter of 18 to 22 millimeters: between two and nine euros
- Sealant and hemp cost two to five euros - depending on consumption
- Pipe holders 20 pieces around four euros in the simplest version
If you also purchase pipe cutters and soldering or welding equipment, your bill will increase by around 200 to 400 euros. If the pipes are under the plaster, a trowel, mortar and putty are added. The costs would be significantly higher if a specialist company were hired and no work was carried out in-house.

