- Author admin caroline@plants-knowledge.com.
- Public 2023-12-17 03:39.
- Last modified 2025-06-01 06:48.
The apartment or recently purchased house has been newly renovated, only the tiles in the bathroom remain as an unattractive remnant - a fairly common scenario because the move always comes quicker than you think. Painting the tiles is a way to give tiles a new look without a lot of renovation work and mess. Read below what you need to consider when painting tiles:
The tile paint: one or two components?
Tiles cannot be painted over with any paint. It would dry on the smooth surface, but would only form a very loose connection with the surface. So loose that you could scrape the paint off with your fingernail (which you never would, but something is bound to scratch). That's why special paints have been developed for painting tiles and similarly smooth surfaces, with which you can apply resilient and durable coatings:
One-component tile paints
Various manufacturers offer single-component paints for subsequent coating of tiles. The preparatory work for these one-component paints must be carried out with similar care as with the usual tile paint with two components, but the one-component tile paints do not have to be mixed together first, but can be applied directly from the paint can. This simplifies processing considerably and can even lead to savings in paint consumption because two-component paints can only be processed for a limited time.
These resin-based tile paints are sold in a variety of light colors for application to wall tiles, can be used as a base coat and as a finish coat, dry quite quickly and adhere well. The paint is touch-tight after 2 hours and can be painted over after 6 hours. Until it reaches its final load capacity, the surface must not be exposed to any mechanical stress, no water squeegee, no cleaning, no splashing water or cooking steam - the bathroom/kitchen simply must not be used. This final strength is achieved after 3 to 5 days; overall, you can use the bathroom/kitchen again up to a week sooner than with the two-component system.
The one-component tile paint is sold in normal 0.75 liter paint cans (or larger), which are enough for 9 square meters and cost 7 to 10 euros, plus a few euros for the painting Accessories.
The finished coating is described as shock and impact resistant, but should only be cleaned with neutral household cleaners (not with abrasive cleaning agents or hard scouring pads). The one-component paints have their limits: They can only be used on wall tiles and not on floor tiles and kitchen work surfaces; the manufacturers also clearly point out this limitation.
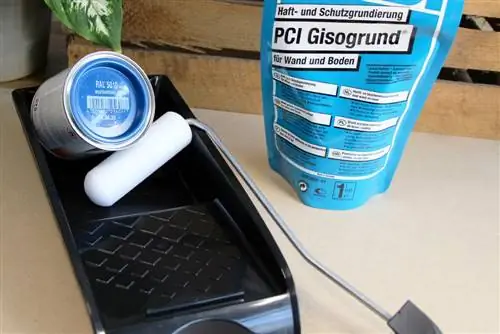
These one-component paints are not offered as “finished tile renovation sets” or similar because you do not need any special system components. You work as normal with paint, brush, roller, the appropriate primer and the appropriate solvent. These accessories are available in painting supplies or in the hardware store near the paints and can be purchased at the same time.
The one-component systems are not intended to form quite as hard coatings as the two-component systems. But not only are the tests good, there are also many testimonials from satisfied users.
Two-component paints
The classic tile paint is an epoxy resin paint in a “two-component system”, often offered as a ready-made color set. This contains cleaning solution, primer, tile paint components, tile sealing agents, brushes, rollers and often other accessories such as masking films, etc. With these ready-to-assemble tile paint sets, you pay for the “putting together of the set” and perhaps particularly nice packaging extra.
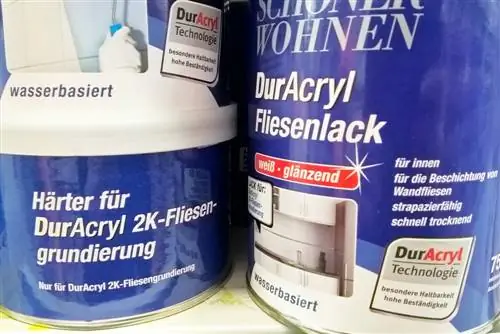
The sets are therefore not exactly inexpensive: you can expect to pay between 9 and a good 30 euros per square meter, while the pure varnish costs a few euros per square meter, plus a few accessories.
The “system” itself consists of varnish and a separate hardener, which can only be added to the varnish shortly before painting; the finished mixture combines on the tiles to form a durable layer.
Frequently used two-component tile paints come from:
- Westfalia (Jaeger bathtub and tile paint) in a set with accessories for 2.8 square meters of tiles about 94 euros
- Molto, tile painting system, set with accessories around €90 for 10 square meters
- Schöner Wohnen tile renovation set, costs around 150 for 15 square meters of tiles, - €
If you pick up the individual components individually at a hardware store, it could be cheaper. However, you would have to find a well-informed advisor or make sure that the individual components have the right composition and can be used together/on top of each other. The savings compared to the sets can be considerable.
When it comes to “painting tools”, it is important that you choose the right hard foam roller with closed pores. Or rather several of them, quote forum: “However, you have to work very carefully and constantly have new rolls ready, as the old ones decompose quickly.”
The two-component systems are not entirely unproblematic/convenient to use: the mixture only holds really well if it is mixed very carefully. It can only be processed for a relatively short period of time, so nothing can get in the way of your work. If you want to repaint floor tiles, you can't avoid the two-component paint.
Here, too, the surface must not be exposed to any stress until it has reached its final load capacity; the bathroom cannot be used for several days in a row. Really not used unless you want to repeat half the prep work. This preparation work must be carried out very carefully if the new tile coating is to hold reasonably well; It doesn't hold up more than reasonably well anyway if the use of scouring milk is prohibited.
Own color ideas
One-component paints are usually offered in light colors, e.g. B. in the 5 “trendy colors” arctic white, coral, cream, lagoon blue and aquamarine, these colors can all be mixed with each other. With two-component paints there is sometimes a lot more choice of colors:
You can also choose your color combination yourself; color pigments or tinting concentrates are available for most tile paints, which must be stirred in when mixing the paint (stir in carefully, filtering the color mixture is recommended). Pigment and tinting concentrate cost extra, depending on the desired color around €5 per 5 - 10 square meters.
Tiles and household “suitable for renovation”?
If the preparations are carried out properly and carefully and the tile paint is applied exactly according to the manufacturer's instructions, a smooth and durable coating is created.
However, your household should be organized so that all family members can survive without a bathroom/kitchen for a few days, without exception. If you have finished preparing everything and a family member has to come before the final painting, e.g. For example, if you absolutely have to take a shower, the project could fail because of this. A fingerprint from the creamed hand, a splash of shampoo, and the color no longer holds properly in this area.
It all starts with mending and cleaning
In order for the result to be satisfactory, the preparatory work must be carried out extremely carefully. Loose joints would have to be scratched out and re-pointed, loose tiles would have to be fixed, damaged tiles would have to be replaced, and dowel holes would have to be closed with joint filling material. Newly grouted joints must dry for at least 2 weeks before they are painted, otherwise the paint could react chemically with the joint filler.
The old tiles and the ceiling are thoroughly cleaned, descaled and degreased using the special cleaner that matches the tile paint. This special cleaner must then be thoroughly washed off the tiles again.
Preparing the bathroom for painting
Now it really starts: Silicone joints must be completely removed, including all (even old) silicone residues, preferably with a commercially available silicone remover. Glue residue e.g. B. from towel hooks are removed with nitro thinner.
Then the entire tile surface is washed with lye and this is washed off again and/or sanded with coarse and fine sandpaper (preferably corundum sandpaper). The sanding dust must also be removed thoroughly, by damp wiping or with a brush on the vacuum cleaner brush (if the vacuum cleaner has enough suction power).
Fixed furniture, fittings, etc. are protected with masking film and adhesive tape if only the walls are painted, including the floor. When the room and the surface are ready for priming, nothing is allowed into the room until it is painted, including air with swirling dust.
Apply primer
With the one-component paint, the primer is also ready for use and can simply be rolled up thinly.
The epoxy resin primer for the two-component systems must be mixed. It is then applied with the hard foam roller (with closed pores). The epoxy resin primer must then dry for at least twelve hours (up to 16 hours, depending on a certain humidity level).
Painting joints
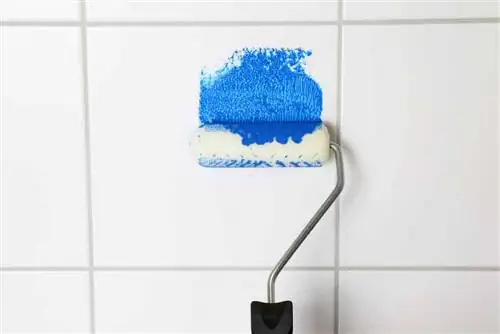
If you paint the tiles in the bathroom with tile paint, you should be aware that the joints will also be painted in the same color; the tile covering will later become a smooth, monochromatic surface. The joints are first painted with a brush before the remaining surface is treated with a roller.
It should be impossible to apply different colored paints (contrasting colored joints) to the uniform coating. This is what most of the manufacturer's instructions say, but there are also pictures on the internet as examples of successful tile painting that would then not be possible:
However, you can probably assume that the tiles were not painted piece by piece on the wall.
Some systems solve the design of the joints with special adhesive strips for the joints:
Painting tiles
Before the first coat of paint, the primer must also be sanded over the entire surface.
Once that's done, it's time for the actual varnish, which you also have to mix together first, very thoroughly and for several minutes (how many minutes and how often and at what intervals - the mixed varnish usually has to rest for a while then be stirred again - the manufacturer's processing instructions will tell you).
If the color of the old tiles makes it conceivable, you could apply just a single coat of tile varnish, then very thinly, so that it deliberately looks a little “cloudy”:
Normally, tile paint is applied in two coats of paint, with each application once from left to right and once from top to bottom with the roller evenly distributed to create a smooth surface. So that no roots are visible later, you should coat larger areas wet-on-wet in one go.
There is six hours of drying time and “another round of sanding” between the two coats; the paint should also be stirred occasionally during processing. Finally, a protective coating usually has to be applied.
When the last coat has dried, the connections must be resealed with silicone. If you want to paint dark tiles light, you will need three coats. This also means having to mix the paint again because it hardly remains usable for that long (take into account time and purchasing).
Then the new coating just needs to dry thoroughly; after five to eight days the new tiled surface can be used.
Ask landlord
Again from a forum: “I would do it again if I rented an apartment.”
But:
With the tile paint, you are redesigning it forever, and in rental properties, depending on the rental agreement, this is only permitted with the consent of the landlord. This you must obtain in advance and should be recorded in writing.
If you are not interested in lengthy negotiations or additional agreements with the landlord, which may be interpreted as a change to the rental agreement (e.g. B. undermine your protection against dismissal), you should limit yourself to beautifying the old tiles in rented apartments.
Annoying, but perhaps understandable, because the landlord could have difficulty re-letting an apartment with a very colorful bathroom.
Working with tile paint: Please exercise caution
Pay attention to the protective regulations that the manufacturer specifies for processing, tile paint contains highly toxic components.
One-component paints contain up to 440 g/l VOCs (the water-based one-component paint from Wolfgruben-Werke only 140 g/l), two-component paints contain up to 499 g/l. Volatile organic compounds (VOCs=volatile organic compounds) are not without problems in terms of their effects on he alth, including “sick building syndrome”.
The safety measures you need to take in order to survive working with a product without damage must be stated in the processing instructions and, if in doubt, you can find out from the safety data sheet, which you as a consumer are not en titled to receive (not yet). The Federal Association of Consumer Organizations is currently fighting for this), but you can almost always find it on the Internet.
" Exercise caution" definitely applies to he alth-conscious people when buying based on the sales description: When you select products based on certain statements in the product description, you usually do so with a specific idea in mind. If you e.g. For example, if you choose a “solvent-free two-component system”, you usually do so because you do not want to introduce any critical substances into your immediate living environment (quote de.wikipedia.org/wiki/Solvents: “One thinks with regard to paints, varnishes, adhesives, etc.). However, the term “solvent” refers to substances that can cause unpleasant odors, he alth and environmental damage, and explosive fumes).
For a “solvent-free two-component system”, the safety data sheet could reveal the following ingredients:
- Cyclohexanol (harmful to he alth)
- “4, 4′-(1-methylethylidene)bis-, polymer with 2-(chloromethyl)oxirane” (all one name)
- According to the Chemical Book, there are 7 names for this substance
- One of them is “Hydrogenated Bisphenol A Polymer with Epichlorohydrin”
- 3-Aminopropyltriethoxysilane, a toxic compound with the target organs nerves, liver and kidneys
- Methanol
The safety data sheet in question also reports under “Specific requirements or handling regulations”: “All work procedures must generally be designed in such a way that the following is excluded: Inhalation of vapors or mist/aerosols Inhalation of dusts/particles Skin contact Eye contact.” Sounds like that very well ventilated bathroom. How this should work together with instructions in the processing instructions, according to which dust is to be avoided due to drafts, should certainly be asked during production.

“Exercise caution” also applies to the processing instructions themselves, which you usually only receive with the product, but which you should actually download from the Internet and look at first. Then you could decide whether you have time to thoroughly study a processing instruction with over 3,000 words (confusing, closely described, in three columns, full of boxes, bullet points, insertions). Which is advisable, there are some surprises hidden in the 3,000 words:
- Year-old silicone can cause (visually invisible) silicone contamination to which the paint does not adhere (“silicone craters”)
- Approx. 50 minutes after mixing, the paint mixture becomes increasingly viscous until it finally (when?) can no longer be processed
“Exercise caution” will not only apply to cleaning in the future, but also when using the bathroom: “Moat baths and medicinal bath additives with coloring additives can discolor the coating. Avoid contact with textile and hair dyes, tints and other colored objects.”
The alternatives
If the "new bathroom with little effort" project has died in the meantime because your family can't live without a bathroom for several days or a day with toxic fumes, your landlord doesn't think the aquarium bathroom is as great as your teenager (and you like to use the landlord as an excuse because you don't think it's that great either) - or you have simply decided that applying tile paint is a significant amount and requires too much effort for you, the bathroom doesn't have to remain ugly.
Aside from tile varnish, there are a few ways to “pretty up” tiles: decorative elements or entire decorative tiles to stick on, coating with liquid plastic, “tiles from the roll” (a type of waterproof wallpaper), latex paint, wet room plaster and more.
Or you can help yourself with a little “designer imagination”: The beige floor tiles that look really nasty under the lime green wall can, for example. For example, a contrast program on the wall can help a lot.

