- Author admin [email protected].
- Public 2023-12-17 03:39.
- Last modified 2025-01-24 12:45.
Underlays are essential when it comes to preventing dust, soot, rainwater and snow from penetrating the roof insulation and roof structure. If you cover the roof of your new building yourself, you can easily attach underlay foil yourself. Old buildings in particular often lack insulation or are damp due to a lack of underlayment. Retrofitting it makes sense here. The do-it-yourself guide explains how to lay an underlayment correctly and attach it later.
Procedure for new roof construction
There are a lot of things to consider here.
Measure the installation area
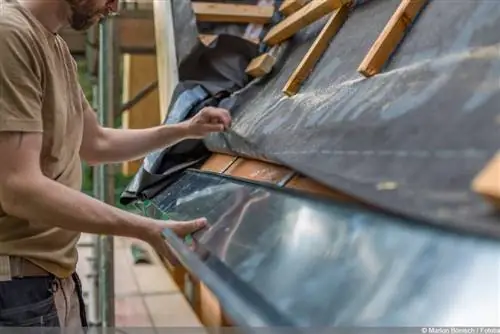
The underlay film is laid parallel to the eaves and is attached up to the eaves sheet. The eaves is a so-called drip edge, which is usually located at the lowest area of the roof. This allows rainwater to drain away and fall onto the roof. There is usually a direct connection to the gutter.
If there is a ventilated roof construction, the underlayment should end approximately seven centimeters below the ridge apex. If the roof construction is unventilated, the underlayment is stretched over the ridge. In this way, greater safety against weather influences is guaranteed. Once the installation area has been measured, the underlayment film is cut to size.
Choose the correct side of the underlay film
The sides of underlay films usually have different coatings, functions and/or properties. For this reason, it is important that the correct side faces the inside and outside of the room before laying. This is usually marked by the manufacturer. If there is no manufacturer identification and there is no specialist nearby, it is advisable to ask a specialist retailer as a precaution. If the wrong side is placed up or down, the underlayment will not do its job and the work and costs would be in vain.
Distance to insulation material

When installing the underlayment, ensure that there is a minimum distance of three centimeters to the planned insulation material. In contrast to underlays, they must not rest on the surface, otherwise condensation can form. An exception is made if it is a so-called vapour-permeable film, which therefore ensures breathability. Nevertheless, a certain distance can't hurt here either.
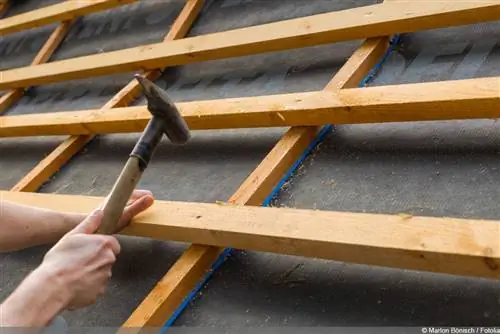
Whether it is a ventilated or unventilated roof structure, with counter battens sufficient distances are achieved from the insulation material, but also from the underlayment and the roof covering. The air can circulate.
Work steps
- Attach underlayment to the roof structure above the insulation area
- Screw to the counter battens underneath
- All underlays must overlap the adjacent ones by approximately ten to 15 centimeters
- Glue overlaps with a sealing adhesive - alternatively, a robust adhesive tape is also possible
- Let the panels protrude at least five centimeters on both gable sides so that they can be hidden by the gable boundary (only with unventilated roof construction - see also under “Distance to insulation material”)
- Prepare lane by lane
Tip:
Once the first underlayment has been laid, it is advisable to install roof battens immediately, as this makes climbing easier and also offers more support and safety. This should be done with each subsequent train.
Laying underlayment on windows
- Set the exact position of the window
- Cut out the battens in the window area
- Tensioning underlayment
- In the upper area, allow the film to exceed the planned window frame by at least 40 centimeters
- Cutting in the area of the planned window with a cutter knife
- Placing batten parts to create counter battens
- Put the resulting strips over the slatted parts and fasten them (for example with a staple gun)
- In the upper window area, form a kind of gutter from the excess film (this is intended to drain water into the rafter area next to it)
- The joints in the corners are glued so that they are tight
Laying underlayment at valley formations
- Assemble the supporting slat construction for supporting the valley formwork
- Place the valley formwork
- Cut the film into a 40 to 60 centimeter wide strip of sufficient length
- There must be an overlap with the other underlays
- Put on the underlayment, tension it and glue the overlapping area
Tip:
Pay attention to the manufacturer's instructions regarding overlap. For some products, other overlap widths are recommended, which can reach up to 20 centimeters.
Attach underlayment to the chimney or dormers
- Cut the foil generously
- There must be a relatively large overlap area with the adjacent strips
- Fix the film to the battens
- Glue overlaps tightly
Later or replace later
Nothing is impossible.
Exchange
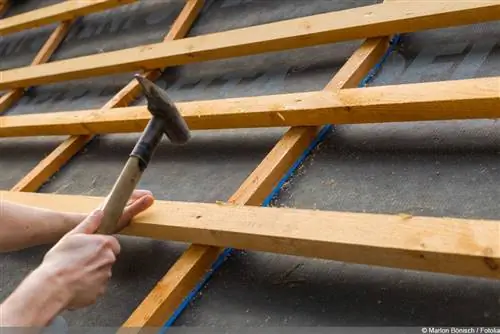
Modern construction usually includes roofing membranes, whereby vapor-permeable films that have breathable properties are usually used. They are usually laid directly under the roof battens via the rafters. The only, but also the most complex, way to replace them is to remove the roof tiles. Only from here can the counter battens be removed in order to remove the old film and replace it with a new one.
Subsequent laying
The situation is different from replacing the foil when installing underlayment at a later date if there is none yet. The protective film usually comes into consideration when insulation is to be carried out. In this case you can insert the underlay film between the rafters. This means that it does not have a protective effect on the roof structure, but is mainly used to protect the insulation material from ingress of the weather.
While the counter battens are on the outside in new constructions, they face inwards when they are subsequently installed. The further details for attaching the underlayment such as overlaps and bonding and already described in the above text section must also be taken into account when subsequently laying the underlayment.
Fastening materials
On wood
The most ideal way to fasten roofing membranes are clamps, which can be quickly and easily inserted into the battens without any effort using a stapler. Alternatively, you can use staple needles. Where there is a hole in the film caused by staples or needles, this is then sealed with a so-called nail sealing tape. This is available for little money in well-stocked hardware stores.
When laying in valleys and projections, such as those found in dormers, it is important to ensure a particularly high level of strength so that maximum tightness can be achieved. It may be advisable to additionally attach a terminal strip here
Slide cohesion
An important aspect is the overlapping of the individual strips, as the wind can push into the gaps and, in the worst case, loosen adhesive surfaces.
Basically: the larger the overlap, the less the wind penetrates. The fundamental question here is how should the overlaps be glued? Specialist retailers offer special film adhesives for this purpose. They can be easily distributed without air bubbles and ideally ensure a high degree of density.
Adhesive strips are also available. It is important to ensure that the adhesive tape is sufficiently wide, which should be at least five centimeters. In areas particularly vulnerable to wind, such as protruding dormers, a larger width is recommended.

