- Author admin caroline@plants-knowledge.com.
- Public 2023-12-17 03:39.
- Last modified 2025-06-01 06:48.
If a cold roof is to be covered, different layers are applied. This also includes the so-called counter battens, which sit between the rafters and the roof battens or support battens and are intended to ensure sufficient ventilation. But how big does the distance have to be when attaching it so that moisture can escape easily.
Function
The function of the counter battens is to create a ventilation zone or a free space for the insulation. With a cold roof, this is intended to ensure that moist air from the interior does not hit the roof membrane directly, but can escape easily. This is important, for example, to avoid moisture damage and mold. The air should be able to circulate in the space created. For this to be possible, the distances must be sufficiently large.
Position
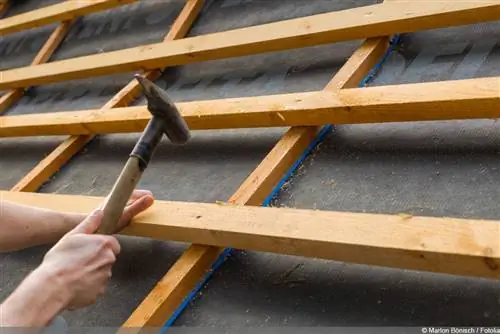
Roughly speaking, the counter battens sit on the rafters. They run vertically from the ridge to the eaves and thus follow the shape of the roof from top to bottom. Horizontal roof battens or support battens are attached to the counter battens.
In detail, the structure of a cold roof from the inside out can be as follows:
1. Rafters
2. Formwork
3. Coverage
4. Counter battens
5. Support/roof battens
6. Roof tiles/stones
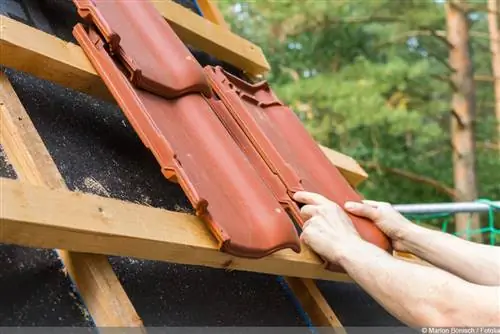
The structure of the roof can vary slightly depending on the materials used, but the support battens always rest on the counter battens and thus create the necessary distance for ventilation and the drainage of water that has penetrated from outside.
Dimensions
The standard dimensions for the roof and counter battens are edge lengths of 30×50 and 40×60 millimeters, the minimum cross section is 30×50 mm. In addition, the battens are only laid by professional roofers in a length of 1.35 meters and must therefore be cut accordingly. The slats are cut to this length because this makes laying them easier. Especially on very steep roofs, longer pieces are difficult to attach, so they are laid piece by piece with shorter, easy-to-manage batten lengths.
Even shorter or slightly longer slats can be laid, as they are fixed to the rafters and therefore provide a stable base. Even leftover pieces can therefore be processed without any problems and scrap usually only occurs if the quality of the material is suboptimal.
Quality
As with all other building materials, care must be taken to ensure that the counter battens are of a correspondingly high quality. Do not use slats that:
- are bent
- have lots of knotholes
- have odd edges
They must correspond to sorting class S 10 for visual sorting and machine sorting C 24 M. They must also be impregnated to ensure sufficient weather resistance.
Distances
Maintaining the distance when attaching the counter battens is easy because they are attached directly to the rafters. The distances between the rafters therefore determine the distances between the counter battens. A so-called slat jack can be used as a simple and practical spacer. The picket is available commercially, but you can also build it yourself. It not only helps to maintain the correct distances, but also makes it easier to attach the counter battens in parallel.
In addition to the distances between the individual slats, the space between the sub-roof and the covering is also crucial. This must be at least 30 millimeters. This minimum distance is already present when using the standard dimension of 30×50 mm for the slats.
Attaching the counter battens - step by step

When the rafters, formwork and roofing are ready, the counter battens can be attached. Proceed as follows:
- Check counter battens and sort out unsuitable ones, then cut each to a length of 1.36 m. Depending on the roof pitch, the pieces adjacent to the ridge must be cut at the appropriate angle.
- In order to be able to lay the counter battens at the correct distances and parallel, a batten cutter should be used. This should be set so that the counter battens rest directly and as centrally as possible on the rafters.
- After aligning each counter batten, it is fixed to the rafters with sufficiently long nails. As a rule, 120 mm long galvanized nails are used. Three nails are placed on a meter of batten. Fixation takes place every 30 to 35 centimeters. The fixation should be at the end edges and, for longer slat pieces, also in the middle.
- Once all counter battens have been attached, the horizontal roof battens or support battens are fixed on top. With these, the distances between the individual battens correspond to the attachment points of the roof tiles or roof tiles.
- Finally, the roof is covered by attaching tiles or stones.

