- Author admin [email protected].
- Public 2023-12-17 03:39.
- Last modified 2025-06-01 06:48.
There are various options to protect your greenhouse and the plants for the new season from the dreaded afterfrost at night. In addition to heaters that consume electricity or are powered by gas, there is also a relatively simple DIY solution.
Greenhouse heater with candles
The construction is relatively simple, the material costs are manageable, the usability is almost unlimited (outdoors and in the greenhouse) and the running costs can almost be ignored. You can heat your greenhouse with a tealight oven or have a cozy evening outdoors and use it to warm your hands.
You need
Tool
- Ruler
- pencil
- Adhesive tape or masking tape
- Cordless drill or drill
- Stone drill bits
- Open wrench
- Glove
- Safety glasses
Material
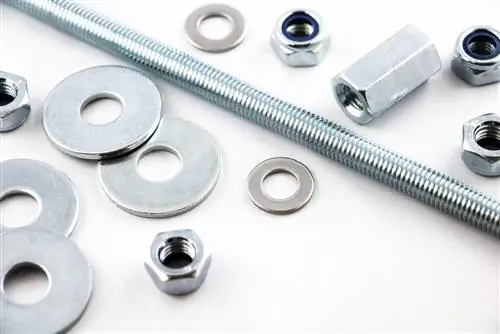
- Threaded rod (if it is too long, shorten it with a hacksaw)
- Nuts
- Threaded spacers (spacer bolts, spacer sleeve) (alternatively additional nuts)
- Self-locking nuts
- Washers
- Clay pots in at least 2 sizes
- A clay coaster
- Tea lights & (stick) lighter
Instructions
To avoid any unpleasant surprises later, you should either make a sketch beforehand or at least measure the pots and nuts so that everything fits in the end.
Step 1
Roughly cover the center of the coaster on both sides with adhesive tape and then mark the exact center. The adhesive tape prevents the clay from bursting out when drilling and the precise center prevents the greenhouse heater from tipping and tilting later.
Step 2
Find a stable surface and use appropriate protective clothing (gloves and safety glasses). Carefully drill a hole exactly in the marked center of the coaster. Remember that terracotta is a very brittle material and it can happen that small chips appear on the hole. The hole will end up being covered by washers and candles anyway, so don't panic.
Tip:
Drill slowly, with few revolutions, moderate pressure and under no circumstances use the hammer drill function.
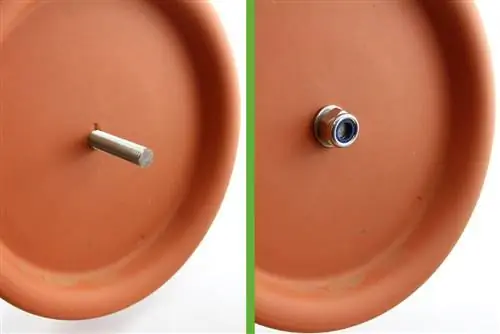
Once the hole is drilled through the plate, you can carefully remove the adhesive tape. Small breaks are not bad.
Step 3
Screw a nut about a hand's width, followed by a washer, onto the threaded rod. Insert the threaded rod through the plate from below, then thread a washer and then a self-locking nut onto the rod and tighten them. Now turn the plates around and counter on the underside of the plate with the washer and nut until the rod is tight.
Note:
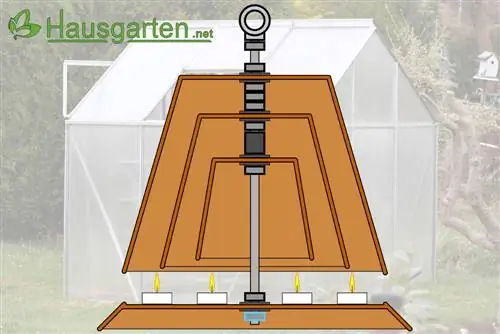
The construction should just look like an umbrella that has been turned inside out by the wind.
Step 4
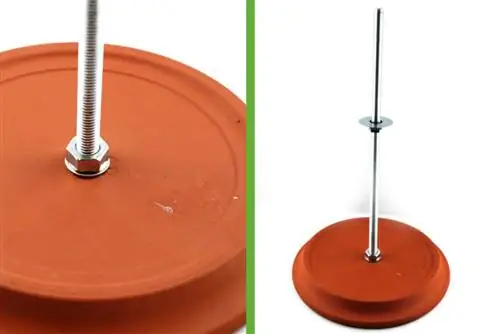
Put the plate “upside down” so that the threaded rod points upwards and the plate stands on its edge. You have now created a stable basis for the greenhouse heating. Now add a nut with a washer to the rod. This should have the height of the smallest flower pot up to the plate + the height of 3 tea lights. This is where the first flower pot is placed.
Step 5
The first pot is secured with a washer + spacer sleeve and screwed hand-tight. The height of the spacer sleeve corresponds to the difference in size from the smallest flower pot to the next largest. Counter the spacer with another nut.
Tip:
As an alternative to spacer sleeves/spacer bolts, you can also overcome the difference in height with several normal nuts and thus compensate for the difference even more precisely.
Step 6
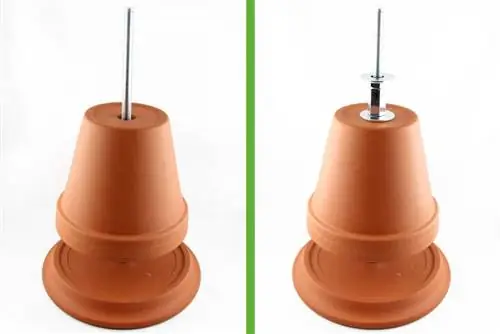
Before the next planter, another washer is placed on the threaded rod. Then comes the pot, which is secured again with a washer and nut. This technique allows you to keep stacking as many pots on top of each other. There should be at least two pots in order to be able to use the heat storage effect. The more pots you use, the wider and more stable the base plate must be so that the tealight oven does not tip over.
Tip:
The greenhouse heater does not necessarily have to be on the ground. You can also hang the heater with a ring nut at the top end of the threaded rod. However, you should definitely screw on a nut beforehand to securely lock the ring nut.
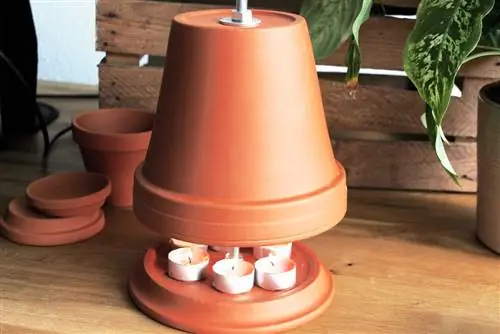
Safety - be careful
“If you play with fire you can burn your fingers!”
The same applies to the tealight oven.
Hand warmer
If you also want to use the greenhouse heater as a hand warmer for a long evening in the garden or while night fishing, you should work with at least two pots. A single pot would be too hot to touch -Risk of burns! So a second pot not only retains heat better, but also serves safety.
Tea lights distance
With a candle, it is not the wax that burns directly, but rather the gases that evaporate from the wax. Sonever (!) place too many tea lights too close together at once. Because candles and tea lights are too close together, an invisible gas cloud can form that is highly flammable. Always keep at least half a distance from the next tea light. Otherwise a paraffin deflagration (wax explosion) can occur, which is really not something to be trifled with.
Secure stand
If you notice that nuts keep coming loose and coming loose, you can always counteract them with another nut for even more security. Always make sure that the greenhouse heater made of candles has a secure footing, does not wobble and cannot fall or fall over.
Fire Danger
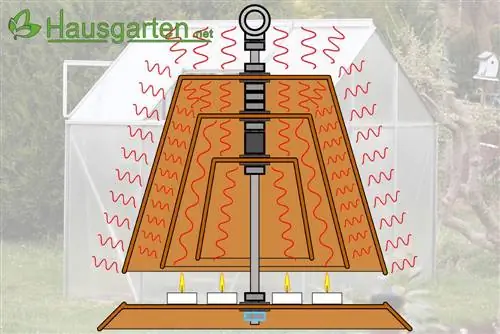
Even if tea lights are considered relatively (!) safe, you should still not store flammable materials in the immediate vicinity of the tea light oven. Do not leave the greenhouse heater unattended for the first few runs. Before each use, check the stability of the construction, whether it stands securely and whether all pots are still intact.
Tip:
If the pots have a crack, they should be replaced.

