- Author admin [email protected].
- Public 2023-12-17 03:39.
- Last modified 2025-06-01 06:48.
A garden house on the property is exposed to all sorts of weather conditions throughout the year, from snow to wind to temperatures over 30°C, which can take a toll on the building. Depending on the use, it may be necessary to insulate the cottage to prevent weather damage. It is important to equip the floor, facade and roof with insulation for all-round protection.
Preparations
Insulating the garden house provides numerous benefits, from storing heat to protecting against excessive moisture and the resulting mold formation. In order for the insulation to be installed efficiently, some preparation is necessary to make the entire process easier and lead to the desired result.
Insulation
One of the most important elements for this is of course the selection of the right insulation material to be used here. The following insulation materials are suitable for use in garden sheds:
Hard foam panels
Hard foam panels are the classic among insulation materials. They are made in different thicknesses and from different materials, of which the following are most suitable for the garden house:
- Styrodur
- Jackodur
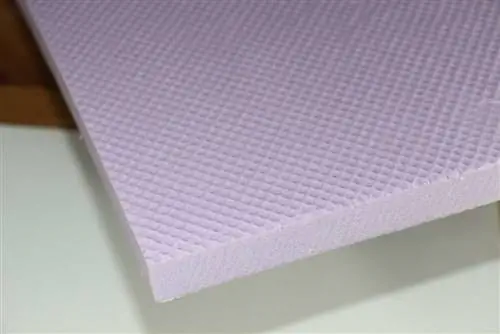
These are not only water-repellent and thermally insulating, but also durable and can be perfectly tailored to the size of the walls and floor. These materials are a little more expensive to purchase, but due to their specialization in thermal insulation and resistance to weather, even soil moisture, they are only recommended. In addition, they are not harmful to groundwater. Perfect for people with little knowledge in this area.
Costs: 50 - 60 euros for 10 m² x 30 mm
Perlite
This material is natural volcanic rock, which is available in two processing forms:
- Soil fill
- Records
A big advantage of the fabric is the combination of effective thermal insulation and fire resistance. You get the necessary amount for the floor fill from the width x length x height of the necessary insulation. This means that for a garden house with a length and width of 500 centimeters and the height of the foundation timbers of 5 centimeters, you will have a final volume of 1,250 liters.
Costs: around 13 euros for 100 liters of fill, around 35 euros for a panel measuring 2 m² x 5 cm thick
Natural materials
Other natural materials that are firmly established as insulation materials can also be used:
- wood wool
- Mineral wool
- Hemp fibers
These are offered either pressed as a board or filler, but it is not as easy to lay as, for example, the insulation boards.
Costs: between 5 - 13 euros per m²
You can find all of these insulation materials in hardware stores, online or in speci alty stores. Before ordering, be sure to measure the dimensions of your garden house so that you do not order too much or too little insulation material.
Necessary tools and materials
- Sealants, for example silicone
- Sealing tapes for windows and doors
- Vapor barrier
- Foundation timbers
- Jigsaw
- Face mask and work gloves
- Cordless drill and matching screws
- ladder
- Tacker
- Angle or wooden connector
- Styrofoam glue
Before you start installing the insulation, you should check the garden shed for possible damage that could allow moisture or cold to penetrate. Depending on the degree of damage, the area may need to be repaired before you begin installing the insulation. Remember: the thicker the panels, the more effective the insulation will be, but the more work will be required and the possible loss of a few centimeters of space in the greenhouse. It can also happen that the floor is raised by the insulation.
Please note:
Do not use sheets made of simple Styrofoam for insulation. Although insulation with Styrofoam is possible, the insulation performance is insufficient and the material has to be replaced more frequently.
Insulate floor
The floor is the most important part of the entire garden shed when it comes to insulation, as the soil cold and moisture greatly affect the integrity of the garden building. In addition, a lack of floor insulation is the biggest cause of cool temperatures in the garden house. Before you can lay the insulation, you must remove the formwork, i.e. the floorboards or boards. Insulation panels or granules are used for the floor, not natural materials. Proceed as follows:
- After dismantling the formwork, you will usually come across a foundation made of wood that raises the floor above the ground. If you have a garden shed without a foundation, you will need to lay it yourself before you can start insulating it. These are often garden houses with a concrete or stone floor.
- To do this, cut the foundation timbers according to the width of the garden house and lay them at a regular distance. This is also necessary when using perlite granules. Fix these with an angle connector made of stainless metal and check whether the timbers have been laid straight.
- Then lay the vapor barrier. To do this, spread it over the entire floor and press it firmly against the wood at every corner and bar. Leave as few gaps and creases as possible as this will increase the effect. More than one pair of hands is much better for this. Now staple the foil thoroughly to the wood.
- The insulation material is now cut to size. To do this, use the distance between the foundation timbers and cut them 2 - 3 mm shorter. This prevents any possible bulging of the insulation material. Use a jigsaw for this and don't forget to wear a face mask and work gloves. Also make sure that the height of the panels must have a small gap between them and the floorboards so that the air can circulate better. About two centimeters is ideal here.
- Afterwards, possible gaps between the insulation material and the wood are sealed with silicone or another sealing material. Then let it dry completely.
- If you use granules, simply pour them between the pieces of wood. Make sure to leave as few gaps as possible.
- You can now apply a second vapor barrier, but this is not necessary.
- Finally, install the floorboards.
Tip:
It is worth choosing panels that are pressure-resistant for floor insulation. This increases their lifespan.
Insulate roof
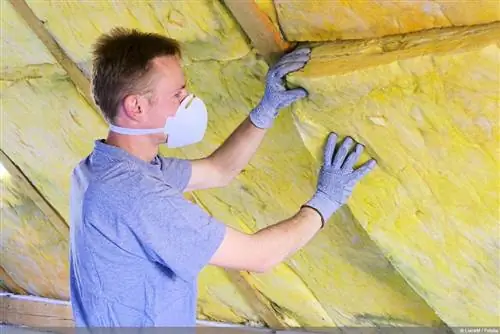
There are two options for insulating the roof:
- inside over the rafters
- outside with rafter insulation
Depending on what type of garden house roof you have, one of the two methods is better. For flat roofs, it is usually recommended to install rafter insulation, as insulation is even more important on these roofs. Insulating panels are preferably used for roof insulation, as floor fill is only possible on flat roofs outdoors.
Do the following:
With internal insulation
- line and fix the rafters with vapor barrier
- Measure panels, cut them to size and glue them to the inside of the roof with polystyrene glue
- Fill gaps with sealant
- then be sure to line it with a second foil
- Depending on your wishes, the roof can be designed decoratively from the inside
With external insulation
- first lay foundation timbers as a frame around the roof and fix them with screws
- then follow the intermediate timbers
- now follow the same steps you used to insulate the floor
- glue the panels to the foil
- then the insulation is covered with foil
- don't forget the pages
- Finally, you can finish the roof as you wish, for example with attractive shingles
Insulate facade
Insulating the facade is time-consuming and exhausting. A multi-layer system is used for this:
- insulate inside with natural materials
- insulate the outside with insulation panels
This stores heat and improves air circulation in the interior. For the outdoor area, proceed as you would with the roof or floor and then cover the insulation with plaster, wood or even stone, whichever you prefer. Of course, don't forget about vapor barriers and eliminating cold bridges. Insulating the interior walls is done in the same way, only you have to make sure to leave an air gap between the formwork and the insulation. This is the only way the room can breathe and regulate moisture better.
Windows and doors
If you are tackling the interior facade, you must pay attention to the recesses for windows and doors when cutting. To do this, measure them precisely and cut them out. After attaching the insulation layer, proceed as follows:
- Joints are repaired with silicone
- Sealing tapes provide additional protection against the cold
Tip:
If your window has simple glazing, a lot of cold can penetrate into the room. Switching to double glazing can help.

