- Author admin [email protected].
- Public 2023-12-17 03:39.
- Last modified 2025-01-24 12:45.
Asparagus is one of the oldest cultivated plants, cultivated around 5,000 years ago. To this day, asparagus spears are very popular in spring. This applies equally to white and green vegetables.
Profile
- scientific name: Asparagus officinalis
- other names: vegetable asparagus or common asparagus
- Origin: Southern and Central Europe, Near East and North Africa
- natural habitat: warm and temperate regions, preferably on river banks
- Flowering time: from June to July
- widespread local varieties: 'Glory of Braunschweig' and 'Huchels Performance Auslese'
Sowing seeds
Asparagus seeds can be sown from March in planters that you have filled with nutrient-poor potting soil. The individual seeds are spread in rows at a distance of eight to ten centimeters and covered with soil one centimeter thick. From mid-May, the young plants can be moved to individual pots where they will be cared for until the next season. Since this method increases the maintenance effort, many hobby gardeners switch to buying early young plants.

Select location
In order not to endanger plant he alth, you should not create the bed in the foreground of hedges or directly next to bushes. When it comes to moisture content, Asparagus officinalis values balance. The soil should be neither too dry nor too moist. Soils that tend to be waterlogged are just as unsuitable for growing asparagus plants, as are shady areas or stony surfaces. In order for tender asparagus spears to develop, the basics must be right. Asparagus requires these conditions:
- sunny locations with warm conditions
- airy space in the open area
- fresh substrates with a loose structure
- loamy soil that has sandy properties
Tip:
Growing green asparagus is easily possible in raised beds. Since bleached asparagus needs to be protected from light and requires thicker layers of soil, you should also raise the walls with a wooden frame.
Dig asparagus ditch
Autumn is the ideal time of year for this step, because the subsequent measures to improve the soil can have their best effect until spring. When creating larger beds, planting cords prove to be a helpful marking tool. The outlines of smaller trenches can be marked with a spade. To ensure that the trench walls are more stable and do not collapse after digging, you should lightly water the substrate before work. How deep you have to dig the planting trenches depends on the desired color of the poles. White asparagus is later planted at a depth of 25 centimeters, while green asparagus grows 15 centimeters deep. Follow these values:
- Trench needs a width of 20 to 30 cm
- Depths for compost application: 30 cm for green asparagus, 40 cm for white asparagus
- Depths for green manure: 15 centimeters for green asparagus, 25 cm for white asparagus
- Make sure the row spacing is one meter apart
- Dig up the earth and store the excavated material next to the pits
Note:
If you want to improve the subsoil with green manure, deep-rooted legumes such as lupins, soybeans or bush beans are sown before the planting trenches are dug. The roots loosen the substrate and by digging, the plant mass remains on the surface so that it is decomposed into humus.
Improve soil
So that the asparagus plant finds sufficient nutrients in the garden soil, it is recommended to incorporate organic materials such as well-ripened manure or compost in autumn. The biological substances come directly into the planting pits, so that the bottom of the trench increases. If you have sown nitrogen-fixing plants in your garden, you do not need to add additional nutrients. It is enough if you dig the sole well in the spring and loosen it up. This is how you proceed with soil improvement:
- Distribute organic matter ten centimeters high into the trenches
- cover with a five centimeter thick layer of soil
- As an alternative to compost, mix in 200 grams of phosphorus and potassium per running meter
Insert rhizomes
Planting takes place between March and April before the root rhizomes sprout. The seedlings consist of a bud system with an elongated to oval shape. The shoots that form the asparagus spears later grow from this structure. When planting, it is important that the specimens are placed in the planting trenches in the same orientation. If the plants are already sprouting, treat the root balls with caution. In this way, you ensure an optimal starting situation for unrestricted growth:
- three to four plants per linear meter
- fleshy root network spread out like a spider on the bottom of the pit
- Lay out the buds of all individuals in the same direction
- Spread soil over the roots by hand so that they stay in place
- Fill the trench to about 10 cm below ground level
Note:
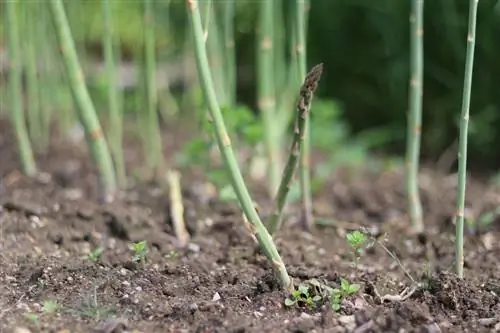
The trenches remain half-open so that the asparagus plant is encouraged to grow. As soon as the shoot tips pierce the surface, add some excavated soil until the trench is filled at the end of the year.
Promoting plant he alth
Proper care is very important so that every single asparagus plant takes root and grows he althily. After planting, watering is recommended depending on the initial conditions. The soil is often sufficiently moist at this time of year so that you do not need to water additionally. The emergence of weeds is the main problem for asparagus, because root weeds such as grasses inhibit growth, while seed weeds such as goosefoot worsen lighting conditions. How to care for the first year:
- work a handful of organic vegetable fertilizer into the soil surface over two linear meters
- regularly pluck out unwanted weeds
- Mulch the bed with completely rotted compost or autumn leaves
- Water the area during dry periods so that the substrate remains evenly moist
Tip:
If you sieve the mulching material before spreading, you can distribute the fine end result thinner and more evenly over the garden bed.
Cut off winter weeds
From the beginning of September, the plant draws its energy from the above-ground parts of the plant and stores it in the root rhizomes so that they sprout with renewed vigor next spring. In October the yellowing continues until the herb finally appears completely brown. Between mid-November and early December the foliage died, which you can also see in the hollow plant stems. If you deadhead plants too early, crop yields will be reduced. Cut this off just above the soil surface.
Prepare for the next season
In order to promote new growth, careful cultivation of the top layer of soil is recommended. A careful approach ensures that you do not damage the asparagus tips. The focus continues to be on weeding so that morning glories, couch grass and thistles do not affect the harvest.
This is the correct way to do it:
- Lightly loosen the surface with a rake
- spread out a fleece in April to protect against late frosts
- Administer starter fertilizer for vegetables in March
- then renew the mulch layer
Create earth dam
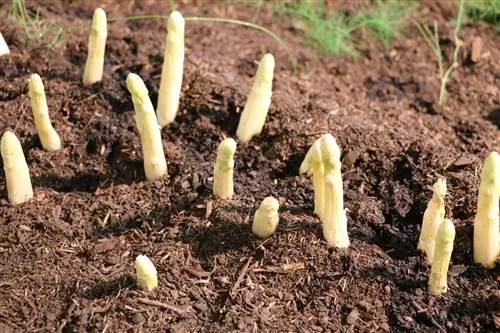
If you want to harvest white asparagus, you can modify the previous step a little. After surface tillage, dig up the soil on the right and left sides of the plant rows and pile the soil into a ridge above the plants. This should be around 20 centimeters high so that the asparagus shoots are covered with around 30 centimeters of substrate. In this way you promote optimal rod length.
Straighten the crown of the ridge and spread a black sheet of asparagus over the rows. It ensures that the soil warms up optimally and the first harvest can begin soon. The soil warms up faster when growing in raised beds than in the garden, so you can do without foil for this cultivation.

