- Author admin [email protected].
- Public 2023-12-17 03:39.
- Last modified 2025-06-01 06:48.
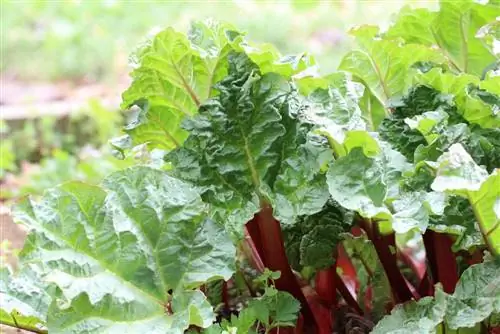
If there is a lot of coming and going in the vegetable patch from year to year, long-lasting rhubarb plants ensure reliable stability. Over a period of up to 10 years, the popular vegetable provides vitamin-rich, sour-fruity enjoyment for the whole family. The list of its many advantages is significantly longer than the small catalog of its requirements. Balcony gardeners can also benefit from this decorative and delicate crop. This guide explains how to professionally grow rhubarb plants in the garden and in pots. Sowing and care can be carried out even by an inexperienced hand.
Sowing behind glass
So that rhubarb seedlings do not fall victim to voracious snails, we recommend sowing on the windowsill or in the greenhouse. You can either sow the seeds between the beginning of March and the end of April or in September if you are growing rhubarb in the garden. For cultivation in pots, we recommend starting in early spring. This is how you proceed professionally:
- Slightly roughen the shell of the large seeds with a file or sandpaper
- Then soak in lukewarm water or chamomile tea for 6 to 12 hours
- Fill growing pots with organic vegetable soil
- Put one seed in each pot and water it
On a partially shaded window seat, temperatures of between 12 and 15 degrees Celsius are only required so that the seeds germinate within 6 to 10 days. Keep the substrate slightly moist until the planting date. There is no fertilization during this phase of growth.
Location in the garden and on the balcony
The choice of location alone indicates the uncomplicated requirements of rhubarb. Since the vegetable plant is completely hardy, the climatic requirements in the garden and on the balcony can be met without any problems. Only the high water and nutrient requirements require special attention if the long-lived perennial is to provide a rich harvest of thick, juicy stalks for many years. The focus is on the following location criteria:
- Sunny to semi-shady location
- Nutritious, sandy-loamy soil
- Ideal pH value of 5.6 to 7.5
- Fresh to moist with good water retention and no waterlogging
As heavy feeders, rhubarb plants feel best in the garden in the immediate vicinity of the compost heap. In ancient times, the majestic vegetable plants often sat in the middle of the compost or manure heap. A direct proximity to the garden kingdom also has a beneficial effect on growth and productivity.
Tip:
A crop rotation of at least 8 years makes sense for rhubarb plants in the bed. Before you plant the heavily consuming stem vegetables again at the current location, the soil should regenerate over this period.
Soil preparation and substrate
Nutrients present in normal garden soil are usually not enough to fully cover the needs of a rhubarb plant. The same applies to commercially available organic vegetable soil, which is suitable as a basic component for pot culture. By enriching the bed soil and pot substrate with mature compost, horn shavings or a comparable organic fertilizer, you optimize the starting conditions for vegetable rhubarb. How to do it right:
- Dig garden soil 2 spades deep
- Removing stones, roots, clods of earth
- Rake 5 liters of compost and 300 grams of horn shavings per square meter
- Alternatively, incorporate composted horse manure, stable manure or guano with horn meal
For rhubarb in the pot, optimize organic vegetable soil by 30 percent with ripe compost, bark humus or leaf mold. Composted, organic soil additives are available from retailers as packaged finished products for home gardeners who do not manage their own compost heap.
Planting instructions for the garden
Plan a space requirement of 100 cm x 100 cm to 130 cm x 130 cm for planting in the bed. Spacious vegetable rhubarb must be able to develop undisturbed so that it increases its yield from year to year. Comparatively weak-growing varieties with red flesh, such as the blockbuster 'Holsteiner Blut', require at least 1 square meter of space. Spacious, green-fleshed varieties such as 'The Sutton' reach their limits early on and should have a correspondingly larger bed area. Plant young rhubarb in the middle of the site like this:
- Soak the potted root ball in water until no more air bubbles appear
- Dig a pit with twice the volume of the root ball
- Shovel the excavated material into a wheelbarrow and enrich it with 30 percent compost and horn shavings
- Unpot the young plant and plant it in the middle
Measure the planting depth so that the root disc ultimately lies under a 2 to 3 cm thick layer of substrate. Press the soil firmly with your hands and water thoroughly. In the final step of professional planting, spread a layer of mulch with 3 liters of mature compost on the ground.
Planting rhubarb in a pot
A suitable pot for vegetable rhubarb has a volume of at least 40 liters and openings in the bottom for water drainage. A 5 to 8 cm high drainage made of potsherds, gravel, chippings or expanded clay effectively prevents waterlogging. Before you fill in the recommended substrate, please spread an air and water permeable fleece over the drainage so that no earth crumbs get stuck between the inorganic material. Place the pot in a location exposed to the wind on a balcony or terrace, ideally add a few handfuls of clay to the substrate to optimize stability.
Planting in the pot is similar to that in the garden bed. The water-soaked, potted root ball is planted so deeply that it is under a 2 to 3 cm thick substrate cover. A 3 to 5 cm high watering edge ensures that rain and irrigation water does not spill over and dirty the balcony or terrace.
Care in the bed and pot
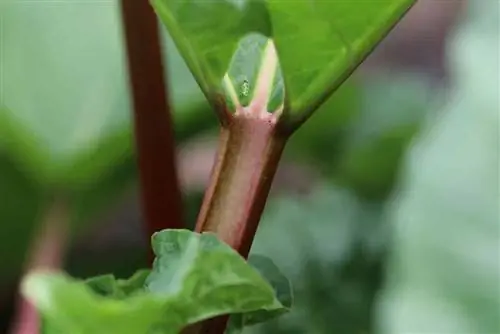
A balanced water and nutrient balance forms the foundation of the uncomplicated care program. All other measures follow this. The scope of work essentially depends on the specific site conditions. All important details are explained in more detail in the following part of these instructions:
Pouring
In the first few weeks after planting, regular watering is high on the agenda. Until a young rhubarb plant has established itself well in the bed or pot, it urgently needs a continuously moist substrate. Subsequently, water the vegetable plant whenever the surface of the soil has dried out. A light downpour does not guarantee reliable protection against drought stress. On adult rhubarb plants, the powerful leaves catch most of the raindrops so that the soil stays dry and is watered. In the pot, this can happen every day in dry, hot weather. Please let the water run directly onto the root disk until it runs out of the bottom opening in the pot or small puddles form in the bed.
Tip:
The harvest time for rhubarb is tight, as Thanksgiving for the delicious stalked vegetable is already on St. John's Day (June 24th). From this point on, prudent home gardeners leave their rhubarb plants alone so they can regenerate for the rest of the season.
Fertilize
For a carefree consumption of refreshing dishes with rhubarb, environmentally and he alth-conscious home gardeners ignore mineral fertilizers. Given the wide range of organic fertilizers available, you can keep growth going for many years with the following nutrient program:
- Administer starter fertilization in March with 3 liters of compost and 100-300 grams of horn meal per square meter
- Additional continuous mulching with nettle leaves, leaves, lawn clippings or leaf compost
- From March to June, shower the soil every 4 weeks with plant manure made from nettles and comfrey leaves
- Administer a liquid vegetable fertilizer in the pot every 2 to 3 weeks from April to June
When the harvest window closes in the last week of June, continue providing nutrients. Since rhubarb plants prepare for the coming season by winter, add another 3 to 5 liters of compost or a comparable organic fertilizer in July.
Tip:
The harvest time for rhubarb is tight, as Thanksgiving for the delicious stalked vegetable is already on St. John's Day (June 24th). From this point on, prudent home gardeners leave their rhubarb plants alone so they can regenerate for the rest of the season.
Cleaning out flowers - pros and cons
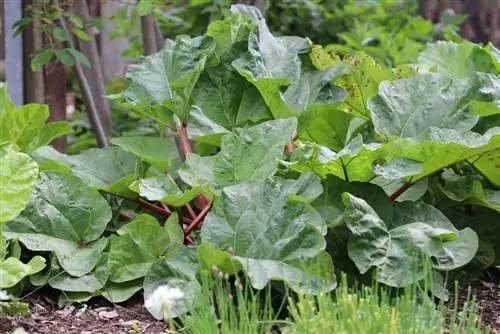
The lavish rhubarb blossoms in May are a feast for the eyes in the bed and on the balcony. Nevertheless, there are various rumors surrounding the blossoms. It is said that the stalks are no longer suitable for consumption when they are in bloom and are even harmful to he alth. Every year the discussion flares up as to whether the flowers should be removed in time or not. In order to pave the way for you to make an informed decision, we briefly summarize all the pros and cons arguments below:
Pro - Reasons for flower removal
Rhubarb plants look pretty in spring with their flower dress to attract numerous insects as pollinators. They aim to grow numerous seeds to ensure reproduction. This striving comes at the expense of the poles, which are now of secondary importance to the plants. Therefore, home gardeners advocate bud removal so that vegetable rhubarb continues to invest its energy in the vegetative growth of thick, juicy stems. For this purpose, all flower heads are consistently broken off directly at the base of the stem.
The proponents of removing flowers from vegetable rhubarb also argue that the content of toxic oxalic acid increases at the same time as the flowering period. Scientists have relegated this assumption to the land of fables. In fact, oxalic acid only rises to alarming levels from the end of June. Since the harvest season ends at this time anyway, there is no reason to clean out the flowers. There is no proven direct connection between flowering time and oxalic acid.
Cons - reasons against cleaning out flowers
Blooming rhubarb is now a familiar sight in private kitchen gardens, as more and more home gardeners are not convinced by the arguments for bud removal. If the general conditions at the location are right and the high demand for water and nutrients is met, the quality of the fruity stalks does not suffer due to the flowering period. In addition, rhubarb flowers are not only decorative, but also edible.
Cutting
From October onwards, rhubarb plants gradually retreat into their rootstocks. The leaves turn yellow and die. Once all above-ground parts of the plant have completely absorbed, cut the stems and leaves close to the ground with a sharp, disinfected knife. To protect the cuts from rot and pathogens, dust them with rock dust or charcoal ash. You avoid the risk of rot and infection if you do not cut off the dead plant parts but remove them by hand. By grasping the stems and twisting them out with a jerk, this component of professional care is also fulfilled.
Wintering in the garden
If vegetable rhubarb has established itself well in the bed, no protective measures are required for the winter period. The plant easily survives freezing frost deep in the ground on its own. We only recommend a layer of leaves or straw in the year of planting, as young plants still have to develop reliable winter hardiness.
Water the rootstock in winter on mild days when there is no snow or rain to provide water. If the sun shines for many hours during frost, rhubarb plants are threatened by drought stress.
Overwintering in a pot
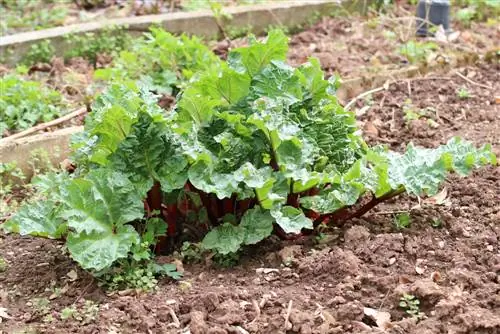
The substrate volume in the pot is too small to reliably protect the root ball against frost. The following winter protection is therefore advisable:
- After pruning, cover the root disc with leaves or straw
- Place the pot on a wooden block in a niche protected from the wind
- Cover the container with bubble wrap or coconut mats
A frost-free winter quarters, such as a garage or tool shed, is advantageous. If rhubarb in the pot is in a location protected from rain or snow during the winter, please water from time to time so that the soil does not dry out.
Repotting
The limited capacity in the pot does not allow it to stay for a long time, as is usual for rhubarb plants in the garden. Depending on the variety and growth, regular repotting is required at one to two year intervals. The best time for this care measure is in early spring, well before the start of the new growing season. Choose the new pot so large that there is at least 4 finger-width of space between the root ball and the edge of the pot.
Conclusion
Rhubarb optimizes the planting plan for the garden and balcony with a classic that will last you for up to 10 years and provide a rich harvest of fruity-sour stalks. For the ambitious home gardener, it is a matter of honor to prefer young rhubarb by sowing it on the windowsill. In a sunny to partially shaded location, the long-lived perennial prefers nutrient-rich, fresh, moist garden soil. In a large pot, vegetable rhubarb shows its best side on the balcony when it can stretch out its powerful roots in a mix of organic vegetables, compost and horn shavings. Abundant watering and fertilizing does not end with harvest time. To ensure that juicy stalks continue to thrive in large numbers next year, continue to care for rhubarb plants after St. John's Day. Only in autumn does the hardy perennial retreat into its rootstock. In the pot, light winter protection compensates for the lack of soil volume to ward off bitter frost.

